

The idea of a first flush diverter is that it sits between the gutter and rainwater tank, and takes the rainwater from the first part of a rain event that contains dirt, dust, sediment and gunge from the roof, and divert it away from the rainwater tank. After a certain amount has gone through, it then allows subsequent flow to be directed back into the tank.
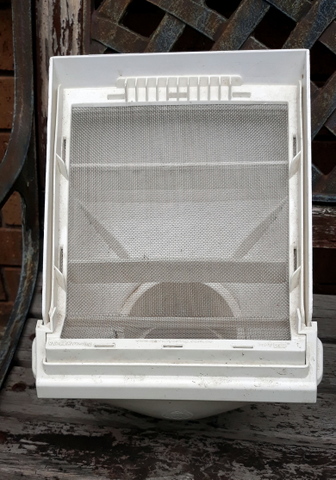
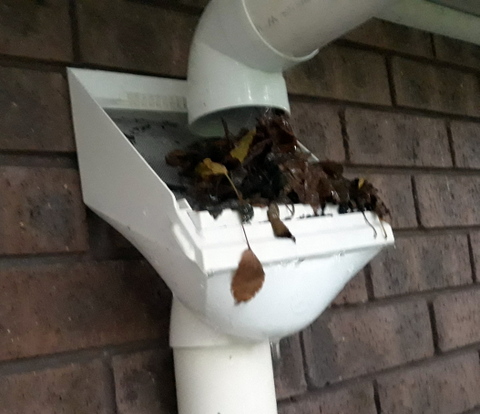
There is also a ‘downspout filter’ that allows the larger lumps of detritus like sticks and leaves to be tossed out before the water even hits the first flush, but that is another story!
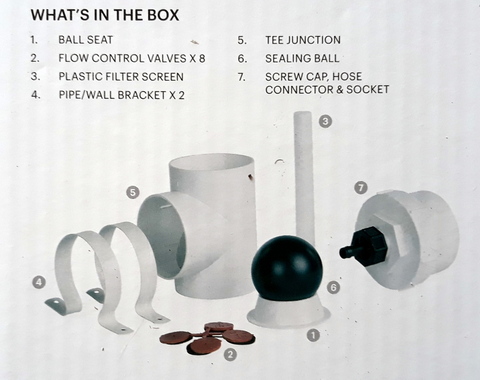
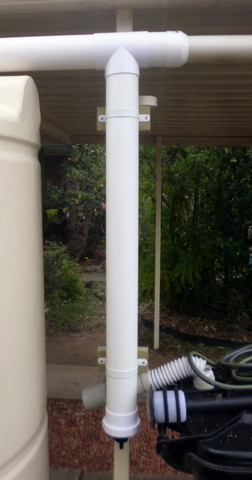
The parts of the First Flush Diverter
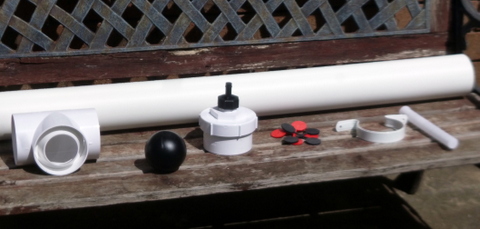
While it is possible to put together a first flush diverter from scratch, there are reasonably priced commercial units, which is what I use. These units are composed of the following components –
1. The ball seat – as the water fills the pipe reservoir the sealing ball (6) floats upward and the forms a seal with the ball seat, allowing rainwater to flow along the horizontal channel into the tank.
2. The flow control valves (also referred to as washers) - These are rubber disks with holes of various sizes that vary the rate at which the rainwater drains from the bottom of the first flush system reservoir. There are two sets of four washers, one set is black and one set is red, each washer having a different size hole. The holes sizes are as follows: Red – 1.25mm, 1.5mm, 1.75mm, 2.0mm – Black – 0.25mm, 0.5mm, 0.75mm, 1.0mm. The larger the hole the more water will be diverted before it goes to the tank, but the less likely it is to be clogged up if some dirt makes it through the plastic filter screen.
3. The plastic filter screen – This is a cylindrical filter that sits over the hose connector and filters out particles of dirt, dust and other small bits of detritus. Particles can sometimes make it through filter and clog up the washer holes, so regular inspection needs to be carried out. I have also had it that so much material has built up inside the first flush to the point that the entire filter screen is submerged in debris, which I then had to scrape out by hand, but at least it hadn’t made it into the rainwater tank!
4. Pipe wall brackets – these are used to secure the first flush diverter to a wall, post, pole or other support.
5. Tee Junction – This is the pipe that takes water from the gutter and directs it down into the diverter reservoir, then once the diverter reservoir pipe is full, it allows the rainwater to flow into the tank.
6. The sealing ball – This is the hollow plastic ball that floats on top of the water that has been directed into the diverter reservoir until it fills up to the top of the pipe reservoir and seals, allowing the subsequent rain to flow into the tank through the tee junction.
7. Screw cap, hose connector and socket – This is the assembly that sits at the bottom of the pipe reservoir and allows the first flush water to drain from the bottom of the diverter. Once the particular rain event has finished, the water in the first flush diverter drains out through the hose connector until it is empty and ready to divert the first flush of the next rain event, automatically.
What is not shown in the picture is the pipe reservoir itself. This is a 90mm diameter PVC pipe, the length which will vary with the size of the catchment area being served by the first flush device. See below:
Calculating the size of the Frist Flush diverter pipe reservoir
The volume required for a first flush diverter works out to one litre per square metre of catchment area, such as the house, carport or shed roof that has been piped to the tank. This figure can be modified however by a factor that takes into account the level of air pollution in the area. Admittedly this is pretty subjective, but here it is: where the catchment area is in a low pollution area eg rural area the amount of water per square metre can be dropped to 0.5 litres per square metre, and if the air pollution levels are considered to be high, such as in a city or near an industrial estate, the number can be raised to 2.0 litres per metre squared to ensure sufficient volume is diverted to provide clean water to the tank.
For example: our carport is 18 square metres in area, and I consider our area to be low pollution so a diverter volume of 9 litres would work, but how does that translate into the size of the pipe reservoir?
Simple, this depends on the diameter of the PVC pipe that you are using as a reservoir. If your system uses 90mm diameter pipe, the volume contained is 6 litres per metre of pipe, if it is based on 100mm diameter pipe the volume contained is 7.9 litres per metre of pipe.
Carrying that through, my first flush system is based around 90mm diameter pipe, and it is 1 metre long so it will have a diverter volume of 6 litres. Theoretically I need 9 litres but that would be difficult to fit, so I am happy with what I have, figuring that anything is better than nothing.
Also to be taken into account is the additional volume of water diverted through the flow control valve (washer) at the bottom of the reservoir as some water will be lost here, depending on the volume and flow rate of the rain event and the size of the orifice in the washer. I was interested to know the impact of the orifice size on the rate of water drainage from the first flush diverter reservoir, so I measured it!
Parameters: I metre long x 90mm diameter reservoir filled with water.
Smallest orifice (0.25mm diameter) = 80mls per minute discharge
Largest orifice (2.0mm diameter) = 845mls per minute discharge
Thus it can be seen that the orifice size can have considerable impact on rate of water drainage from the first flush diverter reservoir.
This brings up another point…. Water will discharge through the orifice to the hose connector for the entire duration of the rain event and needless to say, none of that makes it into your water tank. While that is what it is supposed to do, once the rain has flushed the dirt and rubbish from the roof, if the rain event is longish or you get several rain events in quick succession, that could mean some serious (to me anyway) rainwater loss.
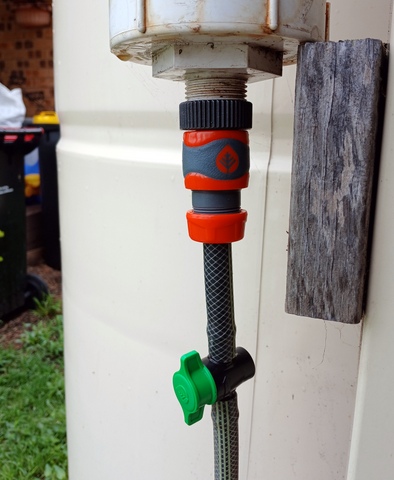
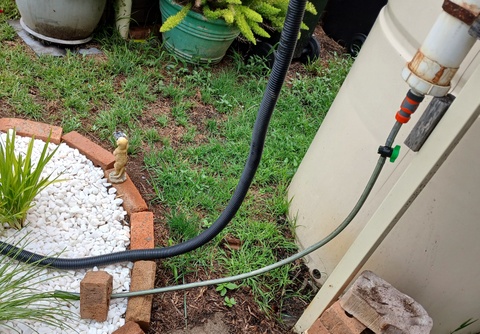
To get around this I have installed a 13mm inline barbed tap in the drain lines from the bottom of each of the first flush diverters. This means that at any time during a prolonged series of rain events, I can close the tap and all of the rain will go into the tanks. Of course I realise I must open the tap again once the rain event(s) is over, but so far it has worked for me!
