

Over the years I have designed our place so that as much of the house is protected by foliage or structures (eg the garage and back deck) from direct sunlight as I could manage, so that we may be better adapted to the increasing heat of the Western Sydney summers. One unanticipated side effect of this, is that there is not a lot of direct sunlight that makes it through to any of the windows, which would help me to grow food in our zone zero. That and the fact that when they built the house the did not put in any north facing windows at all! Anyway, to get around this problem I have been doing some fooling around with growing food indoors under grow lights. This is the adventure so far.
First off, rather than putting something together from scratch myself, I wanted to start out with a commercially available set up to play with, um…. I mean experiment with. I decided on the imaginatively named ‘Home Grown Indoor Garden’ from the Large Green Hardware Store. It a cost of a bit over $75. Currently it has been in continuous operation for four months, hopefully it will be with us for the long haul!
The System
The system is pretty simple, it is composed of a tray at the bottom where the pot(s) sit and that holds any drainage water, the grow light and cable that is positioned above the growing plants and the stand that connects them. The stand is set up to allow the grow light to be raised or lowered depending on the stage of growth of the plants from a low of 20cm to a height of 45cm. This allows the grow light to be adjusted so that it can remain between 10cm and 15cm away from the top of the plants.

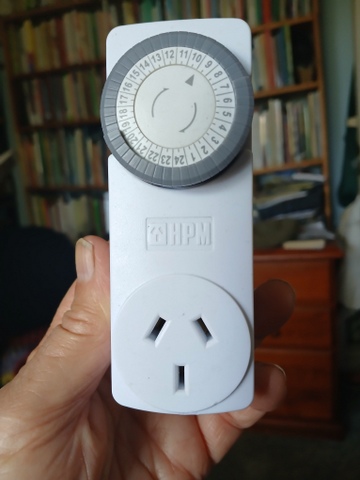
The instructions mention a ‘smart timer’ that regulates how long the grow light runs for (16 hrs on, 8 hrs off) but I have not found anything that looks remotely like a timer, plus I want more flexibility, so I bought my own and installed it between the power supply and the grow light cord. Plants do require a period of darkness but how long can vary with the plants being grown. The timer I am using allows me to vary the on/off time to whatever I want, and I am currently using a period of 12hrs on/12 hrs off and it seems to work pretty well.
The system uses 18.8 watts according to my power meter, so not a huge amount of power usage and it mostly runs during the day, so the power is provided by the solar system anyway.
The Set Up
I went looking for a place to locate the system, it needed to be –
- A flat level space capable of supporting the system and plants
- Close enough to a power outlet to allow me to plug it in
- Not close to heat sources like the stove or cold draughts in winter
- Away from direct sunlight so I didn’t overstress the plants
- Somewhere I regularly go so I could keep an eye on the plants
- Somewhere easy to get to, to facilitate watering, harvesting etc.
What I came up with was a place on one of the bookshelves in my office. I had to clear off some books, then make up a new shelf (the old one had developed a distinct bow!) and set it up a bit lower than it was previously so the system could fit in. After a bit of work putting things together, it fulfilled all of the criteria and is working very well!
Pots, Plants and Growing Media
The first time I used it I used two pots – one was a 27.5cm x 13cm x 10cm deep pot with a small reservoir in the bottom and the other was an 11.5cm x 11.5cm x 12.5cm deep standard plastic plant pot. The pot with the reservoir I filled with my own sowing/potting mix (1 part sand; 2 parts worm castings; 3 parts cocopeat, by volume) and then planted it out with two home grown ‘green mignonette’ lettuce seedlings. The square pot I filled with commercial ‘organic’ potting mix and planted a home grown bok choi seedling into it.
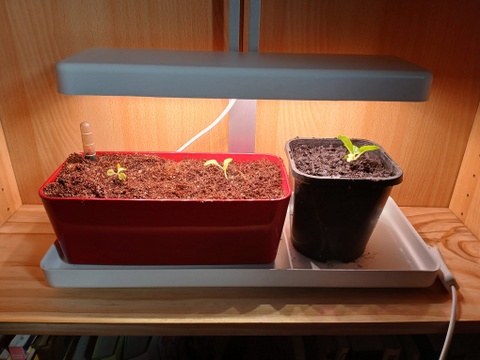
Day One
Although bok choi and lettuce are both easy to grow out in the garden, there can be times of the year when we can have problems. I plant every two weeks so we get a regular harvest, but if we get some really hot weather it can result in the lettuce or bok choi we are harvesting to bolt to seed and go bitter, and the ones coming on to slow down their growth, creating a gap in supply. Another gap can be created by colder weather in winter when growth slows down. These gaps can be filled by crops grown indoors.
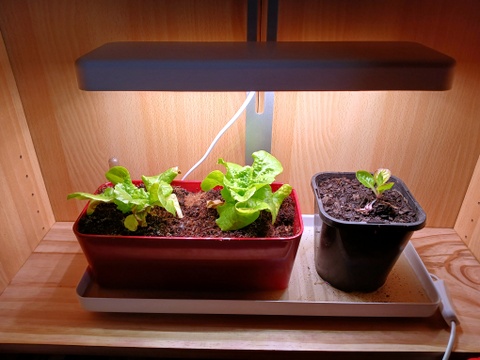
Two weeks later
When growing initially I did let the grow light get a bit close to the lettuce at one stage and they showed a bit of burning at the edge of the leaves, so maintaining the 10cm to 15cm gap between the grow light and the plants is important.
How Well did they Grow?
The lettuces came on quite well, as I expected but the bok choi seedling grew a bit then sat there looking at me and shrugging its shoulders. I suspected it was due to a lack of nutrients in the potting soil so I cast around for something to improve matters. There were a number of possibilities (Check here on how I usually produce them) but I didn’t have anything home produced ready at that point so opened up a bottle of ‘Swiftgrow’ given to me by the gentleman who produces it, he is a member of Permaculture Sydney West. I diluted some and added it to the water I was watering the veggies with. Fortunately, this seemed to spur the bok choi into action and even gave the lettuces a hurry up, although they seemed to be doing ok as it was.
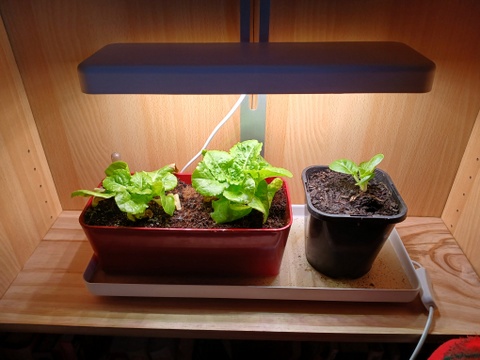
Almost five weeks after planting, a few days after feeding
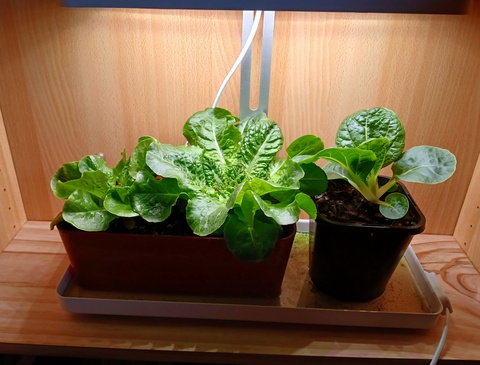
Six weeks after planting
After about eight weeks I started harvesting lettuce leaves and at ten weeks I harvested the whole bok choi and put it into a soup noodle. I have found that when grown outside the bok choi leaves can get somewhat bitter, but this was not an issue with the one I grew inside.

Eight weeks and harvest time!
I consider the experiment to be successful, in that it provided us with food that was grown totally inside. I am still learning and the adventure continues: I am currently experimenting with succession growing bok choi, planting them into 11.5cm x 11.5cm x 12.5cm deep standard plastic plant pots one plant every two to three weeks. There are three in the system and so far they seem to be growing well.
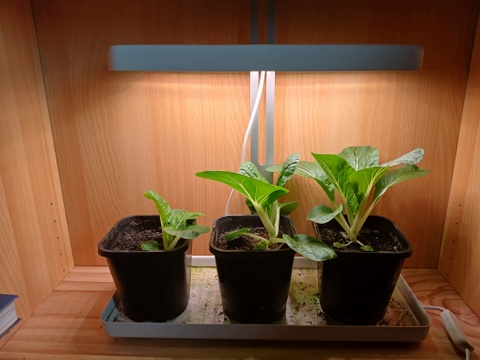
The state of play with succession planting bok choi experiment
