


This little sowing aid starred in my article on baby spinach, and it worked pretty well after some initial mental gymnastics, but after using it some more I got to thinking that it could be more flexible if I drilled and inserted extra pegs into the spaces I originally did not drill.
The Original Construction
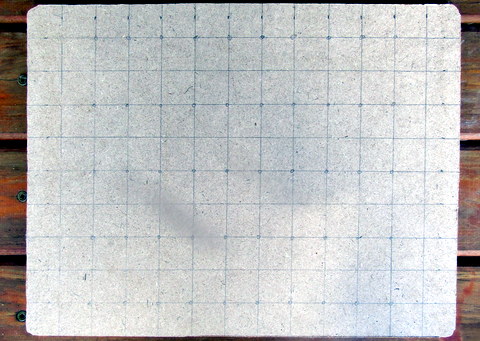
I had some 6mm MDF so I cut it to 325mm long by 250mm wide and rounded off the corners so that it would fit more neatly into the top of the seedling tray. To cut it to size I used a hand saw but used my small band saw to round off the corners. I then sat down and did some calculations (clearly not my strong suit) and worked out I wanted to try to fit 100 baby spinach microgreens into the seedling tray. I ruled up one side and one end into 25mm graduations with a pencil then ruled up the back of the MDF into 25mm squares. The idea was that a seed would be placed at the corner of each square.
In the end I decided to leave a row of holes undrilled between each row of pegs, and left a couple of rows at each end, also undrilled. This would give me what I thought, and turned out to be, reasonable spacing to have 50 baby spinach plants per seedling tray. To form the holes in the seed raising mixture into which the spinach seeds were to be placed I inserted a 6mm x 32mm fluted wooden dowel into each of the holes I had drilled.
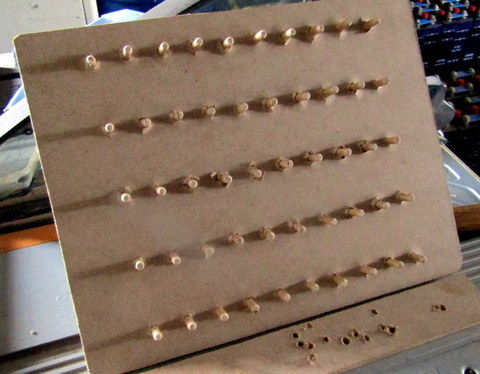
I drilled 50 7/32” holes into the MDF board at designated places. Drilling 7/32”holes to fit the 6mm dowels gave me a firm enough fit that they would stay in place without glue, but not so tight that they couldn’t be tapped in with a hammer. I have a bench drill and used that so that the holes were as close to 90° to the surface of the board as I could get them, pretty much. The new deal actually worked out better than my original idea of gluing the dowels into the holes, because it meant that the length of the dowel (and hence the depth of the planting hole) was adjustable.
The new deal
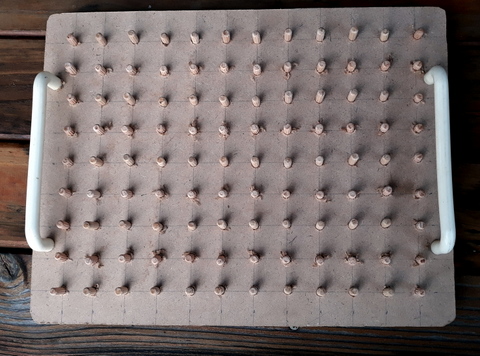
So, with the pegs in place and working well, I decided to drill the extra holes anyway. I have had several goes of growing microgreens like peas, which you then cut off once they are a few centimetres long and toss into stir fries or what have you. My main problem has been inefficient use of space because I always seem to wind up with some parts of the seedling tray pack up tight, with other parts being very sparsely populated. The idea to get around this was to drill the original holes and place pegs in them, which would give me an evenly spaced coverage of 108 plants per seedling tray.
This would not cause problems when setting up more baby spinach trays because I could always hammer the pegs up where I did not want holes for baby spinach, or remove those pegs entirely, or (yes, it just occurred to me) make the full set of holes and only put the spinach seeds in the appropriate holes. Also, the pegs were still adjustable so I could put in shallow holes for the spinach and deeper holes for the (larger) pea seeds. Works for me!
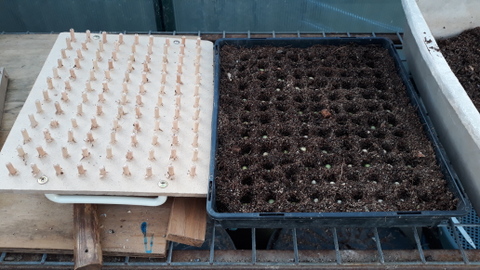
In the end it turned out to be a fairly simple matter to drill the required holes using the bench drill, with the board supported from underneath on some waste DAR pine. That way I could drill the remaining holes without having to pull out all of the existing pegs. I then just supported each side of the board and hammered in the new pegs. To improve its ease of use I dug around and found a pair of old plastic drawer handles and fitted them on each side.
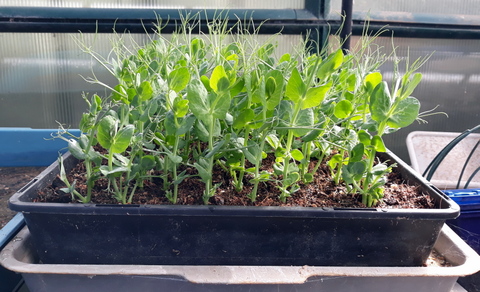
With the spacer now complete, I didn’t waste time and prepared a seedling tray with seed raising mix, then adjusted all of the pegs to 20mm long by placing both sides of the board on some 20mm thick timber and hammering all the pegs down until they touched the bench. It was a breeze with the new handles to press the spacer down onto the top of the seed raising mix and then lift it up leaving 108 precisely spaced 20mm deep holes in the mix, ready to be filled with pre-soaked peas. Winner!
