We have seen a couple of recipes recently that required baby spinach leaves, usually to go in wraps and the like. I refuse to buy the over-packaged stuff but figured it was just another type of microgreen so I would have a go at growing it myself. When I came to do a bit of research on it, there was remarkably little specific data on how it baby spinach be grown in a home-based setting, either on the ‘net or in my books. It seemed to me it was time for a bit of experimentation!
My thoughts were to use a seedling tray (348mm x 290mm x 55mm black plastic seedling trays used by nurseries, hardware’s etc to hold seedling punnets), fill it with my standard seed raising mix and then plant it out. Once the tray was prepared I would sit it one of my sand filled cat litter watering trays to keep it damp for germination and growing.
It all seemed to make sense, but I really had no idea how close of far apart or even how deep to plant the seeds, as information either wasn’t there or was conflicting. So what I decided to do was make up an adjustable rig to put holes into the seed raising mix at a pre-determined points to see what worked. That way, what I was doing would be reproducible once I worked out how best to do it.
Making the Sowing Rig
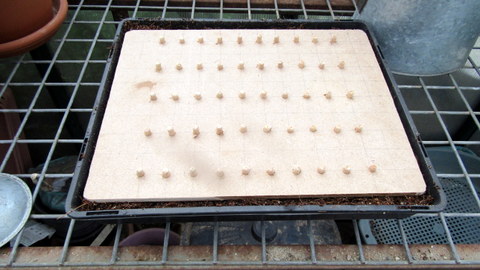
I had some 6mm MDF (and, yes, it was left over from a previous project!) so I cut it to 325mm long by 250mm wide and rounded off the corners so that it would fit more neatly into the top of the seedling tray. To cut it I used a hand saw but used my small band saw to round off the corners. I then sat down and did some calculations (clearly not my strong suit) and worked out I wanted to try to fit 100 baby spinach into the seedling punnet. I ruled up one side and one end into 25mm graduations with a pencil then ruled up the back of the MDF into 25mm squares. The idea was that a seed would be placed at the corner of each square. At 130 total squares this meant I could leave some room at each end of the seedling tray.
The next challenge was to work out how I would arrange it so that I could push a hole into the seed raising mix at the appropriate places, into which I would then plant a seed. For years I have had a pack of 50 fluted timber dowels (6mm in diameter x 32mm long) which were designed to be used in timber joinery but I hadn’t used for anything. Only 50 you say? When I needed 100? Well I had an obvious answer, I would use the aforementioned band saw to cut them evenly in half!
Have you ever tried to cut a whole stack of 6mm x 32mm cylinders, exactly in half, without losing a finger in the process? Anyway, through an amazing coincidence after recalculation it turned out that the best spacing for the seedlings meant I would only need 50 of the dowels. Thankfully the original pack actually had 54 dowels so I was able to carry out some (mostly bloodless) practice with the band saw but still have enough dowels left over to complete the job properly.
I drilled 50 7/32” holes (sorry, I have had my drills for many years and they are pre-metric) into the MDF board at designated places. Drilling 7/32”holes for the 6mm dowels gave me a firm enough fit that they would stay in place without glue, but not so tight that they couldn’t be tapped in with a hammer. I have a bench drill and used that so that the holes were as close to 90° to the surface of the board as I could get them, pretty much. The new deal actually worked out better than my original idea of gluing the dowels into the holes, because it meant that the length of the dowel (and hence the depth of the planting hole) was adjustable.
In some of my reading it had appeared that the spinach seeds needed to be sown 12mm deep, which seemed a bit deep to me, but anyway. By placing the rig on a flat surface and applying a hammer gently to the back I was able to set the dowels all at 12mm.
The Set Up
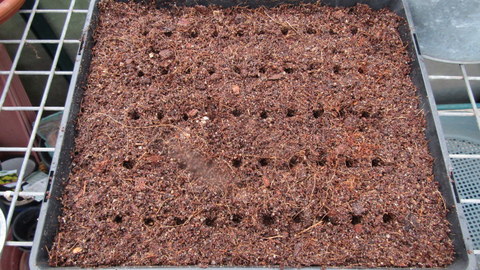
I made a batch of my seed raising mix up, which is covered elsewhere but for simplicity is basically a mix of 1 part coarse sand, 2 parts worm castings and 3 parts cocopeat (horticultural coir) all by volume, I use a 500ml plastic take-way food container as the measure. I mixed it around, making sure it was nice and damp then loaded it into the seedling tray and levelled it out a few mm below the level of the rim, then pressed the sowing rig down on top, to flatten and compress the seed raising mix and press in the holes. Then into each hole I dropped a spinach (English medamia) seed and covered each seed with a bit more seed raising mix.
The seedling tray, seed raising mix, seeds and all, was then placed into one of the cat litter trays three quarters full of sand and water, to ensure the seed raising mix was damp, but not sopping. I kept the water up in the cat tray manually, the seedling tray was too large to allow me to put the upturned bottles in as I usually do in capillary beds to provide a water reservoir.
Results
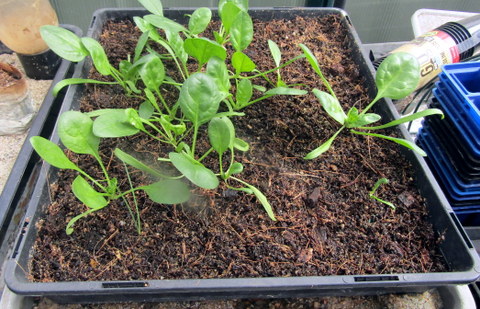
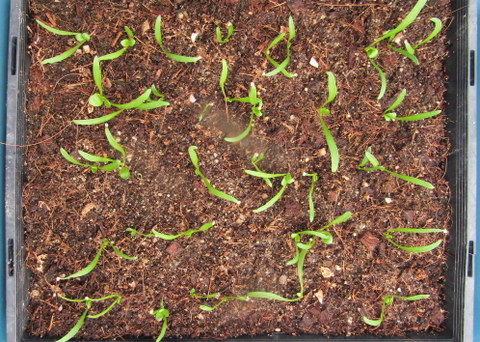
The seedlings started to emerge about a week later, just not as many as I had hoped for. We got a total of 17 plants out of the 50 seeds of which 14 plants made it to harvestable size, about 2 and a half weeks after the seedlings emerged.
It is amazing what you find out when you do things for yourself! I had assumed that the baby spinach would be harvested in the way that most microgreens are – once they have achieved the required size you take a pair of scissors, cut them off and serve them up in true MasterChef style, followed by dumping the growing medium and starting again from scratch.
Not so! We don’t have a huge number of plants but I have been able to harvest half a dozen, to a dozen leaves every day or two to have on our lunch since they got to harvestable size. The supply doesn’t seem to be slowing down yet either!
The future
I am going continue and see how long we can push the harvest for but also about a week ago I set up another seedling tray, but this time I modified the sowing rig so that the seeds would be sown closer to 5mm – 6mm deep.
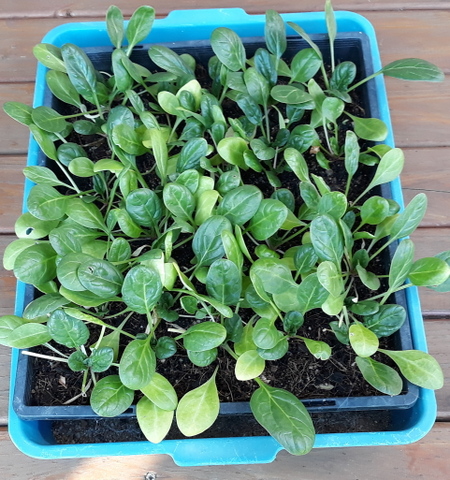
The new tray has been remarkably productive (see above) with a hugely increased germination rate and continued cropping. It seems that the sowing depth of 5 – 6mm is the way to go, but to be fair, even the original tray is still producing on a regular basis a couple of months later. Another difference was I didn't put as much sand in the kitty litter tray the spinach tray is sitting in. This makes watering easier, into the gap between the two trays, and also allows some liquid ferilisation to go in with the water.
I think this has been a great proof-of-concept, if you don’t have much space and want a regular, if small, harvest then this is one way to get it!


