The theory was –
Leave the buckets full of inoculated substrate in a warmish space with stable temperature and I chose under our dining room table, and leave them for three weeks. After the three weeks had elapsed, remove the lids and check to see if the spawn had run properly and the substrate was properly coated with mycelium. If the mycelium had run, move to the next stage, if not, replace the lids and put them back, check in a few days.

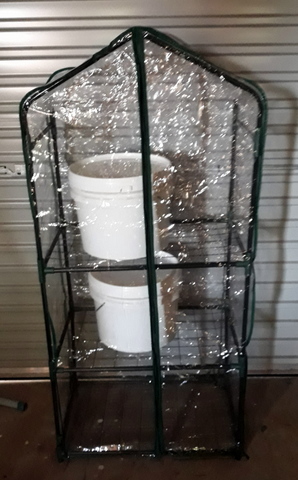
Assuming the mycelium run was good, fill the buckets with cool, clean water and leave them for 12 hours, I was going to leave them overnight, to stimulate fruiting. Drain and place them in the fruiting cabinet (small greenhouse) to maintain humidity and watch to see when fruiting occurs. You don’t need to remove the micropore tape, the mushrooms will push it to the side and break out as they need to.
What really happened –
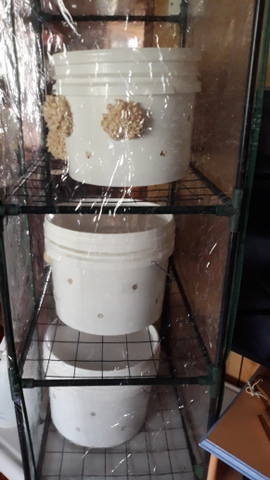
I pulled the buckets out and all of them had really good spawn run and were chockers with the stuff. But one bucket already had mushrooms busting out from half of the holes, the second bucket had mushrooms bursting out from one hole, and only just bursting out at that. The third bucket had no mushies bursting out at all!
Now this was a good thing and a bad thing, it was good because it showed I had the process right, but it also meant that I should have been keeping a better eye out on what was going on! The oyster mushrooms which emerged while the buckets were under the table never really got any bigger, and the best I can make out of that is that the humidity is was too low. Now that they are in the fru1ting chamber, new sprouts of mushrooms are emerging.

The idea with the fruiting chamber is that it keeps the whole set up in high humidity, but you also need to maintain airflow. We had mushrooms protruding from most of the holes in all three containers within a week or two, but it did seem to be a bit of a struggle to keep the moisture up using my go to technique – regular spritzing with a hand powered water spray. I made sure the fruiting chamber was in an obvious place which I would walk past regularly, but when things got busy I would forget (being old probably didn’t help either!) and I think the humidity would drop, resulting in weird mushrooms.

I think the best thing would be to invest in an automatic mister (available online). Some small greenhouses I have seen advertised already come with an automatic mister and so if I was buying a greenhouse for use as a fruiting chamber again, I would get one with an automatic mister fitted.

There has also been another blessing in disguise! In my naivety I assumed that there would have been a uniform eruption of the mushrooms. If that had been the case, ie mushroom bursting out of all the holes, in all the buckets. All at the same time, I would have been up to my armpits in oyster mushrooms, so: mushroom soup, mushroom salad, mushroom pasta, mushroom ice cream – I’m sure you get the picture. In the event though, the harvest of mushrooms has been spread out over a couple of weeks rather than all at once! (thank heaven!).

In the end we got quite a few mushrooms but they mostly tended to be small and some came out very spindly, as a result of the inconsistent humidity. What we did get was very palatable and I included them in dishes I was cooking at the time.

The Adventure Conitnues!
Part 2 - Mixing, Pasteurising and innoculating the Substrate


