Growing plants together
There are endless techniques and patterns which you can use to integrate the variety of plants you want to grow into a de-lawned front yard. Following are some suggestions which you can look at, think about and decide if they will work in your particular situation. If you are not sure you can give it a go, but by reviewing and integrating these ideas at the planning stage you can get some idea of how they will fit into the big picture and work with (or against!) the rest of the design.
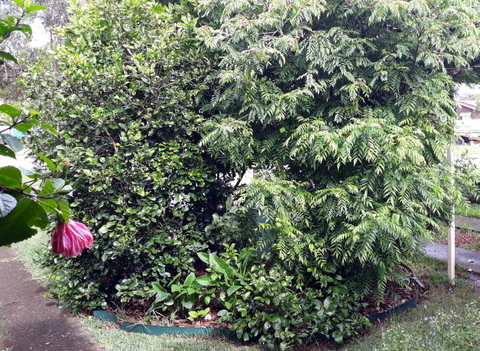
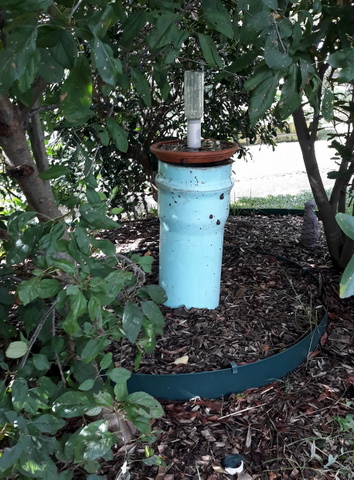
- Fruit tree circle – obviously enough this is a circle of fruit trees (or maybe just ‘productive’ trees) around a central structure which might be a worm tower, large olla (unglazed terracotta irrigation pot), or bee hotel. Our ‘fruit tree’ circle has a macadamia nut, two apples, two limes (Tahitian and Makrut), a dwarf lemon and a curry leaf tree. There is a worm tower in the centre, topped off by an insect waterer and the whole thing is just 3 metres in diameter.
- Banana circle – in a similar idea to the above, you dig a hole in the ground and mound up a circle around the edge with the soil from the hole. Then fill the centre hole with organic materials which will break down and fertilise the bananas, mulch the mound and then plant a number of bananas equally spaced around the mound. We plumbed the waste from our shower/spa into the centre as well so that lots of water is provided, because bananas are a thirsty crop.
- Rain garden – The idea behind a rain garden is that it makes use of rainfall runoff to provide irrigation. That may be runoff from the rest of the front yard, neighbours front yards, water from the house roof or a combination of these. It is sited in a low depression in your soil so that water will move towards it and is set up to have well drained soil so that it doesn’t stay soggy. The raingarden can be planted out with native productive or biodiversity supporting species.
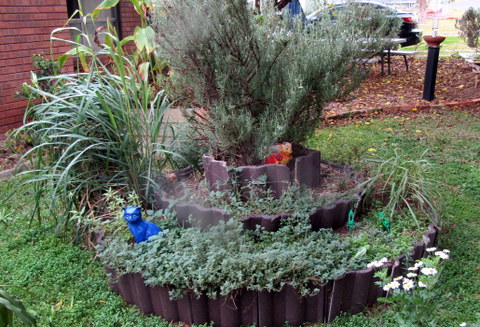
- Herb spiral – A herb spiral is designed to provide a variety of microclimates in a small area so that a variety of herbs can be grown without taking up a lot of space. A spiral is built up with rocks, bricks or whatever is available, then backfilled with soil. We used roof tiles but due to their size and shape we wound up with a herb ‘wedding cake’! Towards the north and top of the spiral is warmer and drier (suiting for example rosemary, lavender, thyme), cooler and damper lower down and towards the south (suiting mint, leafy greens, cress).
- Mandala/keyhole bed – Keyhole beds are raised beds that are round in shape with a circle in the centre and an access way to it giving the bed the look of a keyhole when seen from above. The idea is that the whole bed is accessible from the inside and outside without having to tread on soil, compacting it and comprising the growing area. They work well for growing annual vegetables, flowers etc that need care but dwarf fruit trees would also suit. Where a series of keyhole beds are grown in a circle they are referred to as a mandala bed. A mandala can take up quite a bit of space and may need a large front yard but they can be very productive and visually striking.

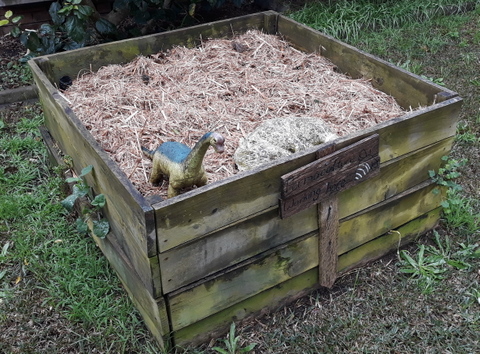
- Raised beds – There are any number of ways of constructing raised beds; they may have sides or not, they may be built from scratch lasagne bed style or made by double digging the existing soil once the grass has been removed. They may be constructed to any length but should only be wide enough such that the entire bed is accessible from both or either sides without needing to step on the bed and compact the soil. The advantages are built in drainage and a light fluffy soil which is great for soil biota and plant roots. HugelKulture style rasied beds use varying size diameter of logs which act as a store of water and fertility as they break down.


Structures
Depending on the amount of land available, where you are located and your interests, you can also include various, for want of a better term, structures in your plan, to achieve various things, such as improving biodiversity, providing for your local community and/or increasing the amenity of your front yard. For example -
Biodiversity – One of the issues with the suburbanisation and urbanisation of our cities has been the destruction of the wildlife habitat which was once there for birds, insects and mammals to provide housing, shopping centres and buildings for humans. It is possible to encourage some of that wildlife to return by providing somewhere for it to come back to. In some respects just providing an increased level and variety of trees and bushes will support this aim, particularly if they are natives. Where we live in St Clair, western Sydney, was clear felled when it was first opened up, and it took many years of private and public tree plantings before we started to see birds in any meaningful numbers return to the area.
Structures which will improve biodiversity
· Nest boxes – Here in Sydney we have six species of microbats which are under threat due to habitat destruction. We have two commercially bought bat box kits assembled by us and affixed to a tree in the front yard. There are many other nesting boxes which can be bought in kit form or built from scratch that will also allow you to improve biodiversity in your area including boxes for possums, parrots, owls, feathertail gliders, sugar gliders, lorikeets, kookaburras and other king fishers. What you will need to put up will depend on the needs of your area but a discussion with your local university may assist. Again, a bit of research early on will make this easier.
· Waterers – watering stations for birds and insects will also attract wildlife to your front garden, especially in the hot dry times that can occur so often during an Australian summer. We have built several based around an upturned bottle to increase the amount of time between refills. Insect waterers are a bit more tricky because the will require a water filled area to also be filled with rocks or gravel to allow small insects like bees access to the water without exposing them to a danger of drowning.
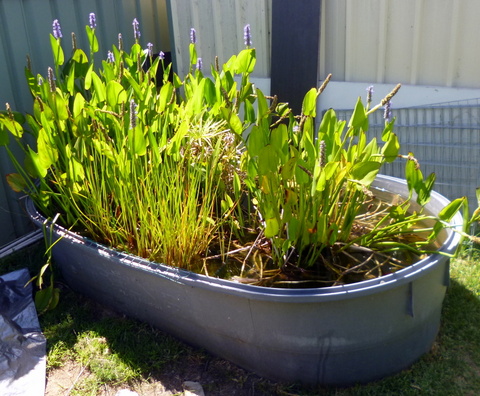
· Water features – while these can also go in the ‘amenity’ section, if properly constructed they can improve biodiversity by providing habitat for native fishes and frogs. The concept of ‘frog hotel’ has started to appear on line and is worth pursuing if you are interested. Water features can also allow growing of edible water-growing plant species such as water chestnut, arrow leaf or kang kong (water spinach) as well as cooling and humidifying the area. One word of warning – water features in the front yard, especially ponds, can provide a drowning hazard for young children and this should be taken into account during design. There may be requirements set by your local council for front yard water features such as a maximum depth and/or mesh cover and perusing their website or giving them a call is strongly recommended before implementing anything.
· Insect hotels – Have a think about it, if you want someone to come and spend some time with you, what you need to provide for them is food, water……. and a place to stay! It is the same with beneficial insects, once an insect waterer and insectary plants are in place an insect hotel (or ‘bug hotel’ or ‘bee hotel’) provides a wide variety of habitats for insects to live and reproduce. You can even buy them in the shops, but my recommendation would be to do some of your own research and build your own. Some of the commercial bug hotels appear to me to be made by people who want to make money off bug hotels rather than people who know what they are doing.
· Native bee hive – Again, this will depend on where you are, but in the warmer parts of the country a native beehive can improve biodiversity and pollination of your front yard as well as your neighbours. They do not have all the hassles and restrictions associated with European bee hives and so are easier to arrange and maintain in your front yard.

Structures to Improve Community
Including structures that facilitate interfacing with neighbours and passers-by can improve the feeling of community in your area. When you are implementing your plan for the front yard and growing some food there, lots of conversations and sharing can be started by that alone. Installing one or more of these community structures can also facilitate sharing and conversations, a worthwhile goal in and of itself.
· Street Library – This essentially, is a structure on the boundary between your front yard and the street, containing unused and unwanted books that can be picked up or donated by anyone walking past. We have found over that last couple of years that we don’t always see the people patronising our street library and contrary to my expectations all the books did not disappear in the dead of night but slowly got turned over. Often I would check the library and find a new load of donated books. How you make and set it up will depend on your skills and interests, I have curated ours so that the top shelf has fiction books and the bottom shelf has non-fiction, with a mix of kids and adult books in both areas.

· Street pantry – this is like a street library but with food! Ours is mainly to share excess produce but depending on where you are and who your clientele are you could keep any food related materials for use by passers-by. Obviously, if you are sharing dry goods your street pantry will need to be more weatherproof than ours as the fruit and veg do not suffer from the odd drenching if it occurs.

· Community Bench – All manner of people can go walking around the area and it can be handy to have a place for those who are unwell or more mature to sit and recover from their exertions. One day I found a woman and her kids making use of the bench while reading to the kids from books out of the street library. It was really nice!
Structures for your Amenity
While we are talking about productivity, it is worth building in areas where you can enjoy the sheer pleasure of just sitting in your beautiful and productive front yard to enjoy it. That is, improving your amenity.
While this would normally be done in the back yard, doing it in the front yard provides greater potential to engage with neighbours and passers-by. By thinking about this at the planning stage it will be easier to include and area or areas for this in association with other garden features.
- Seats – in a similar way to providing a community bench for the use of others, a bench, seat or outdoor swing chair for ourselves can provide a great place to read, think, or enjoy the productive front yard in and of itself.
- Table – We have a table with attached seat under the mulberry tree, which gives us a cool shady place in summer but allows the sun in during winter and it is a great place for an outdoor lunch with friends or just ourselves.
- Swings – attached to a tree if they are big enough or to posts and supports if they are not is a great play space for kids or grandkids, and small cubby would not go astray either. Amenity is not just for the adults!
Putting it all together
At this point in the plan, while there is research left to do, you should have some idea of what you want to achieve in the de-lawning of your front yard and thoughts and how you will achieve it. So the next step in the plan can be to use pencil and paper to work out what goes where, in other words, you will be developing a mud map of how the project will come together.
Speaking for myself, I am a crap artist who has a bad relationship with even straight lines, but I still want to be able to put a plan together on paper. I am also old, so I don’t get the myriad of aps out there that will probably allow you to put a passible map together. I am analogue not digital so I use an A4 grid exercise book with 5mm grids.

It is really handy and more meaningful if the map can be drawn to scale and this is made much easier if you are using grid paper. Just work out what size the area you want to make the map of is and then work out what scale the grid needs to be, for example 5 x 5mm grids being equal to one metre on the ground. Drawing this on the map itself will help keep things in perspective.
The first thing to do once you have worked out the scale is to look at the sketch map you put together as part of the assessment and transfer across any of the items that had been identified at that stage as keepers. Stuff you couldn’t, or don’t want to move is likely to have an impact on the remaining space so transfer them across, but this time to scale, which may require you to do some more measuring.
At this point you can put in any proposed water points including rainwater tanks and earthworks which will impact on drawing of the plan. Then it is a case of adding in the plants, how they will go together and structures (for amenity, biodiversity and community) which you have decided upon.
It is important to do all of this work in pencil, because it is likely that there will be a number of revisions and your ideas may change with time and research. Also, it may be that something which looked eminently feasible and practical on the plan doesn’t work in real life, or is too much work or whatever. By drawing the plan in pencil this will allow additions and modification to be recorded during the project so that the finished plan will reflect what your new front yard actually looks like.
Delawning Your front lawn - Part 5 - Developing your plan Part b: Plants


