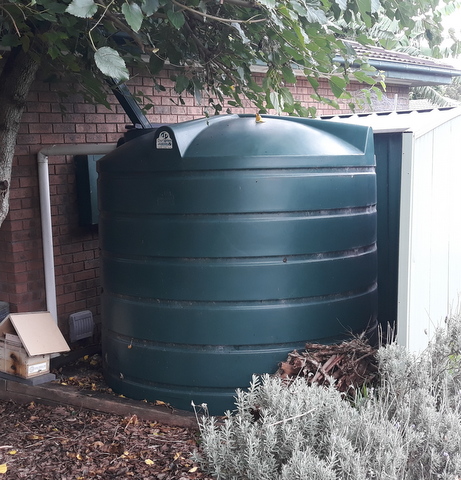
The first large poly tank to go in was the 5,500litre on the northeastern corner of the house about 15 years ago. It was the area where we had the most room to be able to fit a decent sized round tank, and as a bonus it was shaded from the sun by the mulberry tree. Winner!
Well, almost! What I didn’t plan on was that the mulberry was a deciduous tree and would lose its leaves every year over the tank and northeastern corner of the house is roof! Coincidentally, this was where the runoff that kept the tank full came from. Hmm, this could be (and was) a problem.
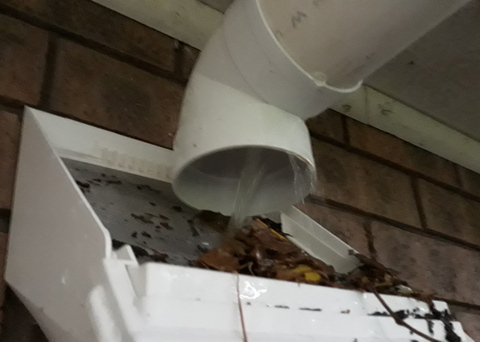
The set up for the gutter to tank connection was simple. A friend who was a roofer helped me re-do the gutters after they had given me over 25 years of service but had got to looking pretty scrappy and corroded. He suggested just angling a piece of the rectangular steel down pipe we were already using to hit the inlet of the tank. The tank had a screen over the inlet, and I added another removable screen on top of it and hoped that using that, in association with cleaning the gutters regularly would keep the water in the tank fresh and clean.
Unfortunately, over the years there got to be a build-up of leaves, dust and other detritus that was washed off the roof, into the gutter and from there into the tank. The water from the tank would occasionally get a bit of an off smell, but seeing as we were not drinking it, just using it to water the garden it was not a problem.
So, what changed?
Walking around the neighbourhood recently I saw a first flush set up, coupled with a downspout filter that would work where the tank is, so I decided to build one. It would be in two parts – The first part is the downspout going from the gutter to the downspout filter and then the second part is the downspout filter/first flush diverter assembly itself.
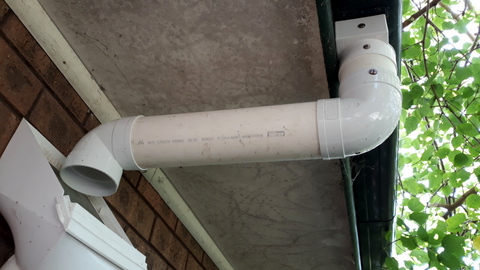
Part 1 – the nozzle that directs the rainwater from the gutter into the downpipe, in our case was a 100mm x 70mm rectangle, but most of the rainwater pipes and fittings available seemed to be round. I decided to use 90mm diameter piping for simplicity, because it is the same as I had used on other parts of the house. To connect the rectangular nozzle with the round downpipe I got hold of an 80mm x 100mm 90mm adapter. It was a bit larger than needed but the next size down was too small so that was it.
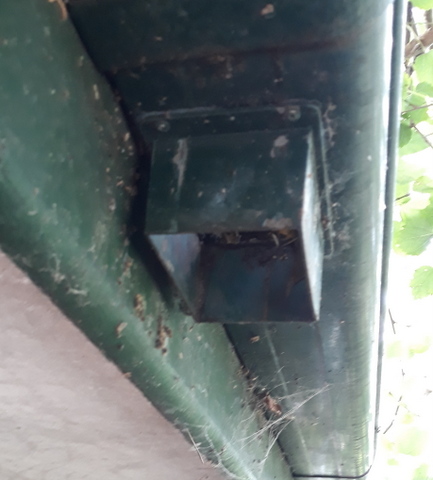
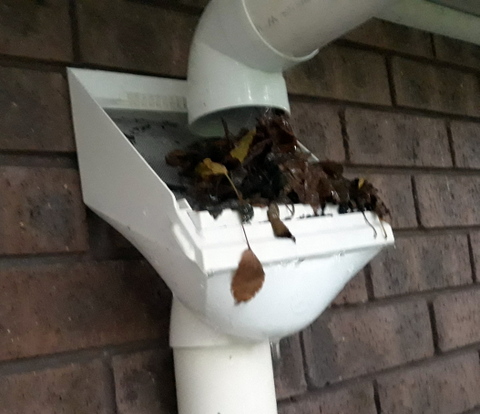
Rectangular gutter nozzle
I removed the original downpipe, placed the adapter on the nozzle and screwed it into place. I then fitted a small length of 90mm round pipe vertically, a 90° elbow on the end of it, then more 90mm pipe horizontally towards the house and then another 90° elbow to direct the water flow down into the downspout filter/first flush assembly.
The pipe and first 90° elbow are screwed together rather than glued so they can be pulled apart for cleaning, and the second 90° elbow is just a push fit, there being no pressure on it. An extra complication was that the under-eaves of our house are asbestos, so I didn’t want to be disturbing it by drilling brackets if I could avoid it and it seems to be working OK so far.
Part 2 – I assembled the downspout filter/first flush system first, then attach it to the northern wall of the house. The first action was to get hold of the components for the first flush system plus two by one metre lengths of 90mm diameter stormwater piping. The downspout filter I already had in the back of the cupboard (literally) for years but never used. Having checked it was there, I went out and bought the first flush and 90mm piping along with some 90° bends for the other section from the hardware.
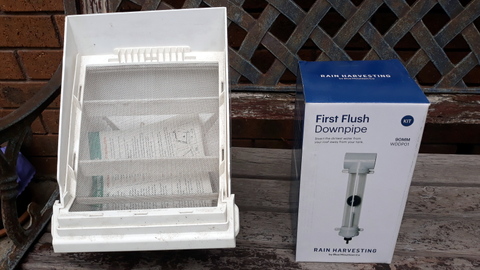
Downspout filter and the first flush kit
When I put the first flush together for the previous tank, it was set up horizontally. That is to say water flowed in one side, down into the first flush then out the other side once it filled up, into the tank. This time, water would be directed down from the roof, onto the downspout filter then vertically down into the first flush and from there out the front of the assembly and into the tank.
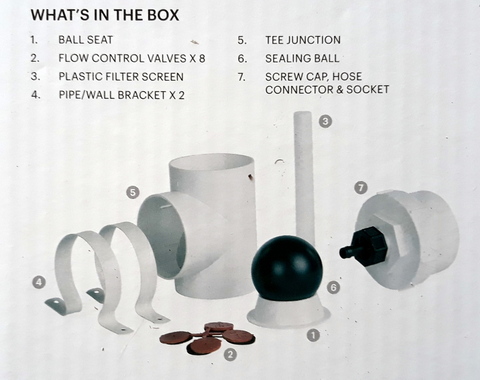
Contents of the first flush kit
To assemble the downspout filter/first flush diverter I took the Screw cap/hose connector and socket assembly and glued it to one end of the 90mm diameter tube. I glued this in place because it would be on the bottom have to hold the weight of the water and not come apart, all other joins were just pushed together to allow disassembly for cleaning if required. I then fitted the tee junction on top of the pipe so that the long axis was vertical and the outflow on the side would face the tank. I fitted 150mm of 90mm on top of the tee and then placed the downspout filter on top of that.
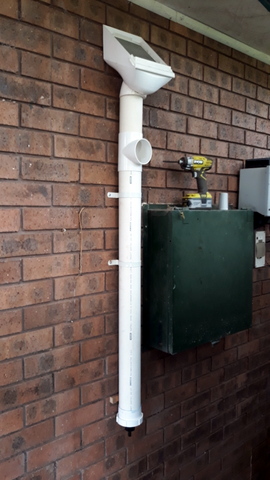
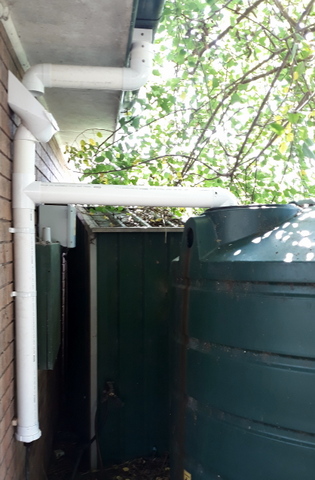
Downspout filter and first flush in place

Making sure the drain has a slight down angle towards the tank
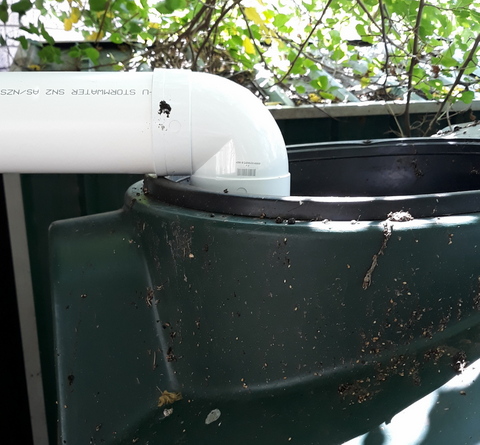
System olutflow into the tank
To affix the set up to the wall I used the two pipe wall brackets which came with the first flush kit, drilling holes into the bricks and fitting masonry plugs in the holes and then installing screws to secure the brackets to the wall. One important point is that the screw cap on the bottom of the assembly needs to be removable for cleaning, and if the pipe is secured tight to the wall this is not possible. To enable the cap to be removed I secured the brackets high up on the pipe and inserted a small timber bracket just above the screw cap, so the assembly kicked out a small amount at the bottom, allowing the screw cap to remain clear of the bricks. With this done I could tighten the screws securing the assembly.
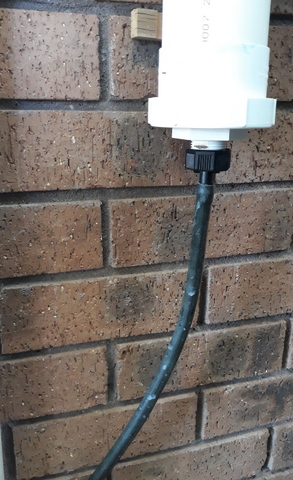
First flush drain, with timber bracket near the top of the pic
System in place and set up (tank overflow removed for clarity)
The way the first flush diverter works is that rainwater gets diverted into the tube first, which fills up, causing the ball to rise to the top and block the tube, resulting in subsequent rainfall going into the tank. There is a small orifice at the bottom of the tube which allows water to drain slowly away so that when rain occurs next time, the tube is empty and the process begins again. There is also a coarse filter at the bottom of the tube which prevents the orifice from being blocked by dirt and rubbish, but the system does require regular inspection and cleaning.
So…..did it work?
Late the day after I installed the system, we got a heavy shower of rain and the system performed flawlessly. No more dirt, leaves and other rubbish will going into this tank!
The system works!