


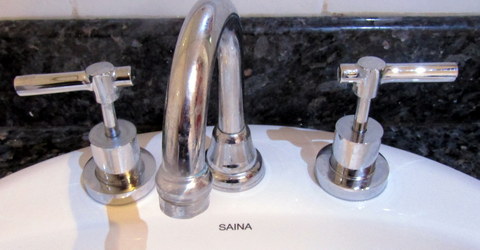
As I mentioned in our Zone 0 series article about our bathroom and toilet, we changed the conventional taps on our bathroom sink for lever style taps. We did this with a huge lack of understanding about these plumbing fittings but now after a couple of years we have learned quite a bit, and I want to share what we have learned with you!
The taps worked very well for us for about two years and we really had no complaints during that time, unfortunately after two years, the cold tap started to leak. I don’t know what your standard response to a leaking tap is, but mine is to turn if off harder! What I did not appreciate was that these taps work in a completely different manner to a conventional tap, such than turning the lever harder against the stops will have no effect or even make the leak worse!
Yes, I am speaking from experience! Here I am at 10:00pm on a Sunday night, heading for bed when I realise the tap is dripping and I need to stop it. The end result was that the tap was no longer dripping, but was actually gushing water straight down the drain, so I had to whip out the front, turn the main tap off, pull it apart and then spend half an hour on it until I could get it to the point where it was…………..you guessed it – dripping! *sigh*
If you have ever pulled apart a conventional tap, you will know it works by screwing down a soft tap washer onto a seat, through which the water comes up and out of the tap nozzle. As the washer is screwed down onto the seat, the water is cut off. If the tap is leaking it is usually due to a dud washer which can be replaced very cheaply. Sometimes it maybe a defect in the seat, but this can be remedied by the use of an inexpensive reseating tool, and away you go again!

The mode of operation of the lever taps is totally different. They, too, have a plastic seal which comes in contact with the seat of the tap, but all it does is prevent water escaping from the lever tap innards (called a cartridge) and gushing straight down the drain. In my efforts to fix the original leak I wound up dislodging this seal and shortly thereafter ran through my entire vocabulary of curse words! I was able to remedy it eventually by removing the cartridge from the tap (AFTER the water was turned off at the meter) and re-seating the seal. This stopped the gushing but did nothing for the original leak. I was thinking of conventional taps and did not understand the seal which I re-seated was not the problem.
It was research time!
My chief researcher (Linda) came up with a YouTube video from the UK where the gentleman explained how the taps work. It appears that there is a fixed and moving ceramic plate inside the tap, they both have holes in them and as the tap rotates one plate as it is turned, the holes line up more and more, increasing water flow. From this it becomes obvious that turning the tap off more forcefully will have to impact on a leak where water is seeping between the plates.

The official way to get over a leak of this type is to replace the cartridge (meaning: the whole inner guts of the tap!). Depending on the type and make of tap you have this can mean a cost of a bit less than $50 up to $100 plus! Ouch! Expensive and wasteful of resources, big time!
So, the guy in the video said that, more often than not, the problem tends to be that the lubricant between the two plates has been displaced and you get a leak, but you can pull the whole thing apart and re-lubricate the plates. The two best choices for lubrication, he said, are silicon grease, or failing that, Vaseline. We didn’t have any silicon grease.
I also didn’t feel like pulling the whole thing apart! What we did have has some Vaseline, and on closer inspection, it seemed to me that with the cartridge removed from the tap and some Vaseline on the end of a cotton bud, a small amount of Vaseline could be applied to the stationary plate quite easily. Once the Vaseline was applied to the stationary plate it would only take a couple of rotations to spread the new lubricant out between the plates, thus stopping the leak!

This was, in fact, what happened although it was with much trepidation that I replaced the cartridge into the tap and turned the water back on, but……..no leak! It has been several weeks now and I still look sideways at the tap when I turn it off, but there is no sign of a leak. We will continue to re-apply the lubricant (I need to get me some silicon grease!) as needed until that approach no longer works. That should considerably extend the life of the tap, thus saving us water, money and resources that would otherwise be wasted.
