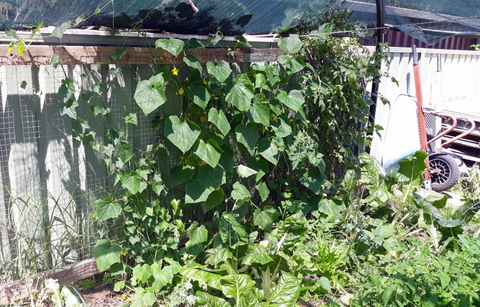
One of the problems with growing your own is being able to keep things maintained so that they remain productive. A couple of months back the weight on the trellis along our southern fence from a really good crop of peas and snow peas resulted in the trellis succumbing to gravity, causing it all to fall forward. This was unfortunate, seeing as I didn’t want to interrupt their yield and could not get access to fix it. I had to wait until harvesting was complete and the chook tractor had been through and cleared the area of herbage.
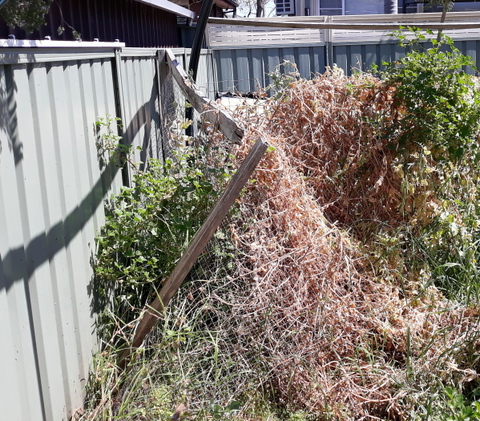
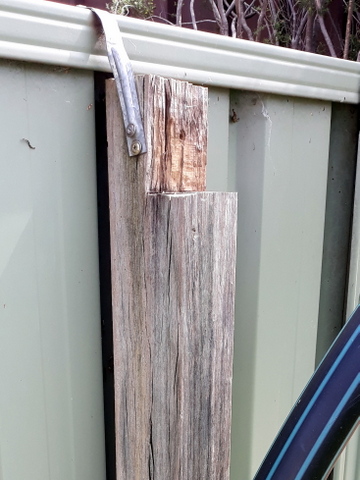
That had finally happened and the trellis looked pretty sad, with the top rail broken, the bottom one sagging and all of the wire mesh falling off it. The wire mesh was still in good condition and the uprights on each end were perfect, it was only top and bottom rail which were in poor nick. The uprights are hardwood, salvaged from the original back deck when I pulled it down before building the new one and for being out in the weather for 15 years plus, they looked pretty good. They were still attached to the fence by galvanised strapping at the top so they just sat there waiting to be re-connected to new rails.
The problem was I needed the timber to renew the top and bottom rails to be 4 metres long, and I didn’t have any timber that length. What I did have was some 45mm x 90mm floating around but the maximum length was only 2400mm. Overall, I had enough timber to bridge the gap but they would need to be joined together somehow.
I hunted around and found one 200mm long x 60mm x 40mm galvanised angle bracket, this could be used to join two lengths of timber together. Unfortunately there was only one so I screwed that onto the bottom of the top rail, figuring that it would be under the most stress. Years ago I used a stack of 75mm long by 60mm x 40mm galvanised brackets to hold the original timbers edging the veggie beds, but these had started to come away as the timber in contact with the ground deteriorated. Thus I was able to find three of them kicking around and still in good condition.
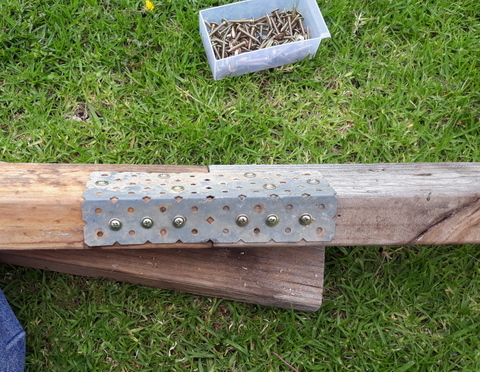
I cut the timber for the bottom and top rails to size, so that all up they were 4 metres long and copiously screwed a galvanised bracket on each side of the join. I was unsure if it would be solid enough, but in the event it worked surprisingly well. I then positioned the top rail and affixed it to the upright with a coach bolt on each end (drilled first then secured with the battery powered impact driver and a socket). Once the top rail was secured, I followed the same process with the bottom rail. Thankfully Linda was on hand to keep the free end in place while I secured the other end.

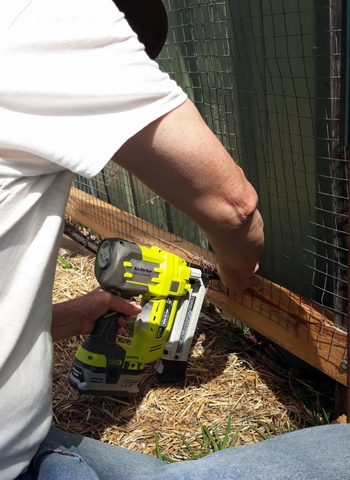
With the framework in place it was a simple matter to drag out the old wire mesh, stomping on it to platen it out. Because it had been bent out of shape by the peas, and re-attach it using a staple gun.
I am really happy with how it turned out, it had been bugging me for some time and it was remarkably satisfying to see it back in usable form. Now we just have to wait and see how it copes with vegetation growing on it!