


I picked up a book recently because it looked really interesting and it turned out to be something I wanted to try. The book was called ‘Year-Round Indoor Salad Gardening’ by Peter Burke. He was growing sprouts using a process he calls ‘soil sprouting’, which appears to be a cross between regular sprouting and growing microgreens, but with some differences. His idea was to use the process to grow salad greens indoors during times in the US when gardening outdoors was not possible due to the low temperatures. I found it interesting because there was no need for direct light of any description, either from the sun or grow lights. Needless to say I had to give it a go!
Summary of the Process
The idea is to soak sprouting grade seeds (ie edible, no chemicals added) overnight, spread them onto a container filled with a specific seed raising mix, put a wad of moist newspaper on top, then place them into a warm, dark cupboard for 4 days. Once the sprouting and initial growth is started for the 4 days in the dark, remove them from the cupboard and place them on a windowsill and green them up and grow them on until they are the size you want, harvest and eat. Simples!
Another advantage (apart from the lack of need for light) of the process is that it lends itself to a continual rotation, or sow, grow, green, harvest and eat. By setting up one or more trays every day, you can ensure a continual harvest of salad greens without stepping outside your house.
The Details
Seeds
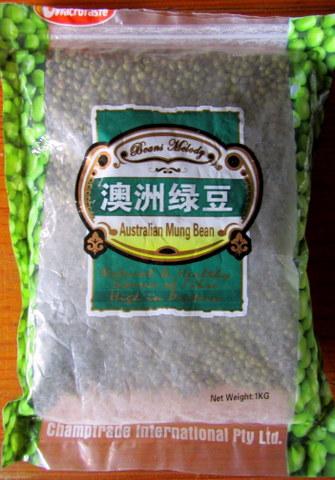
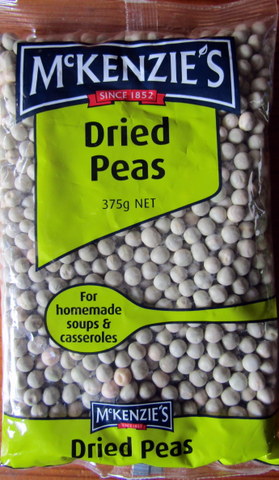
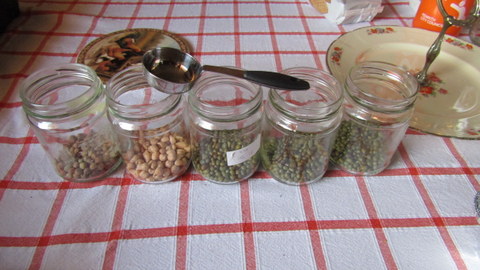
Most seeds designed to be eaten as sprouts or microgreens will work for this process, but there are a couple of other options which can be followed rather than buying small amounts of expensive seeds specifically for sprouting. There are some seeds which are designed to be used as food directly available in the supermarket or similar shops. These include dried peas (designed for homemade soups and casseroles not the ‘Surprise’ style peas) or chickpeas in the supermarket or adzuki beans or mung beans in the Asian supermarkets. Bulk food shops also have grains which may be sproutable such as wheat, buckwheat, rye or millet which can also be used with this techniques. With a little experimentation and searching you can find palatable grains, seeds and legumes ideal for this process which are quite reasonably priced.
Soil
The soil mix advocated in the book is very specific, but is based around peat, which is not particularly sustainable, so (as usual) I thought I would try out my own. First cab off the rank was my standard potting mix/seed raising mixture: a mix of one part coarse sand, two parts worm castings and three parts cocopeat AKA horticultural coir, all by volume, and it worked! It seemed to do pretty well for me anyway.
The mix of soil and water is also quite specific, too much water and your get sludge, not enough and it affects the germination of the seeds. I let my soil mix dry out for a few days before adding any water at all so that the soil/water mix was reproducible. After a bit of fooling around I found that a ratio of 1.75 cups of water to 2.0 litres of soil works pretty well. I just put the soil and water together in a closed container and shook to distribute, then left it to soak overnight. I used a sealable plastic bag and kept it sealed so that the soil and water ratio remained the same ie no evaporation.
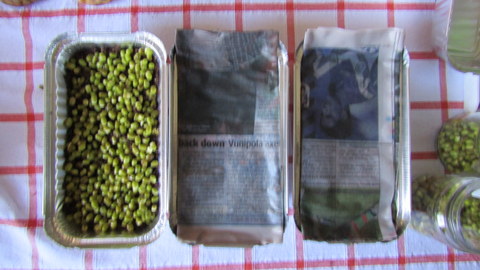
The other technique the book talks about is to put a small amount of a fertiliser, liquid sea kelp, in the bottom of the growing container before placing the soil in there, that way the seeds sprout and send down roots, which hit the fertiliser just as they need it. So I put together a little experiment with three trays of sprouts: one had a small spoon of eco seaweed concentrate (S), one had a small spoonful of SwiftGrow (F) fish waste fertiliser (which is produced by a friend of mine) and a third one with nothing as a control or blank (B).
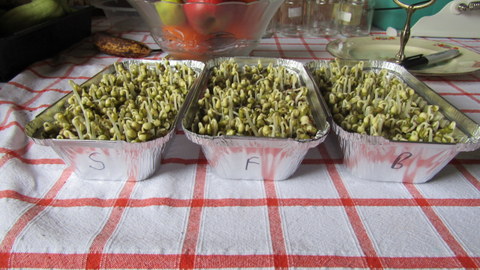

In the end there didn’t seem to be much in it, with the blank being as least as good as either of the other two. As a result, I elected not to add any extra fertiliser. I assume the difference is that his formulation for the soil had no added fertiliser (apart from the stuff in the bottom of the container) whereas mine has the worm castings. Anyway, take from that what you will!
Containers
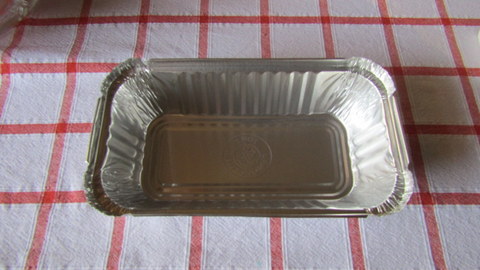
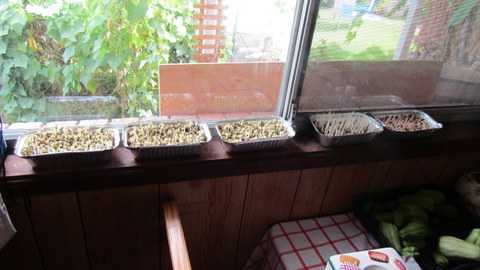
These can be just about anything, and there is no need for drainage holes. In the book they use aluminium food trays, which made sense to me as they are light, cheap, recyclable and a good size to experiment with. I bought a couple of packs form our local El Cheapo shop for less than $10. There were a couple of sizes, but I bought the smallest at 20 cm by 11 cm by 5 cm deep.
Paper Cover
This is the cover of moist newspaper placed over the top of the seeds once they are applied to the top of the soil-filled container to keep them moist and aid in germination. To suit my containers I used one sheet of newspaper for each cover. I made the covers by taking a full newspaper sheet and folding it in half so that it was two thicknesses of normal newspaper size (ie 390mm x 280mm), folded it in half top to bottom so that it was now 195mm x 280mm, then folded it in thirds to form a newspaper pad roughly 90mm x 195mm. I then soaked the pads in the sink with warm water in it for 20 minutes to half an hour before they were ready for use.
Process
This is the process which I used, based on the components as detailed above.
1. Soak your seeds overnight, or at least 4 hours in water then drain. I used 2/3 of a tablespoon of mung beans, I tablespoon for chickpeas and green peas, and a teaspoon for smaller seeds like brassicas (broccoli, cabbage, Kale etc.). In the book they use plastic cups but I used recycled glass food jars.
2. Add 1.5 cups of the pre-soaked soil mix into the tray and smooth it out, and top with pre-soaked seeds and smooth them out so that they are in a single layer, and covering as much of the surface of the tray as possible.
3. Cover the seeds and soil with the pre-soaked newspaper cover, pushing it down where required so that it is in direct contact with the seeds being sprouted.
4. Place them in a dark space for 4 to 5 days. Check the periodically to make sure all is well and that they are not drying out. We have a couple of bookshelves with a closed in bottom cupboard in our lounge room, so I elected to clear out the top shelf in the cupboard of one of them and set up the filled containers in there.
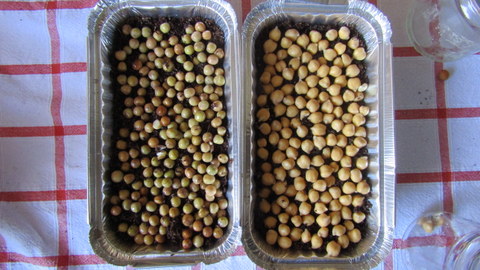
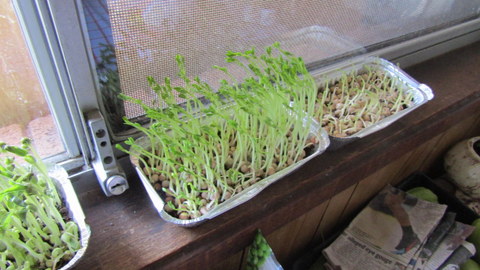
5. Once the seeds have sprouted and come up 20mm – 30mm, you can remove the newspaper cover (which will be supported on top of the sprouts at this point) and place them on a windowsill to green up. I placed ours on the dining room windowsill which gets very little (if any) direct sunlight at this time of the year due to the cover over our back deck.
6. Leave them for a further 4 to 6 days, depending on the point at which you want to harvest, it is likely that you will need to water them during this time, which can be done with a small watering can, watering the soil rather than the sprouts, just to the point where the soil is damp, not wet or sludgy. This might not take as much water as you think, because due to the lack of drainage holes, all the water you put in will eventually be absorbed by the soil.
7. Then harvest with scissors by cutting the sprouts off above the soil surface. Discard the roots, soil etc. into the compost or a garden bed and start again.
The sprouts harvested can be combined with other sprouts and veggies to make a fresh salad every day, included in a stir fry or as a part of a Vietnamese rice paper roll. The sprouts are very versatile, full of vitamins and minerals, and just plain crunchy and tasty!
Results
In general I was very happy with the output of our little sprouting experiment, usually including the harvested sprouts with lunch, as part of a sandwich or wrap made with homemade tortillas. If there was one less than satisfactory element for me, it was that when sprouting peas, the cotyledons remain on the ground and when the sprout is harvested they are not included. This is as opposed to jar sprouting where they are part of what is eaten.
Apart from that it worked pretty well!
