


The introduction of stage 2 water restrictions here in Sydney, meaning that we can’t use a hose connected to the reticulated water system to irrigate our food gardens, has set the cat amongst the pigeons.
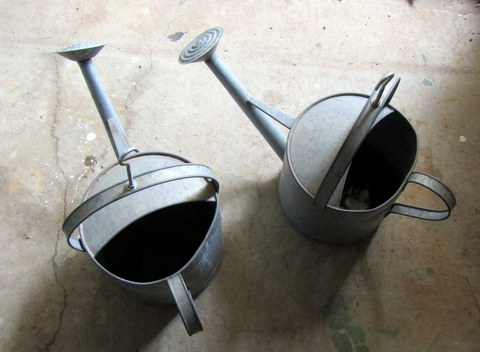
My first response was to replace all the buried pipe in our 3 metre beds with ollas, the buried pipes requiring water pressure from the hose to be effective whereas ollas can be filled using any water source. It also started me thinking about easier ways to use watering cans. We have two galvanised watering cans which hold about 8 litres each and there are times when a watering can, can be useful, specifically for crops such as carrots, onions and beans, which we are sown where they are to grow and/or are planted in a block. They can also be handy applying water to beds which have been out of production for a while during dry weather, to rehydrate the soil and get it nice and damp ready for planting out seedlings into them.
The downside is that they can be heavy, and it takes time going back and forth to fill them up, time which could be halved if I could manage two watering cans at once. My increasing level of maturity is also making things a bit difficult. So what is the answer?
I kept coming back to an image in my head of a farmer in Asia walking along with a yoke across his shoulders supporting two large watering cans, as he applied the water from the cans to his crops. I have seen yokes used to carry many different types of loads in Asia, with the design usually being just a pole, carried across the shoulders, or one shoulder, supporting a load on each end. I have also seen examples of European and Australian carrying yokes which were works of art, carved to go around the neck and shoulders, which looked supremely comfortable. I thought I would try for something between the two.
Making the yoke
After looking round the place I found a piece of timber 790mm long x 85mm wide x 20mm thick, it was a piece of pine, given to me by a friend as part of a pile of reclaimed timber, it was originally pallet wood but someone had run it through a planer to dress it up a bit. It was a reasonable size (ie it extended out past my shoulders a bit), was fairly light and (I hoped) strong enough to do the job.
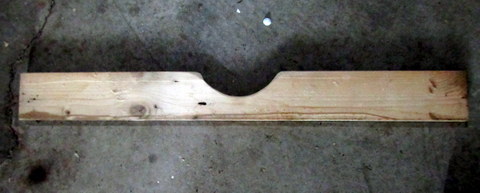

To cut out the notch for my neck, I simply used a tape to measure the circumference of my neck, and then calculated the diameter of my neck (using the internet of course!). I then scrounged around our place until I found a plastic container the right diameter. I placed it at the centre of the board, such that it was in from the edge about half way through the width of the board and traced around it with a pencil. I cut out the half circle with a jigsaw and used my hand sander to take off the sharp edges of the timber. That gave me the cut-out for my neck, so a way to attach the watering cans was the next item on the agenda.
To do this I needed a fitting on each end of the yoke, something to connect the yoke to the watering cans and then a fitting on the handle of the watering cans. I checked out the local hardware and bought –
• 75 x 14mm (6mm diameter) galvanised eye bolts – 2 off
• 107 x 20mm (6mm diameter) galvanised hook bolts – 2 off, and
• Long link chain, 3mm thick with 32mm long links x 2 metres
To make use of the fittings in the yoke, I drilled two 6mm holes, in the centre of each end the yoke about 30mm in from end. Into these I install the galvanised eye bolts, I then drilled a 6mm hole into the top of the watering can handles to install the hook bolts. To connect the yoke to the watering cans I cut the 2 metres of chain into 1 metre lengths.
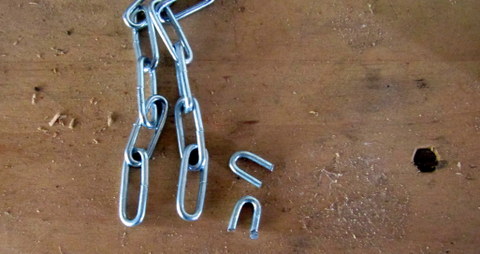
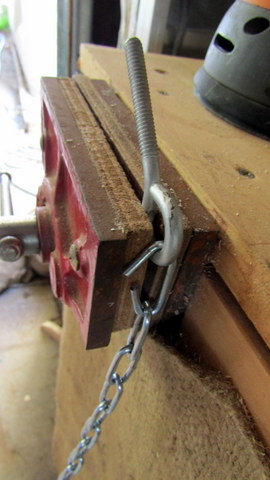
My original idea was to bend the open end of the eyebolt out and slip a link of chain in but, my attempt with two sets of pliers proved to me that wouldn’t work, the steel was too tough or I was too weak, take your pick! So I used the pliers again, but this time to open the end link of the chain, slip it into the ring bolt and then bend it closed again.

Thus the chains were now attached to the yoke, to attach the watering cans to the chain, I fitted the apex of the watering can handle with a hook bolt in each, then slipped the end link of the chain over the hook bolt. I guessed that one metre of chain would be a good starting point but after some mucking around found that 450mm (or 17 links of chain) worked out the best for my height.
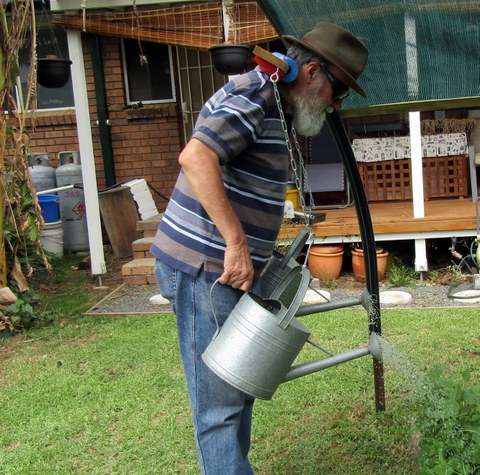
Trialling the Yoke
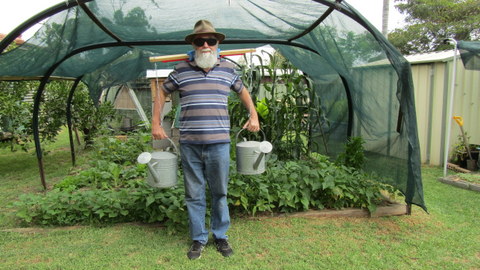
It was with considerable excitement that I put the thing together, filled up the watering cans and took it for a test drive, and it worked! I was able to carry and use the watering cans, but with some difficulties –
1. The set up was surprisingly hard and heavy on my shoulders and some form of padding would be required for the yoke to be useable in comfort over time, and
2. The holes in the yoke were a bit far back in relation to my arms, making it difficult to grasp the handles of the watering cans.
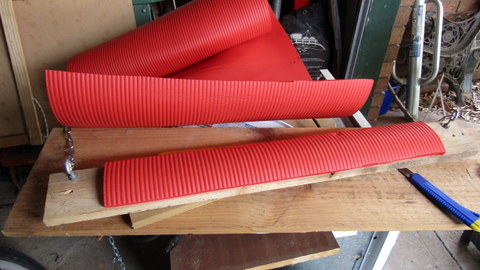
To correct number 1, I cut a section from the end of an old, closed cell polyurethane foam yoga mat (yoga? Me???) which was 620mm x 85mm x 10mm thick and double sided taped it to the underside of the yoke. I used a sharp knife to cut out the notch for my neck, and it seemed to fit pretty well.
To correct number 2, I drilled another pair of 6mm holes, 15mm from the leading edge of the yoke and re-installed the eyebolt/chain assembly in those holes. This also worked, giving me much better access to the watering can handles. However, according to the law of unintended consequences, it also tipped the yoke up towards the front, putting more of a load on my neck.
To fix that, I cut 220mm of pool noodle, cut it open down the centre, put a bit of a slit in the centre and then fitted it into the neck notch of the yoke. This improved the comfort considerably!
So there you have it! I can now transfer water from our tanks comfortably, in enough volume that the irrigation doesn’t take all day, without need the pressure from the hose, winner!
