


What is a gabion I hear you ask? It is not a term I was familiar with until comparatively recently, and my answer would be: ‘a wire cage full of rocks’. According to the all-knowing Wikipedia –
“A gabion (from Italian gabbione meaning "big cage"; from Italian gabbia and Latin cavea meaning "cage") is a cage, cylinder or box filled with rocks, concrete, or sometimes sand and soil for use in civil engineering, road building, military applications and landscaping.”
So you can see that I was not far off!
They are a thing in suburban gardens as well, sometimes as retaining walls, sometimes as supports for a garden bench, quite often filled with white, waterworn stones of various sizes. They have a number of things in their favour if you are looking at these structures –
- They are comparatively quick and cost efficient to put together, particularly when compared to earthworks, and traditional brick walls
- They are permeable to water, so don’t act like a dam if you use them as retaining walls,
- They can protect slopes from erosion,
- They are durable and low maintenance, they just sit there looking great!
- They can be filled with local materials (more on this later).
And, these are the bits that interested me –
- They provide a habitat/shelter area in their interstices for a wide range of small wildlife,
- They provide basking areas with greater heat storage (due to thermal mass) for reptiles and invertebrates.
The start of the story
Years ago I built a besser block base for a wood fired pizza oven in the back yard. For various reasons it never really worked out and I wanted that space for a three bay composting system so decided to demolish it. Unfortunately I had constructed it much more strongly than I remembered, with steel reinforcing, concrete and it was filled with concrete rubble. It took a LOT of work to remove.
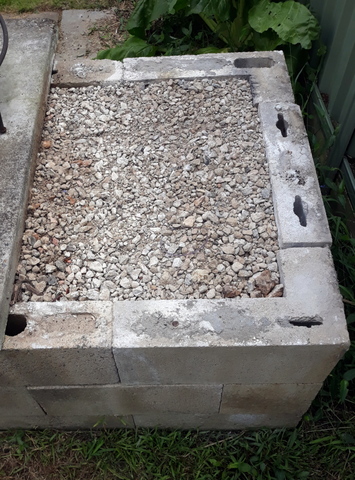
What it looked like when I removed the concrete cover
I wanted to recycle the resulting rubble, but when I contacted concrete recyclers I got no answer, I figured I had about a cubic metre of the stuff so it must have been too small for them to be interested. So relented and figured a skip was the way forward……..until I costed one! The minimum was two cubic metres and it was $400 (cough! cough!). Now I know why they don’t put costs on their websites, you have to ring them.
It was after that that I decided to retain and use the rubble, or ‘urbanite’ as it is often referred to, as a resource, rather than dispose of it as recycling (or worse) as a waste product. Thus killing the proverbial two birds with one stone: utilising a material which could have been waste onsite, and improving our biodiversity by providing habitat for small invertebrates and reptiles.
.jpg)
Some of the larger urbanite lumps
The Gabions
The first materials I needed to ‘gabionise’ were irregular shaped lumps of concrete that I discovered filled the inner part of the structure, along with a whole stack of gravel, which would be used elsewhere, not in the gabions. I was hoping to get some wire mesh discards, but that fell through and I wound up buying some 40cm wire mesh cubes from a certain hardware store, because I was impatient.

Flat pack gabion!
The instructions on how to put the gabions together by the manufacturer was pretty sparse and amounted to – ‘put ‘em together; put ‘em in place; fill ‘em with rocks’. The sides are essentially composed of 2.5mm wire configured into 50mm x 50mm squares, and the sides are held together with these weird looking clips (see pic). After some trial and error (they give you plenty of clips) I found that a pair of long nose pliers and a pair of combination pliers allow the clip to be held in place by one, and the tabs bent over to secure it by the other. Roles of the pliers vary depending on access. I put two or three clips on each side and the bottom, but have not yet secured any of the tops.


Hold with one, twist with the other!

voila!
I set up two gabions in the front yard, then began the process of removing the concrete and gravel from inside the structure. The lumps of concrete (larger than 50mm so they don’t fall out) I removed by clearing away the gravel from in between them, placed them into a steel bucket, then transported them to the gabions and placed the concrete lumps inside. There is an art to arranging rocks in a gabion, an art I don’t have! But I got there eventually. The concrete lumps pretty much filled one of the gabions, with a few leftovers.
I had hoped to separate the besser blocks and re-use them, but it didn’t take me long to work out that the only way to get things apart was a sledgehammer and then a 3 pound hammer (sorry about the lack of metrication). So I followed the same process basically, beat the living daylights out of the besser blocks until they came apart, and then put the fragments into the bucket, transport and stack into a gabion.

In the end I got a total of four gabions, all filled with what could have been waste, but was in fact a resource once I had thought enough about it. They are now in the front yard, providing the seats, and home for tiny critters, a win-win situation!

