As I mentioned in part 1 of the delawning article series, Bill Mollison referred to lawns as ‘green cancer’ and while I am not sure I totally agree with his summary there are certainly issues with the ubiquitous Australian suburban front lawn. Regardless of what we do in our back yard, most of us living in suburbia maintain a front lawn. Where I live here in St Clair, 90% of dwellings have a front lawn, with the odd bit of shrubbery to break up the monotony but lawn is the front yard ground cover of choice. In summary, the issues with that are –
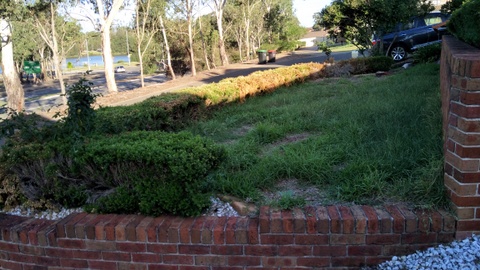
- Lawns are consumptive rather than productive – that is to say, they consume resources (time, money, fertiliser) and produce nothing but grass clippings, which are often dumped rather than used.
- They are monocultures, and we weed out (literally) any biodiversity which would support bees and other insects, birds etc.
- They do not support community and can act as a barrier to it.
- They are just bland green spaces to look out on, rather than providing beautiful and diverse views from our front windows.
- They can leave the house open to the full blast of the Australian sun, rather than providing protection and cooling.
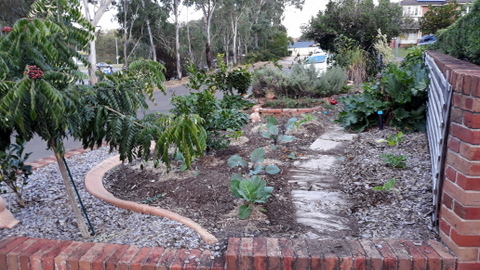
So the idea is to de-lawn your front yard, and turn it into a productive and biodiverse space that is also beautiful. Part three of the series provides some hints on doing your own delawning project, but conducting an assessment prior to starting will give you an idea of what you have to work with. How do you do an assessment of this kind? I’m glad you asked!
Issues in Assessing the Front Yard
Before rushing straight out and starting, or even making any big decisions on what goes where, spending a bit of time to assess what you have and what your options are, then using the assessment to develop a plan is a good thing. It reduces the likelihood of mistakes and allows you to make the best use of resources (time, money, and people) to achieve the desired outcome from your delawning project.
To help you out, I have developed a Front Yard Delawning Assessment Form and method to walk you through the process and prompt the things you need to look at.
Vision: This is the part where you can record what you want to get out of your front yard/garden and obviously it is best if you can do this up front. Once you can articulate what you want, it is possible to work backwards from that and develop a plan to deliver as much as you can of your vision.
Some things to think about include:
- how much lawn needs to go and will it be all at once or a staged process?
- What plants and structures do you want to install or retain?
- What are the overall aesthetics you wish to achieve? Manicured vegetable garden, chaotic bush garden or something else?
- What does the family want? (It will be important to discuss this idea with them and get their input before ‘breaking ground’ as well).
Date: This draws the line in the sand so you know when you did your assessment, you may wish to look back on it or amend it in the future, so having an idea of when it was done can be handy.
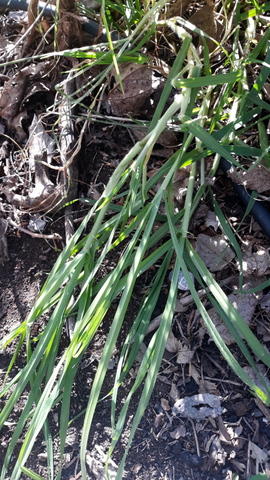
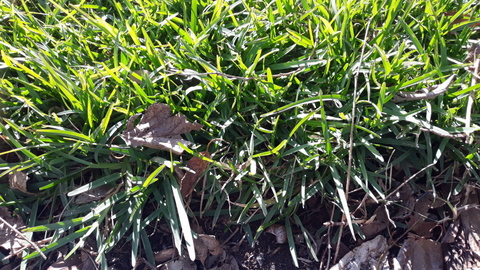
Grass Species (if Known): Is the lawn buffalo grass, a slow growing and relatively non-invasive species, or kikuyu, a grass that will toss you out of your house and take over given half a chance? Or is it somewhere in between? Is it a mixed sward? It is handy to work out what species you are dealing with at the assessment stage so that effective ways of dealing with them can be included in your planning.
Dimensions and area of the Yard and the area under lawn: one of the critical limiting dimensions of the design will be the area which you have to work with. The overall shape may be important too. A long and narrow yard may require a different approach than if it were square so having the dimensions as well as the overall area will be useful.
Fence type and height: any fencing or wall type will affect the impact of the sun, wind and rain on features planted close to the yard boundary. Whether it is brick, steel or wood, whether it is solid or has areas where sun and rain can get in like an old fashioned picket fence may be important to setting out what goes where and so is important to record. Also, do you have any privacy screening across the front yard or between you and your neighbours or do you want to add it in? This can be included in your plan later if required.
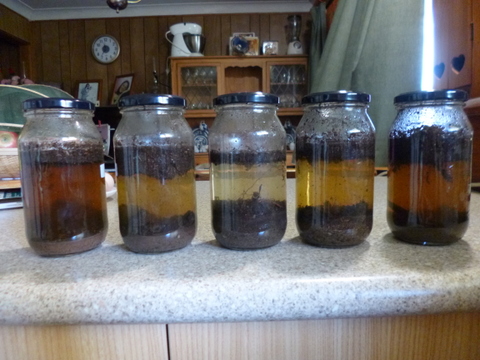
Soil: While it is possible to improve soil over time, it is handy to know what you are starting with. It is worth running a few qualitative or quantitative tests to check what you have to deal with and these can be broken down into three types – Physical, chemical and biological tests More details on each of them can be found here. Generally speaking, a glass jar test will give you an idea on the soils’ physical characteristics, a pH test is a good start on the soil chemistry and an earthworm test gives you an idea of what the soil biota (or lack of it) is like. In a large yard there may be some variation in soil type across the yard.
Aspect: the direction the yard faces is probably the most critical non-alterable characteristic of the yard as a whole. Here in the southern hemisphere a south facing yard will mean considerably reduced direct sunlight. This will limit options for growing food crops but may still provide options for flowers or natives. Almost any aspect will allow some form of food production but the more favourable the aspect (i.e. closest to a north easterly aspect) the more productive the area can be.
Drainage and Slope: Does the yard have any slope, and if so what direction and how steep? The drainage into the land itself will depend upon the soil (which will be looked at later). A slope will drain water and cold air from high to low and the steeper the slope the faster the drainage of both fluids. If the slope is steep, some consideration should be given to retaining rainwater on the property with swales or terracing etc. Any earthworks required should be programmed in pretty early in the plan.
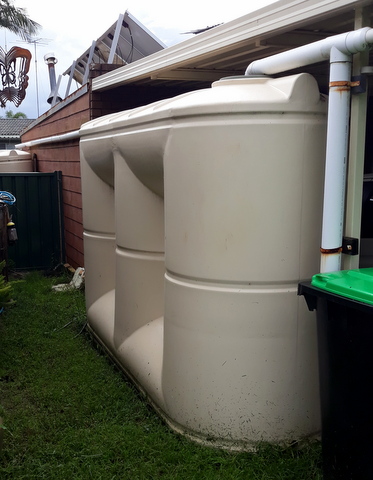
Water Access: if there is a tap right there in the front yard, as there mostly is, it will make things easier. But even if you do, what other opportunities to gather water are there? Do you have a front yard accessible rain water tank? Do you store water in the ground with existing swales? Does water enter your front yard from the neighbour’s property and if so is it likely to contain pesticides, herbicides or chemical fertilisers. Similarly, do you lose water from your yard into the neighbours or into the gutter?
Shade – shade may come from local trees (your yard, neighbours yard or street trees), other houses/buildings in the vicinity such that even with a good aspect the hours of sunlight may be reduced. The amount of shade will also vary with the seasons and this can be taken into account with a Sun Sight (if you have an analogue brain like me) or using a phone app like Sunseeker.
Prevailing Wind: some history of wind in the area will be important to the design. Surrounding buildings may also modify the direction a wind comes from. High winds will be hard on the more delicate plants causing both physical damage as well as drying plants out quickly and may necessitate designing in a wind break of some description. The Bureau of Meteorology site can be valuable for this, or if you want more local data keep an eye out for those home weather stations on one of the neighbour’s rooves, or get your own!
Microclimate issues: by looking at the front yard and its environment as a whole it may be possible to identify particular microclimates such as warm and sunny or cool shady spots, a damp area which seems to catch the rain or an exposed area more subject to the wind than other parts. Identifying these issues at the start can allow the design to make the most of any existing microclimates rather than trying to overcome them.
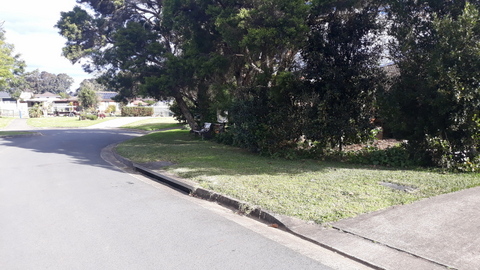
The Road: This being the front yard, interfacing with the road will be guaranteed, and some consideration will be required as to how close the road is and whether it is a quiet suburban street or busy arterial road which might require some privacy/noise/pollution reducing screening. Traffic noise can reduce the amenity of the front yard by keeping up an annoying hum and air pollution from passing traffic can affect both the garden and the gardener. Also the heat island effect can mean warmer winters but also hotter summers. Needless to say, a corner block will have two roads to deal with!
Another consideration, particularly in terms of growing edibles at the front of the yard, is that if the property was developed prior to 2002 (in Australia) and near a busy road, there may be some contamination with lead. If the property is near a busy road it might be worth taking soil samples and having them tested for lead. This can be done economically through VegieSafe, but even if lead is present, natives or other attractive plants can be used in that area to positively impact amenity and biodiversity.
Existing Materials, plants and structures: The stuff which is already there will have an effect on what new stuff you can introduce. If some of the existing stuff can be removed that is worth recording this. It will give you more space but before finalising your plan it is important to know what can be moved and what can’t. The material of construction and location of paths and driveways should be noted and can either be retained or, replaced, with more porous materials to reduce runoff if required.
Conducting the Assessment
OK so you now have a printout of the blank assessment form on your clip board, and are ready to go......maybe! At this point it is a good idea to collect the following things to help you record your data during the assessment –
A compass – an orienteering compass is good but in a pinch anything that shows you where north is, even if it is an app on your mobile phone. Don’t guess which way you think the yard faces. Check it with a compass and make sure to note it down on the form. This will save lots of hassles later.
A tape measure – You will need to take the measurements of everything! The length and breadth of the yard itself can be paced, out but recording the dimensions of everything on it, where things are in relation to each other, will be made easier with a tape measure.
Digital Camera – Photograph everything! That will help you when you are working out where everything is and how much space you have to work with. Digital photos will act as a supplement to your measurements and assist you to work out where everything is now, and where the new stuff will fit.
Spirit Level, Stakes & string – These can be used to measure the slope of your yard. Insert a stake at the highest and lowest part of the yard, bearing in mind that the top of the stake at the lowest point in the yard will need to be as tall as the stake at the highest point. Tie the string at ground level on the highest stake and then run the string down to the lowest stake. Move the string up and down the bottom stake until a spirit level held along the string shows it is level. Tie the string off and measure the length of the string (run) and the distance between the ground and the string on the lower stake (rise). Divide rise by run and multiply by 100 this gives you the slope percentage. (There is lots of info on the net showing you how to do this!)
Stationery – A selection of pens, pencils, plain, lined and graph paper is a great support for taking notes and sketches and drawing out ideas.
To conduct the assessment, first do a quick look over the yard to get the lay of the land, as it were. Then set to and take photos from as many angles as you can manage, with separate photos of any features which are to remain after the plan is put in place. Once things have been photographed within an inch of their life, take as many measurements as you can and draw up a mudmap of the yard and what is on it.
With all the data recorded you can starting putting together the plan.
Previous articles about delawning:
Part 2: Some examples of what it might look like


