For years, I wanted to have bees at the Choko tree. They would provide pollination, honey, wax, all sorts of good stuff. So about 15 years or so ago I got a hive of European honey bees and set them up on the roof of one of the sheds. Unfortunately I was working full time and travelling a lot and with everything else on my plate at the time, the bees turned out to be a bridge too far. I had a bee subject as part of the Farm Technology Certificate at TAFE some years prior but was no expert by any means. Anyway, there was a bit of a debacle and they had to go! Ever since that time, if I mention bees Linda gets the look in her eyes that says “which would you prefer – divorce or death?” so I have had to give up that particular dream. (Read the story here)
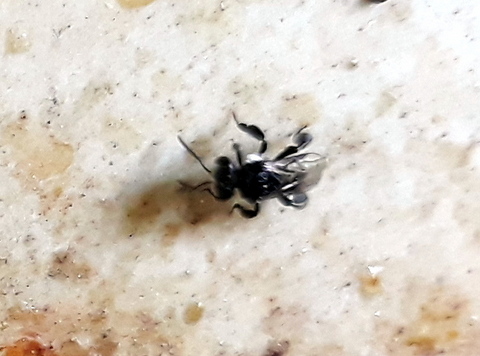
Of course, there is another possibility – Australian native bees, stingless and non-harmful! They bring with them the promise of improved biodiversity and pollination, but the wax and honey – not so much. Still worth a go though, and back in October 2018 I bit the bullet and got hold of a hive. Believe it or not, they are still going, and (I hope) ready for splitting soon, but that is another story.
Sourcing
While I would love to tell you that I used my superior bee attracting and construction skills to build my own hive and then attract a swarm of native bees to it, the fact was I bought a commercially produced hive (from Melissa Ballantyne at Sydney Stingless Bees for those interested).
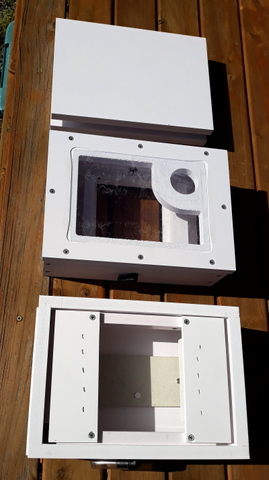
The hive came in an OATH (Original Australian Trigona Hive) box, these have been the standard hive used for Australian native bees since the 1980s. The ‘trigona’ bit is because at the time this was the species name for Australian native bees, and while this was revised to ‘tetragonula’ some time ago, the old name continues to be used for this type of hive box. The bottom section of the hive (above) is the combination bottom brood box and hive base (showing brood support bars), the next section is the middle brood box and has a clear section on the top to allow checking on the bees by removing the lid above it and (of course) the top or third section forms the removable lid. Our current bee hive does not have the clear section in place. Neither our current hive nor the new one have a honey super at this point.
Species
It seems that in general terms there are two species of hive-forming native bees available: Tetragonula carbonaria and Tetragonula Hockingsi. The T. Carbonaria species deal better with the temperate regions like ours (down as far as Batemans Bay) whereas the T. Hockingsi species is a more tropical species. Needless to say we went with T. Carbonaria.
Siting our Hive
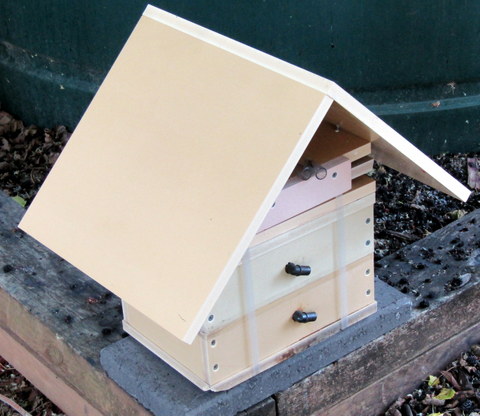
According to those skilled in the art, the hive should be off the ground at least a bit, facing somewhere between east and north, with shade during the summer and sun access during the winter. We satisfied the majority of these conditions by siting our hive on the surround of our 5,500 litre tank, working on the idea (correct or not) that the water would act as a heat sink to even out temperatures near the hive. Also, by setting it on the surround it is mounted about 250mm above the surrounding ground and there is quite a good runway in front of the hive for 5 or 6 metres over a surface covered by wood chip so that foliage can’t grow up and obstruct the hive entrance.
The other natural advantage of this site for our bees is that the area is covered quite extensively by a large mulberry tree, providing good shade in summer, but losing its leaves in winter allowing the sun to shine down on the hive without us having to move it. One of the recommendations is to have the hive in shade in summer and then move it a maximum of one metre into the sun for winter. The mulberry tree sorts that out for us.
Dealing with Temperature Extremes
Here in western Sydney We get temperatures down as far as -3⁰C and up as high 45⁰C or more, so it can be a bit of a struggle keeping anything alive. While I believe we have sited the hive as best we can we still need to deal with these extreme temperatures every so often during the year. For the cold temperatures, the hive came with a polystyrene box cover with a cut out in the front so the bees could still get access to and egress from the hive entrance. I generally put this over the hive in mid-autumn and remove it again in mid spring, exact times vary with the year but generally if temperatures are going to spend much time below 10⁰C the cover stays on. I believe it would be easy to make such a cover with a polystyrene broccoli box and some tape if you didn’t have one. The new hive we bought so we could split the original did not come with one so I will find out how easy (or otherwise) they are to make soon enough!
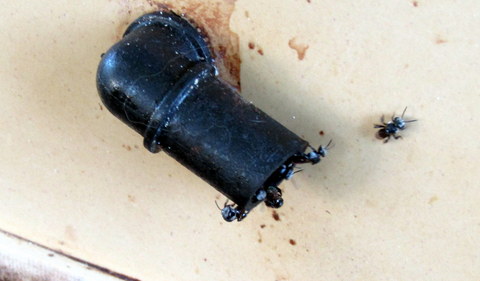
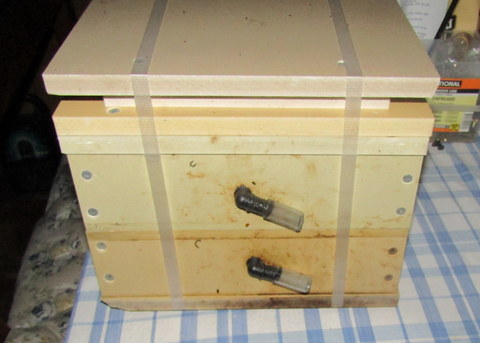
Hot weather is another matter and it is said that temperatures over 40⁰C can be fatal to a hive. Frankly that bit of knowledge scared the willies out of me that first year. As an accessary, we bought an extra roof to try and keep temperatures down and rain off the hive but this would clearly not be enough. Then the hive arrived, the egress holes were covered with a short piece of plastic tube which had mesh over one end, thus keeping the bees in while allowing ventilation. During that first year, when we were facing heatwave conditions I waited until dark, then went out and fixed the tubes in place, then brought the hives inside.
In the last couple of years though I have found another strategy and it seems to work pretty well without disturbing the bees. I remove the ‘roof’ structure and then next to the hive I place a galvanised water bucket, I guess about 4 litres to 5 litres in volume. Next I get a cotton towel (very good at water wicking) and then soak it for a minute or two in the water bucket. Once it was well and truly saturated, I dragged it out over the top of the hive, leaving one end in the bucket of water. The water in the bucket continues to wick up into the towel and then evaporate, cooling the hive and protecting it from the worst of the hot weather. After installation it is just a case of keeping an eye on the bucket and making sure it is topped up with water. So far this has allowed the bees to deal with all the hot weather Sydney has been able to throw at them.
The story continues…..
The next adventure will be splitting the hive. I checked and it appears that the hive should have doubled in weight before splitting is attempted. I didn’t know how much it as originally but it now weight 6.4kg. It turns out that the hive should be a minimum of 7.5kg before splitting so I still have a little way to go before I look at splitting.
Watch this space!


