


Chook Tractors
As I have mentioned elsewhere, I have never claimed to be the sharpest tool in the shed but I do know a good idea when I see one, and my world changed when I came across the concept of the chook tractor! I found out about chook tractors through Bill Mollison’s permaculture work somewhere between 15 and 20 years ago and as soon as I saw it I knew I had to have one!
The advantages of a chook tractor were –
- It would allow me to make the best use of the chook poop by having the chooks directly apply said poop to each veggie patch in turn,
- Their scratching would shallow cultivate each patch, after which I would apply mulch and the worms would come up to the goodies on the soil surface and finish the job. No more rotary hoeing or double digging for me!
- The chooks were isolated from the wild birds thus solving the second and third issues referred to above.
- Due to their constantly being moved onto new ground, there was less likelihood of the chooks suffering from a build-up of pests or diseases.
- The chooks could make use of leftover vegetable and weed trash and harvest any residual snails, slugs and other bugs thereby reducing my workload and improving their nutrition.
- It looked great! By this time the old chook shed, Which was designed for a one way trip to Aust. full of glass beads, was now over 10 years old and looking pretty shabby so the chook tractor was a marked improvement.
Of course the chook tractor would also impact on how we grew our veggies. Originally I would just move the tractor around the several large beds (4m x 4m and 6m x 6m) we had at the time but I wound up dividing each veggie patch into beds 1200mm by 2000mm, which coincidentally is the footprint of the chook tractor! I have since increased half of the beds to 3000mm long, but that is another story.
Chook Tractor 1.0
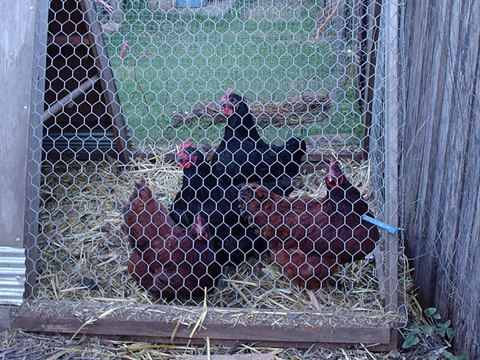
I made this for the most part out of a deconstructed timber bed we were removing from the house and I built it to be able to take a direct hit from a thermonuclear weapon. It was solid! One half was covered, with the roosting and laying areas in that end as well as the door to the main part of the tractor and a separate door to the laying area. The other end was completely open, just covered by fairly strong chook wire.
It did the job well, but it was just too heavy! I wanted to ensure the chooks safety in case a marauding dog got in, but our backyard is well fenced and very secure so it never happened, I had made it extra heavy for no reason. Another problem was that the main door allowing access into the tractor was hinged at the bottom so that its natural position was down and if I didn’t latch it properly and it got loose it would flop down and let the chooks out. Of course when this did happen the chooks would spurn their current patch and make for the most recently planted bed and devour all of those fresh, tender little seedlings. It was rare, but happened enough that I knew the next design would have to be different. Eventually it collapsed due to rot and I took some of the original parts and re-did it!
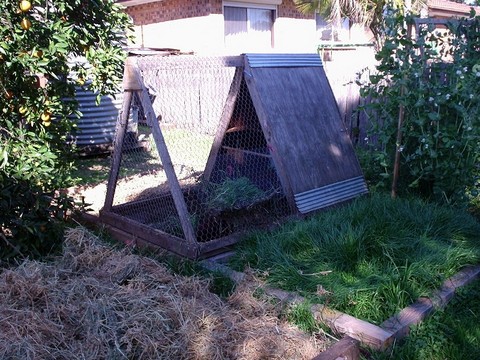
Chook Tractor 2.0
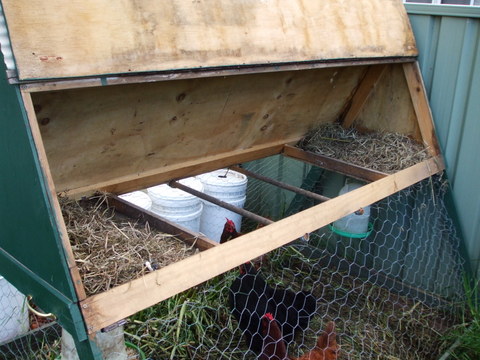
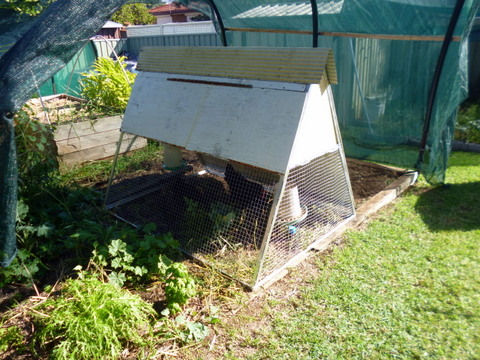
This one was also made of timber, but the nesting/roosting area was all in the top of the tractor, accessible through a flap that lifted up and was hinged at the top so that its natural position was down (with the result that there has been no unauthorised digging in the patch by chooks since!). To reduce weight I used smaller lighter, timber (DAR pine mostly) and lighter chook wire. Also to save weight and improve ventilation, the entire lower part of the tractor was surrounded by the chook wire. To improve the aesthetics yet again, and help it last longer, the entire tractor received a coat of British racing green paint. I also installed a set of handles at each end to facilitate moving it.
As performance goes, it worked every bit as well as the previous one, almost, but was much lighter. As time went on however, some flaws in the design did show up, particularly in hot weather. One difficulty was that with the bottom area entirely surrounded by chook wire, there was very little relief from the western Sydney hot afternoon sun, almost no shade at all. This meant the chooks had to take refuge in the top roosting section, whereupon the other issue became obvious. That lovely British racing green top area sucked in the heat and got much too hot as well. In the end I wound up tossing some shade cloth over the whole thing to try and cool it off.
Also, it only lasted a few years and, as usually happens with such things, collapsed at a very inopportune moment while I was at work. Thankfully Linda was able to shepherd the chooks back in and secure it until I got home.
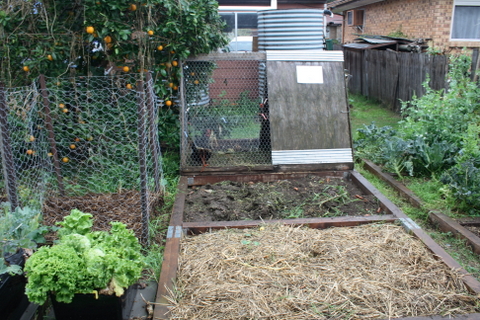
Chook Tractor 3.0
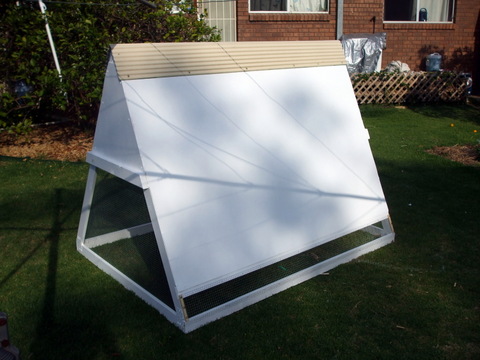
While the basic design for this iteration of the chook tractor was similar to the one before it, I made a couple of important changes. The first of these was to extend the non-opening side of the roosting/laying area down to almost the bottom frame of the chook tractor, filling in the small gap left with a bit of wire. With this in place, depending on the orientation of the bed the tractor was on, could be faced north or west in hot weather to provide a cooler, more shaded environment for the chooks. The second change was that the whole thing was painted a nice, reflective white – three coats! That should stop the bugger rotting and falling apart!
Alas, it was not to be and after 5 years of constant use, it also fell apart due to rot.
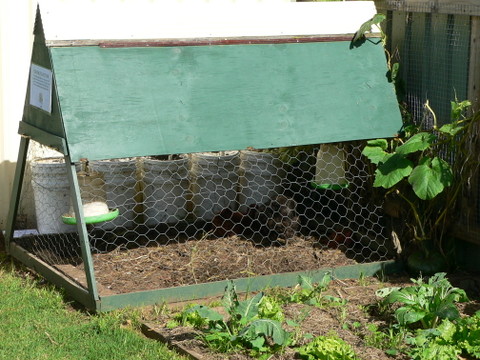
Chook Tractor 4.0
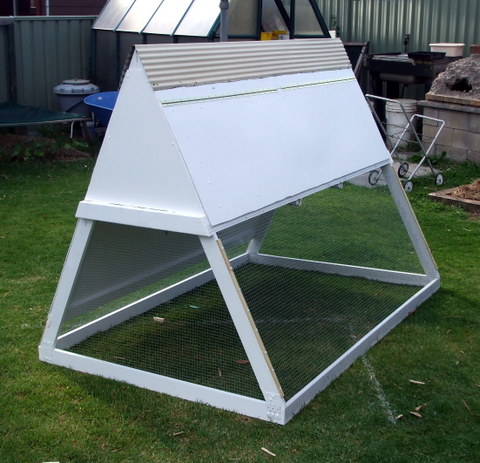
The design for chook tractor 4.0 is almost exactly the same as for 3.0, with one significant change. Rather than using DAR pine and paint the living daylights out of it, I use aluminium angle! While being light and strong the 25mm x 25mm x 3mm thick aluminium angle in contact with the soil is absolutely resistant to the rot that killed the other three. I put it together three years ago and the wood covering bits could do with a bit of paint but the aluminium frame is in just as good a nick as when I built it!
Our Chook Journey Part 1: The Early Years
Our Chook Journey Part 3: The Retiement Village and Other Things
