Aquaponics - Making a Bell Siphon
Created: 2012-01-28 03:10:04
Aquaponics is a combination of aquaculture and hydroponics that allows you to produce fruit and veggies as well as fish, all at the same time using a closed system. The nutrient rich water from the fish tanks is pumped into grow beds continually but can be set up so that the water fills up the veggie grow beds to an appropriate level then drains out to allow oxygen to access the plant roots (called flood-and-drain). However, rather than including a long diatribe on the pros and cons of steady state versus flood-and-drain systems and the pros and cons of types of siphon if you opt for flood-and-drain, I will assume that know what a bell siphon is and want to make one.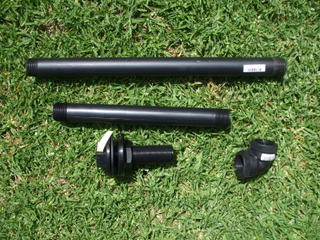
Once I decide that a bell siphon was what I needed I started scouting around in hardware shops like Bunnings and plumbers supplies, working on the idea that they would have the sort of bits I wanted. After getting considerable frustration in the hardware shops and large amounts of weird looks and head shakes from the plumbers supplies (“aqua-who?”) I finally twigged that irrigation suppliers were the way to go. As well as providing me the bits I needed, the one I went to had some really good advice – stick with the common sizes – 1”/25mm or 2”/50mm – for pipes and fittings because once you move away from these sizes the variety of fittings and bits available is dramatically reduced.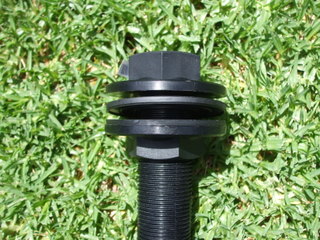
I was looking for stuff that would fit my grow beds which are recycled bathtubs and they come pre fitted with a roughly 50mm plug hole, which is handy. A 50mm diameter upstand is pretty damn big and can shift a lot of water though and the baths are only 200 litres before you fill them with growing medium, so I opted to build my upstand out of nominal 25mm diameter pipe and fittings, the bell and outer cover would have to be bigger in diameter.
The way I made mine was to gather (per siphon) the following bits and pieces –
- 1 x 25mm through wall fitting (Hansen part no SFTFT25)
• 1 x 300mm long x 25mm diameter pipe riser with male threads on both ends (90443300)
• 1 x 450mm long x 25mm diameter pipe riser with male threads on both ends (90443400)
• 2 x 25mm BSP 90° angle elbow with female threads both sides (90463300)
• 50mm diameter PVC water pipe (I bought 1 metre and got 2 and a bit siphons)
• 1 x PVC 50mm end cap
• 90mm diameter PVC storm water pipe (I have a couple of metres floating around and it appears to be the right size.
• 1 x 90mm PVC end cap
• 8mm ID tubing
• PVC tubing glue
• Aquarium silicone
Install stand pipe into threaded fitting on top of the 25mm through wall fitting after cutting it so that it is 25 – 50mm below the intended level of the media, if the nutrient rich water gets high enough to come into the light it will start algae growing on the top of the growing medium which won’t do anything any good. We used a mitre saw to make the cut and the big hint with cutting any of the plastic tubes/pipes (particularly the larger diameter, thin walled stuff) is to go very slowly otherwise you can cause chunks to be broken out, wrecking the pipe.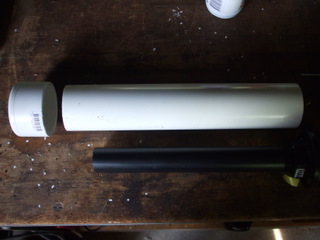
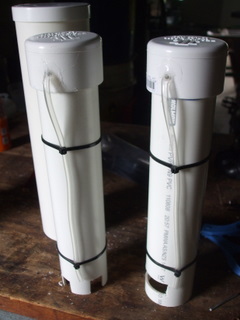
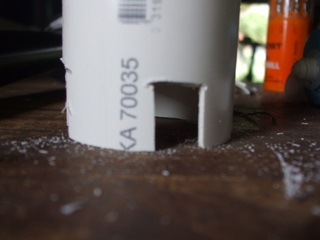
Outer pipe of bell should be twice diameter of the upstand and I used 25mm diameter upstand so I had to get hold of 50mm diameter PVC water pipe for the outside of the bell. I Cut 50mm diameter water pipe with the mitre saw to form outer part of bell; I left 30mm between top of upstand and end of 50mm water pipe and then glued the cap onto the end of the 50mm water pipe with blue PVC cement to form the end of the bell siphon, then allowed it to dry. You can cut a horizontal slot or series of vertical ones at bottom to let water in and because I was making two I made one of each type. I used small band saw to cut the long axis of the slots then used a small 12v dremel tool and cutting disc to cut out the short axis then pushed out the waste plastic. The area slots cover should be at least as big as the area of the open end of your stand pipe.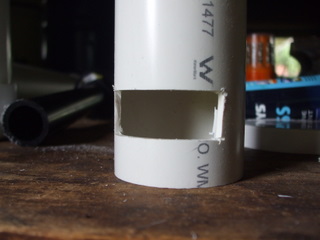
To break the siphon at the right time you need to install a small tube in the top of the bell. For the size bell I was using (50mm diameter) I needed tubing 8mm or 5/16” inner diameter and I happened to have some left over from a previous project. Drill a hole the same size as the outer diameter of your tubing about half way up the bell at the end of you siphon, insert the tubing and secure with aquarium grade silicon (this is handy stuff). When the silicon is set, secure the tubing to the side of the bell with a couple of cable ties.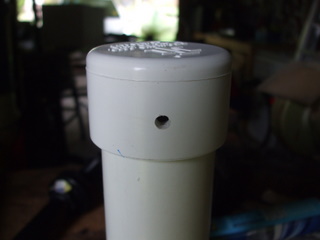
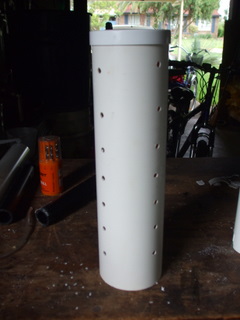
To cover the outside and prevent media from clogging holes 90mm stormwater pipe (which we had hanging around) was cut to length 25mm or so longer than the bell siphon and then drilled with holes to allow water to get in and a removable cap fitted to the end. This is then placed over the bell siphon assembly and viola! You have your very own bell siphon.
