Making DIY Ollas (Clay Pot Irrigation)
Created: 2013-10-03 03:25:02

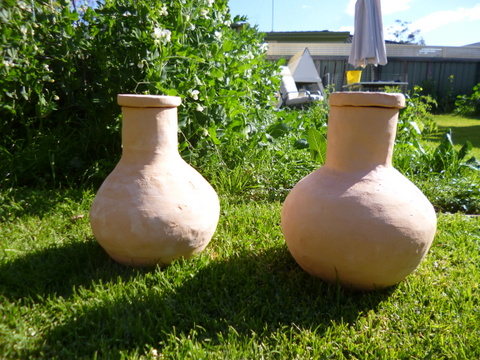
In dry parts of the world such as North Africa or Sri Lanka (where they are called “Ollas”) they have used unglazed terra cotta pots to irrigate their crops, the so-called pitcher irrigation. These pitchers were round bellied pots with a short neck and they were buried up to their lip in the soil and then filled with water and covered. The theory goes that the water then travelled through the unglazed terracotta slowly and into the soil, keeping the growing plants well irrigated.
Last summer I bought some thin walled clay plant pots and turned them into ollas to keep one of the veggie beds watered. They worked reasonably well but the genuine olla, because of its shape, would take up less space at the surface and provide a greater area moist water exchange area under the ground. The problem is that I could not find an unglazed pot that looked anything like I wanted, so I decided that I would to make my own.

They seemed to work well enough overseas that the concept was proven so I wanted enough ollas to be able to install four to six, staggered throughout each of my veggie patches. That adds up to somewhere near 70 ollas! Digging and refining the clay would add too much time to the project, so I am using commercial clay.
The Mould
Because ollas have a rounded bottom, you can’t make them sitting directly on the flat surface as you would a flat bottomed pot, so the best thing to do is to make a round mould that the bottom can sit in and still maintain its shape while the clay is soft. It also supports the body of the olla so you can keep building the layers of clay up without any danger of it collapsing due to the soft clay.

Find a ball or sphere a bit bigger than you want the belly of the olla to be, remembering the clay will shrink during drying and firing somewhere between 5% and 10% so making your mould oversize will take that into account. Get hold of some plaster of Paris, (possibly quite a bit if you want to make large ollas) the mould I use weighs about 10 kg, so that gives you an idea of the sort of amounts you might need. The mould is 330mm x 330mm and 160mm deep and the diameter of the half spherical shape in the mould is 270mm.

To make the mould, find or make a box the right size, probably a bit deeper than you think it needs to be to allow for over filling. Mix the plaster with water (it’s probably best to follow the directions on the packaging, the manufacturer goes to a lot of trouble to work them out) and then pour the plaster into the box you are making the mould in. Place the ball as close as you can to the centre of the mould and push down so that the “equator” of the ball is level with the surface of the plaster. You will need to hold it there until the plaster has set, then pull the ball out and leave the plaster mould a day or two to fully cure and dry out.
The Olla
The olla is made by coiling so the first thing to do is make the base. To do this knead up some clay and pat it out to roughly the diameter of the base you want, place a stick the thickness that you are looking for (I usually use sticks 10-12mm thick) on each side and then roll it out with a rolling pin if it will sit on the sticks. If you don’t have a rolling pin long enough a piece of thick dowel or some 50mm diameter PVC pipe the right length will also do the trick. Once you have a base of uniform thickness place a shape to cut around on your clay. To save hassles I use the lazy Susan that I use to turn the pot on which is 250mm in diameter and as luck would have it, it makes a great template.

With your base now ready, get hold of a large “hair net” and place it over the top of the mould before placing the base in it. The hair net material prevents the clay sticking to the mould and makes it very easy to get the olla out when you need to. You can then place the base in the bottom of the mould and gently form it so that it fits the bottom of the mould snugly. The process will be made easier from here on in if you place the mould on the lazy susan so it rotates freely, this will allow easy access to all sides of the pot as you build it up.

Next, roll out some clay to about 10 – 15mm thick roll and loop it around the edge of the base, against the mould and smear the edge of the base and the roll until you can no longer tell where they join. Repeat this process until the sides of the pot reach the sides of the mould. You can continue to build up above the edge of the mould a couple of rolls, but as you place each roll on top, give it a few hits all round with a wooden bat to consolidate the rolls and smear both sides of the top roll onto the one below.
Now lift up the hair net so that one side of the pot is exposed. You will still be able to see the shape of the rolls all the way down to the base. Work your way around consolidating all of the rolls by smearing them into eachother to make the surface denser, give the sides a few firm hits with the bat. Once all of the rolls have been consolidated slide the hair net around so that the pot is sitting upright again. Now is a good time to scrape the inside of the pot with a rubber kidney to smooth out any imperfections and make the surface denser and harder.

The next roll you lay should be a bit smaller than the one before, but continue the process with the bat and smearing and patting the outside with the bat to keep it smooth and dense. As you continue this process you will need to support the soft clay with your hand on the inside of the pot when hitting it smooth with the bat. Keep this process up until you have a hole a bit larger than your hand, then put your hand in and use a rubber kidney to smooth out the lop layers of clay. The keep going until you have a hole in the top about 100 to 120mm across. It is now time to start building the neck.

To build the neck, place a roll of clay around the outside of the hole, on top of the pot and consolidate as you have been. Using the bat to hit the top will help it key and make the top nice and flat but may make the centre of the pot sink down if the clay is too soft. If this happens you may wish to leave the pot for a couple of hours to harden up a bit.
When it is ready to go keep up the practice of putting one roll on top of the other and consolidating them by smearing and using the bat around the outside and the top and the rubber kidney around the inside if you have space. Even a plastic ruler can help smooth and consolidate the inside of the neck of the pot and fits easier!
How long the neck is, is up to you, because that will determine how far underground the main body of the pot will be. Mine are about 100mm long from the body to the lip; to make measuring easier I have made a mark on one of my wooden pottery tools that shows me how long to make the neck. Once the neck is completed, use the bat to make the top surface flat and smooth, it will make the lid fit better.
The Lid
While not strictly essential, I wanted a lid for my olla to reduce evaporation and keep the water in while keeping out insects, small rodents and dirt.

To make the lid, I rolled out some clay to about 10mm thick in the same way I did the base, and then used an empty margarine container about the same width as the neck to cut out a circle using my high tech, recycled butter knife. I then peeled away the surrounding clay to leave the disk for the top, cut some 10mm wide clay strips from that remaining clay and then placed them on the disk in a circle at the same diameter as the inside diameter of the neck. I gave the circle a couple of belts with the bat to secure it and made a small (2-3mm) roll of clay. I placed some of this roll on the inside and the outside of the circle and used one of the tools (see above) to smear it around, securing the circle even more to the lid. Check for size regularly to ensure the lid will fit.
If you have intentions (as I do) of making a stack of these things, it can be very handy down the line if you inscribe a number on the side of each olla and the underside (or wherever) of each lid. The making of ollas and lids by hand means that each one will be a little bit different and not necessarily interchangeable. Following Murphy’s law, if it is possible to confuse the lids, it will happen and by numbering them now it will allow you to keep track of them later and ensure you are not left over with one lid and olla which absolutely won’t go together!
Final Points
After some practice it now takes me about 2 – 2.5 hours to make an olla from start to finish, but sometimes you don’t have that much time in one sitting. If this is the case, when you have to stop lift the pot using the “hair net” and slide a plastic garbage bag underneath, and then sit the pot back into the mould. Fold the garbage bag over to keep the moisture in and then if the weather is likely to be hot, place another garbage bag over the top. This should keep you pot workable for a couple of weeks. If you need to go longer, the weather has been particularly hot or the bag wasn’t closed properly you may need to “score and slip” when you start work on your pot again.
To help the pot dry evenly once you have got it where you want it, push a rolled up sheet of newspaper down inside the pot to absorb some of the moisture. You can change it every few days but if it gets left in for the firing it won’t matter it will just burn out. Once the olla and lid are fully dried, fire to between 1000°C and 1150°C which is usually referred to as earthenware or bisque temperature.