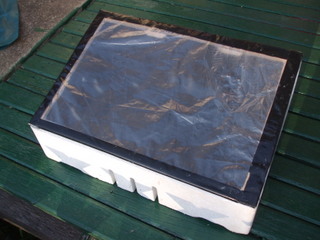
Making a Low Cost, Low Tech Solar Food Dryer
Created: 2012-09-20 12:15:52
Drying excess food from the garden is a great way to spread the harvest and create new tastes, a solar dryer is great because it uses the sun rather than electricity and one made out of a polystyrene veggie box is even better because it turns a waste stream into a useful tool for sustainable living.
But why a polystyrene veggie box?
- There is little or no cost associated with it.
- The polystyrene foam acts as an insulator to keep the heat where you need it, around the food you are drying.
- It is rigid enough to form a good base.
- With the right tools it is easy to work.
- It’s light and easy to transport.
-
The right type of veggie box takes only a little work to make it into a solar dryer.
How do you make it?
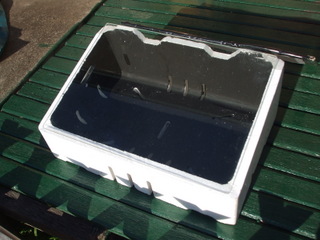
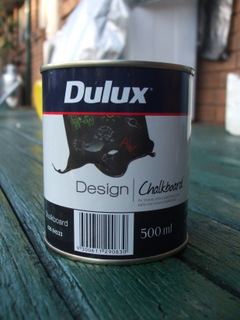
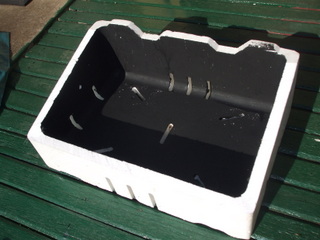
Once you have selected your veggie box you can either cut it first or paint it first, so I decided to paint it first. This involves using a water based matt black paint to coat the inside, allowing the sunlight to be captured to heat up the air inside the drier. The paint must be water based because solvent based paint, even in a spray pack, will melt the polystyrene foam to a greater or lesser extent. Finding water based matt black paint proved surprisingly difficult but in the end I found a water based blackboard paint at our local hardware which I applied with a soft paint brush and it worked really well.
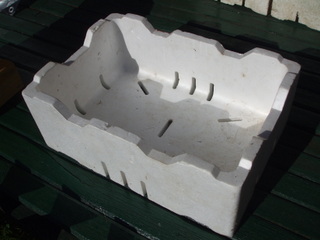
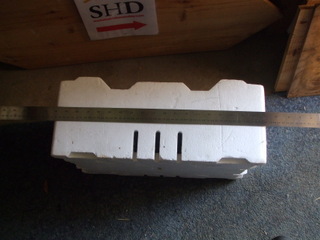
If your veggie box has high sides, greater than say 10 to 12 cm, it is a good idea to cut three sides down to form a slope to let more sunlight (and heat) in by reducing the shading effect of the sides. To do this, measure down the two corners that will become the front of the dryer an equal length such that the resulting “front” will be about 10-12cm high and run a pencil line between the two points, a metal one metre ruler is handy to use for this. Then run the ruler back along each side from the mark up to the back of the box so that the line on the front continues diagonally along the side and up to the back of the box.
To cut the sides and front down it is easiest to use a hot wire cutter (see the hay box cooker article) and to get the best possible line, hold a steel ruler or straight edge of some description on the line and run the hot wire cutter down it, making sure to keep the wire perpendicular to the side of the box. This gives a smooth, straight edge which makes fitting the clear cover much easier.
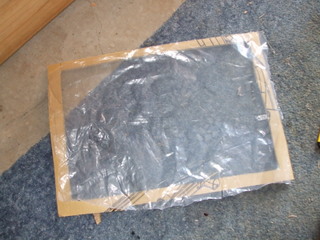
Now you have a box with a sloping top, but now you need a clear cover to let the sun in heat up the inside of the box and drying the food. The best cover is glass and a piece of recycled window the right size does the job, I had a recycled sliding glass door out of an old kitchen dresser which, as luck would have it, was just the right size. If you don’t have any glass you can make a cheap and much lighter alternative top by getting hold of some corrugated cardboard from a big box or whatever and cutting a piece to the size of the top of the dryer.
Then cut a window out of the piece of cardboard so that there is a border 10 to 20mm thick, then cut a piece of recycled plastic sheet (we used the plastic bag from around our new mattress) to the size of the outside of the cardboard. Tape the plastic to the top of the cardboard with 50mm duct or gaffer tape and you have a light, transparent window that sits on the top of the solar dryer.
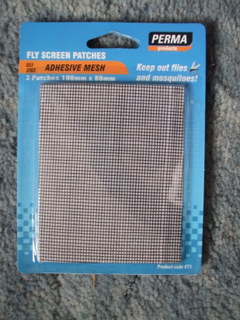
The carcase of the dryer is finished but the holes are still open and if you have bug problems – a possibility with drying veggies, probability with drying fruit and a definite with drying meat – you will need to screen off the air holes on the bottom and sides of the box to keep the bugs out. The cheapest way to do this is to tape some old fly screen from recycled window screens over the holes; the box is well insulated so the tape won’t get hot on the outside. If you have some spare cash you can get hold of some self adhesive screen patches used to repair fly screens and stick that on the bottom and sides of the box. The patches look neater and can be cut to the correct size but will cost you more.
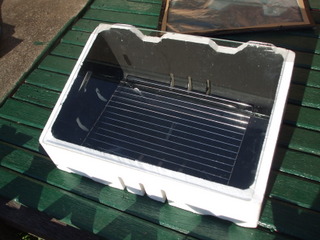
So, now you have the outer box completed all you need to start drying is a rack to go inside to allow air circulation right around the produce you are drying. A cheap cake cooling rack will work but will only have bars going in one direction and may need to have a covering of (well cleaned)fly screen to stop small bits of food falling through. For two to three times the price of a cheap rack you can have a better one than will be bigger, stronger and wires going both ways to form a cross hatched pattern, much better for supporting the food being dried.
So that is how it all comes together, the food sits on the rack, the sun shines through the glass or plastic on top and heats the food directly as well as the air inside the box. The warm air rises, taking some of the moisture from the food and dragging in fresh air from the sides and bottom, and then exits at the back of the top part of the dryer. The process continues until the food is dried to your specification.
With the dryer pointed at the sun here on an afternoon in early spring I was easily able to achieve 45°C so as the weather warms, the performance of the dryer should improve also. All up, assuming paying for the box, paint and drying rack but being able to get hold of the materials to make the window, my solar dryer cost me about $5. That’s not a bad investment!
