


Planting seedlings rather than seeds means you can get a jump on the weather by raising the seedlings under plastic early in the season and then planting out when the weather is warmer. Planting well grown seedlings also gives them a jump on pests set to devour frail little plants, and when you plant a seedling you don’t waste time and garden space waiting on seeds that are not going to germinate.
The following method also allows you to hold seedlings for a while if you get inclement weather, don’t have the beds prepared or life happens and you are short on time. It also minimises transplanting shock on the seedlings too.
Sowing in Punnets
Generally speaking, the seeds of root crops like carrots, parsnips and beetroot etc, need to be sown directly into the soil where they are to be grown. If they are started in punnets and transplanted they will not grow well. Large seeds like those of peas, beans, corn etc can also be direct sown but will also work if the following process is used. All other vegetable crops will thrive using the process of sowing into punnets, potting on into newspaper pots and then planting out.
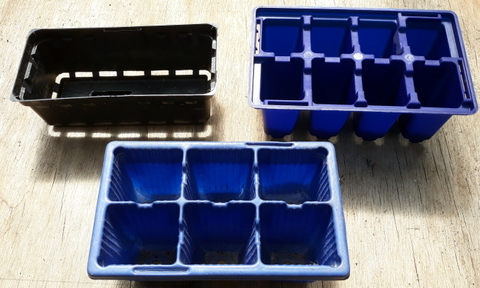
These are some punnets in my collection
I have a world class collection of plastic punnets! They are all left over from when I used to buy seedlings from the nursery and before I realised how easy they are to grow yourself. I use the punnets with eight divisions or cells in them although for larger seeds like pumpkin I can still use the older style with no divisions.
If you are re-using your seedling punnets you should wash them in disinfectant and dry them off before you use them. This is to prevent a build-up of diseases like damping off, I usually use Dettol® or one of the “el cheapo” quaternary ammonium disinfectants available from the supermarket. Another way is to wash them with soap and water, then put them out in the sun to be dried and disinfected by the sun’s rays.
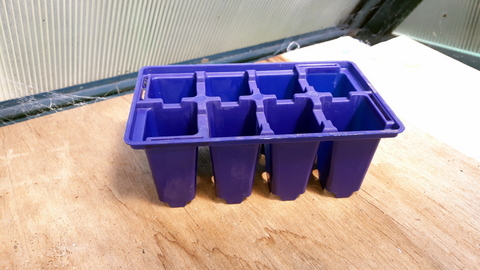
This is the style of punnet I use mostly today
To fill the punnets I make a seed raising mixture that it composed of -.
- 1 Part by volume coarse sand (not brickies sand or the sand that goes in a child’s sand pit, that is too fine)
- 2 Parts by volume of sieved (and preferably home produced) compost or worm castings*
- 3 Parts by volume of cocopeat or horticultural coir
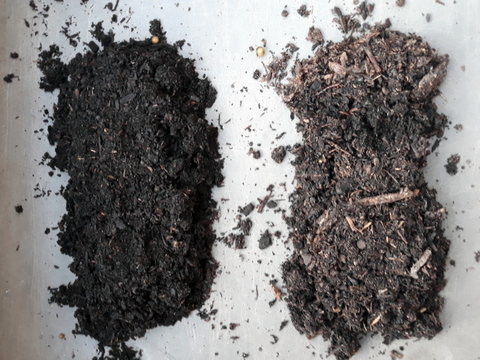
Sieved compost (L) and Raw compost (R)
This is what the mix looks like
*When I started out, I was using compost exclusively, and while being stored in the greenhouse it got a bit of heat treatment which may have killed off any pathogens, I make a cool compost. I started to get problems with the seedlings keeling over from damping off and changed over to the worm castings. That was over 15 years ago and the damping off has not returned so you may take what you will from that.
The compost/worm castings give some nutrition and body to the mix, the cocopeat ensures water retention and the sand ensures drainage. I was adding one part of perlite to the mix and also tried vermiculite, but both were expensive so I left them out and it did not seem to make any difference. I use a 500ml plastic Chinese food container as a measure. All of this is placed that wonderful product, the cat litter tray – cheap, available and mind bogglingly useful, more on them later. Mix by hand and voila! Homemade seed raising mixture.
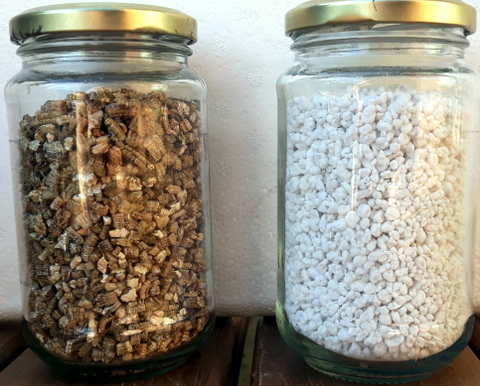
Vermiculite (L) and Perlite (R)
A Quiet Warning
I don’t know the technicalities, but some people have gotten sick with Legionella infections after working with commercial potting mixes, when they inhaled the dust. If you keep all your raw materials moist that should keep the dust down and mixing outdoors where there is plenty of ventilation will also reduce the risk. If you are still concerned purchase an Australian Standards approved dust mask to wear while doing this work.
One of the things about buying commercial seedlings in punnets is that you get a load of the same veggie seedling at one time, meaning that they will all get planted out together and then be ready to harvest together. This means that some will bolt to seed or become over ripe before you can consume them. To avoid this eventuality, I use eight cell punnets and then sow a few seeds of each type or variety of veg in each cell. This is the way our system is designed to work by providing a continuous small harvest which is consumed quickly rather than a large harvest at once which then needs to be preserved. There are some exceptions to this such as corn and onions but this is the system we have been running successfully for over fifteen years.
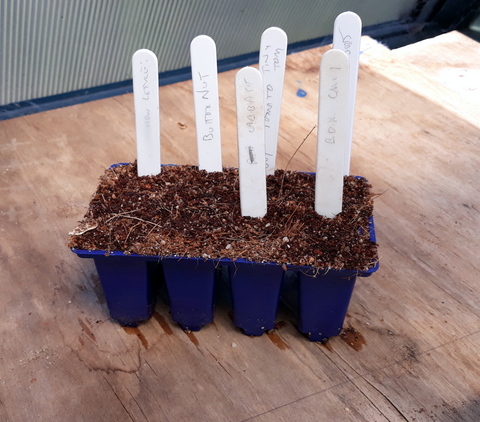
A punnet sown and labelled
To sow your seeds in these punnets, place your homemade seed raising mix in the punnet and firm it down with a finger, leaving a small depression in the centre of each cell. Place a few seeds into the depression and add a light cover of potting mix over the top and press down gently to give good seed raising mix to seed contact. As a rule of thumb, seeds should be sown a maximum of two to three times their diameter deep into the soil or seed raising mix. Some seeds, such as lettuce, will germinate better if they have access to light and so should be sown more shallowly.

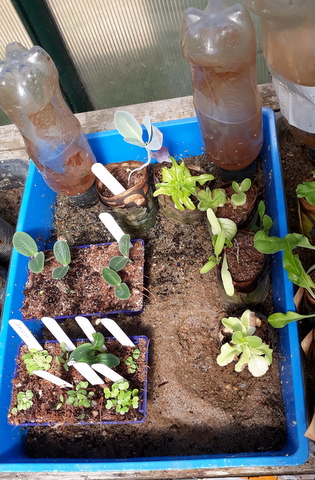
The veggies have sprouted!
The surface of the seed raising mix should be flush with the surface of the punnet so that there is good air drainage, otherwise still, moist air can favour damping off, a fungus which causes the new seedling to look pinched where they emerge from the soil, killing them. Label the division with a tag (These can be cut from an ice cream carton with scissors) showing the vegetable type and variety, plus sowing date if required. Follow this process for the rest of the punnet divisions.
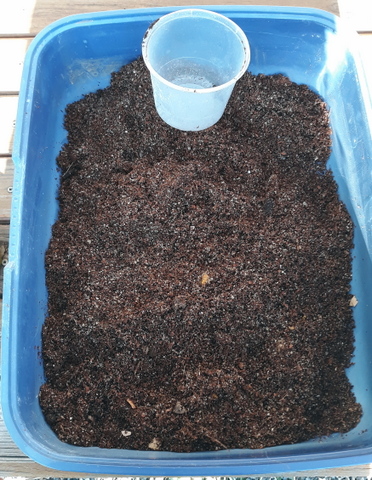
Once the punnet is full it needs to be kept warm and moist until the seeds germinate, but watering from the top can wash the seeds out of the seed raising mix so they need to be watered from underneath. The easiest way to do this is to make a capillary bed by getting one of the aforementioned cat litter trays and half filling it with coarse sand (fine sand will crust over) I use the same sand I add to the seed raising mix. Add a couple of bottles as water reservoirs and you are good to go!
Capillary bed in action
Place the punnet(s) on the sand and then water the sand until there is just a little free water over the top of the sand. The seed raising mixture in the punnet will absorb the water through the bottom by capillary action eliminating the need to water the punnets directly. Also, the sand will form a reservoir of water reducing the amount of the attention needed by the seedlings. In hot weather place the capillary set up under some shade cloth and in cold weather make a small plastic house, green house or cold frame to keep the seedlings warm. More detail on making a capillary bed is available here.
To ensure a continuing harvest of veggies, I sow a mix of veggies into punnets twice a month. They are then potted on into newspaper pots somewhere between two and four weeks after sowing (depending on time of year) and then planted out two to four weeks after that (depending on time of year). The seeds will take longer to germinate and are slower to grow after potting on in the colder parts of the year.
Potting On
Once the seedling has grown to the four leaf stage, it can be potted on into a larger single container to grow further until you are ready to plant it out into the veggie bed. Originally, I used to do this by making up a potting mix that is a bit richer than the seed raising mix –
1 part by volume of coarse sand
2 parts by volume cocopeat
3 parts by volume sieved compost
But I found the original seed raising mix worked just as well so I now use that mix alone for both operations.
I used to pot the seedlings on into 100mm lengths of cardboard tube that I was getting from where I was working at the time (They are the spool around which paper for the plotter is wound) which were thrown out. To start off with I coated them in wax and the used a wooden slug to push the seedling out so that the tubes were re-useable, but I found that the transplanting shock for the seedling was considerable and after 2 or 3 uses the tubes carried all sorts of bugs that caused damping off etc. so I gave up on that idea and used them uncoated as a single use only, allowing them to rot down and allow the roots out into the soil over time.
The old system
However, I left that place of employment and after 12 months my stock of tubes had depleted, so I moved over to making newspaper pots to do the same job. The seedlings did much better in the newspaper pots and the newspaper pots rot down much more quickly than the cardboard tubes did anyway!
To pot the seedlings on I fill a newspaper pot with seed raising mix then push a hole down the centre of the mix in the pot with my finger. I then dig the seedling(s) out of the punnet with my space age technical potting on tool (a paddle pop stick). I push the stick down into a cell of the punnet and then push it back while lifting, levering the seedlings, their root mass and the seed raising mix out of the punnet. This minimises damage to the seedlings.
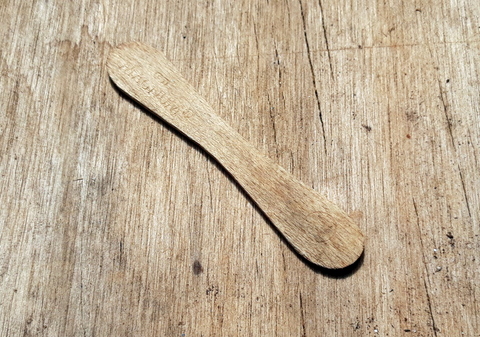
My potting on tool!
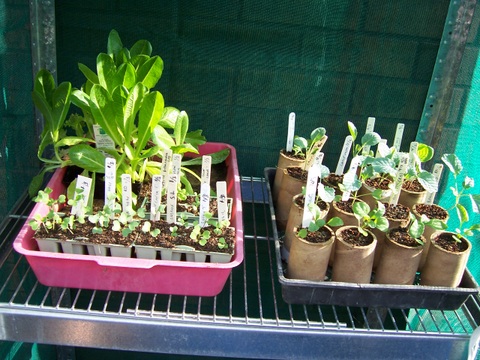
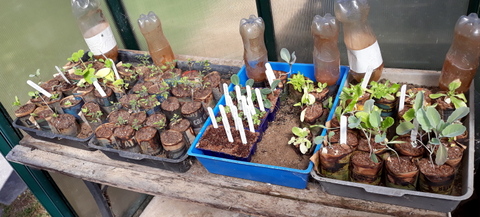
I tease the mass of roots and seed raising mix apart and choose the largest and most well grown seedling(s) to pot on, keeping as much of the seed raising mixture around the roots as possible. I place the seedling gently into the newspaper pot, then top the newspaper pot up to level with the edge and place it in a plastic flat (designed for holding punnets) which holds 20 newspaper pots. I carry the freshly filled newspaper pots out to the greenhouse then place them directly onto a capillary bed to keep moist until they are ready for planting out.
Direct Sowing
As mentioned previously, the seeds of root crops need to be sowed directly where they are going to grow if they are to thrive, and large seeds can be direct sown into veggie beds rather than raised as seedlings first. This requires no specialised equipment or training (although a trowel can help to loosen any compacted soil) just some appropriate seeds and a place to grow them. However, each veggie has their own requirements in terms or sun, water, nutrients, soil pH, planting time and so on, so before sowing it is worth doing a bit of research to make sure that will do OK where you are intending to sow them.
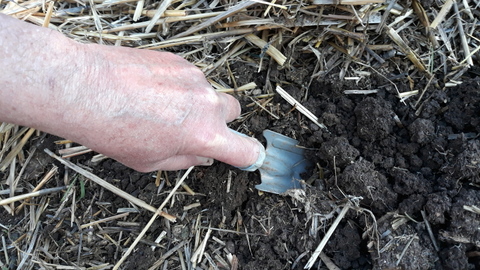
Loosening up the seed bed
When it is time to direct sow, check the soil to make sure it is level, moist and has a fine tilth, especially when sowing small seeds like carrot, and that there are no sticks or rocks to inhibit the seedling’s growth. This is also a great time to check for and remove any weeds growing in the area.
Seed bed ready to go
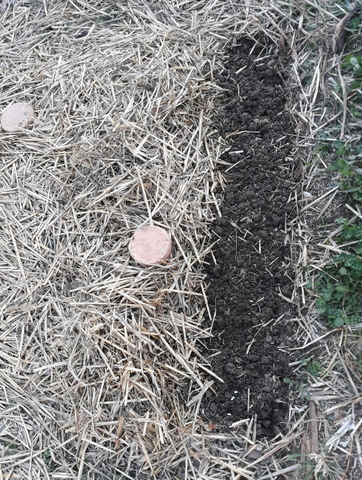
Sowing depth is two to three times the seed diameter. For larger seeds you can dig a furrow at the correct depth, sow the seeds the correct distance apart and then cover them over with the surrounding soil, or push them into the damp soil with your finger as I do with our peas and bean seeds. Smaller seed like carrot needs a bit more care and can be sown onto the surface of the bed and then covered with a light dusting of soil, sand or cocopeat.
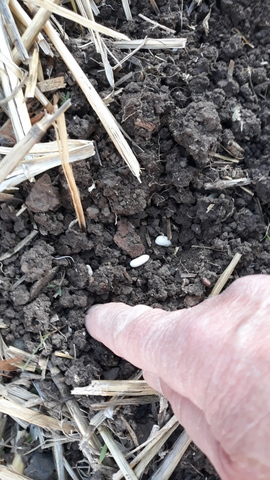
Pushing in the bean seeds
Once sown, larger seeds can be given a light layer of mulch (1 -2 cm) to maintain soil moisture, but smaller seeds may find it difficult to make their way through a mulch so the soil should be left bare until the seeds have sprouted. In any case, it is important to ensure that the soil stays moist until the veggies are poking their heads through the soil, as this will also prevent a crust forming on the soil that inhibits sprouting.
