The original concept of buried pipe irrigation was getting hold of, or making, a whole stack of unglazed terracotta pipes which you would then bury beneath your veggie patch, leaving one end open at ground level so you could pump water into it. In the same way ollas work, the water in the pipe would diffuse out into the ground, thereby irrigating any vegetables etc planted above it very efficiently. The pipe would have been put in either directly under or to the side of veggies planted in rows.
Terracotta pipes seem to be fairly difficult to come by these days and are expensive when you do find them, but there is a modern alternative – ag pipe! Agricultural pipe (or Ag pipe for short) is a flexible corrugated pipe, usually with slots in it, the larger sizes (100mm+) are covered with a non-woven sleeve or sock. The idea is you bury it in an area that is poorly drained so that the excess ground water drains to stormwater or local watercourses etc, thus removing unwanted excess water. But…….
It can also be used to do the opposite, supply irrigation water underground to the roots of your precious plants. I find the best of the sizes to use is the 50mm diameter stuff, but it does not come with a sleeve or sock covering it. The idea of the sock in this instance is it keeps roots and debris out of the pipe so it doesn’t get blocked up, but it also acts as a wick, allowing the water run into the pipe to be wicked up so that it is available to the plants from the full diameter of the pipe.
Making the Sock
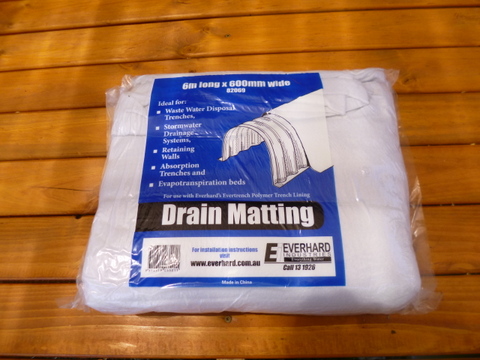
To make a sock for your 50mm pipe, get hold of a pack of 60cm x 6m drain matting, this is a non-woven fabric used as a filter in drainage trenches etc to keep them clear. I have used drain matting from RELN and from Everhard, and found the Everhard product to be a bit thicker, so I would use theirs again.
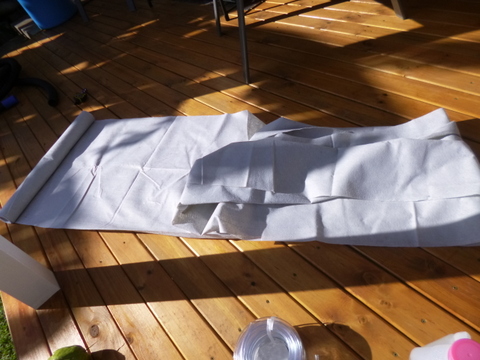
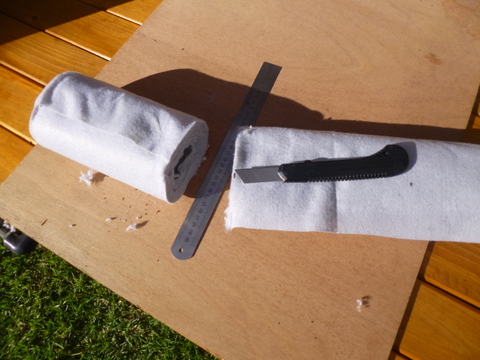
Remove it from the package and unfold it so it is sitting on the floor in a single layer, then start from one end and roll it up tightly to form a cylinder 600mm wide by about 150mm in diameter. Make sure you have a good solid leather glove on your non-dominant hand (which holds the straight edge used to guide the knife). Then place a metal straight edge across the role 200mm from the edge, (ie 1/3 the way in) and then cut through the drain matting with a sharp Stanley knife or similar, it will take a number of strokes. Measure in the middle of the remaining 400mm width roll and do the same again. This will result in you now having 3 x 200mm wide by 6 metre long strips of drain matting.
The next trick is to find someone whose super-power is sewing (mine isn’t but thankfully Linda’s is, among other things!). Fold the matting over so that it is 100mm wide and then sew down the open edge so that you then have a 6 metre long tube in effect. Slide the sock over the ag pipe slowly and carefully until it is fully covering the designed length of ag pipe. Your buried pipe irrigator is now almost ready to be installed.
The Filling Point
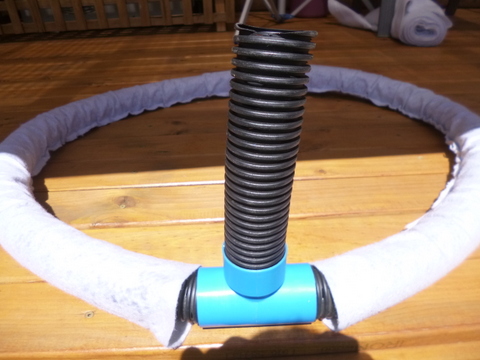
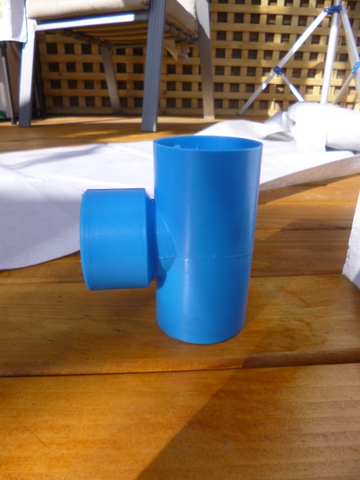
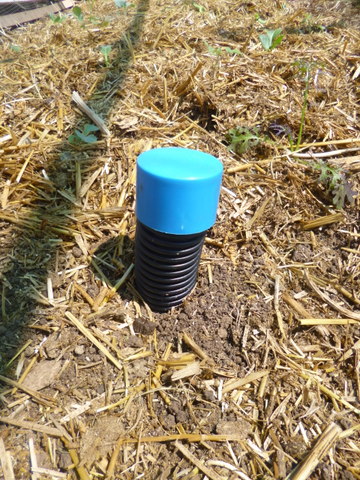
With most of the buried pipe…………well, buried, there still needs to be an aboveground section where we can put the water in, it ain’t gonna irrigate itself. With the pipe needing to be in a circuit I had to find some way to join the two free ends anyway, so it was very easy to use a Tee fitting, bought where I got the original ag pipe from. I made sure the sock covered up to the solid plastic part of the tee piece, then I fitted a short length of ag pipe into the upturned section of the tee to form the filling point. All I had to do then was add an end cap to keep out dirt and prevent critters like snails from using it as a base of operations for raiding parties.
Installation
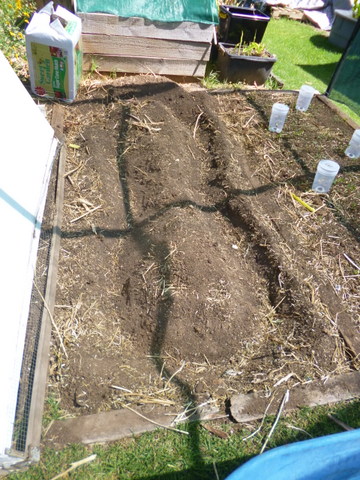
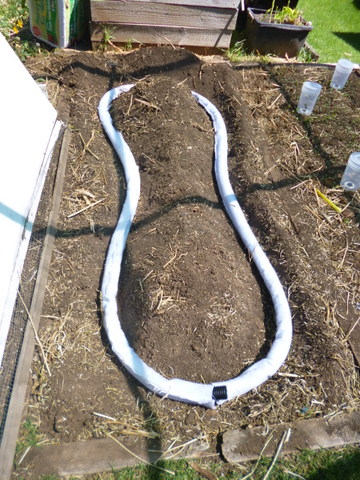
I have run this type of irrigation in two beds, one 2.1 metres wide x 2 metres long and one 2.1 metres wide by 3 metres long. The general process was to dig out a 50mm – 100mm wide ditch down into the bed using a trowel and hand-hoe following a not quite square, not quite oval path, with a few wiggles along its length to increase surface area. Once I got below the level of cultivation I hit good old hard Sydney clay subsoil so I didn’t get as far down as I wanted but 50mm to 100mm seems to work OK.
I placed the sock covered ag pipe onto the bed, formed it so it ran where I wanted it to go and then traced around it in the dirt. I then dug out the channel using the trowel and hand hoe, getting the bottom as level as I could. If the pipe runs uphill away from the filler point it could cause problems getting the water distributed evenly along the pipe so use a spirit level to make sure it is roughly level. To get that much soil out of the bed meant it kept falling back into the ditch rather than sitting on the top of the bed, so I had my wheelbarrow nearby and was able to put some of the soil in there. Once the pipe was installed and covered I distributed the soil in the wheel barrow over the top of the bed.
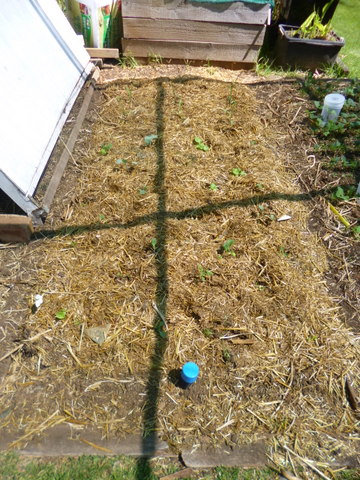
I ran some water into it to make sure it worked and then mulched and planted out the bed. Finished! (almost!)
Testing the System (or - A trap for young players!)
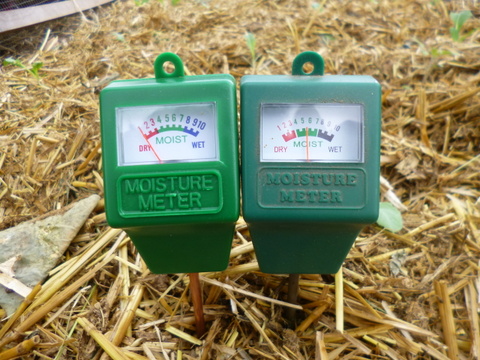
When I installed the buried pipe in the 2 metre long bed, I left the furthest end from the filling point uncovered so I could check that sticking a hose in the filling point and turning it on watered the entire length of the pipe. This was a good test but I forgot to do that with the 3 metre bed so I decided to get technical, and inserted a cheapie moisture meter (you know shows dry-moist-wet soil) at the furthest end from the filling point.
I turned the hose on and waited, and waited and waited. The needle did not move off the “dry” setting at all. Bugger! I figured I would need to install another tee fitting so I could fill from both ends. Just for the hell of it, I inserted the moisture meter half way along the buried pipe. Still no reading, this was not looking good. I had obviously screwed up something monumental. So I removed the meter and the inserted it right beside where the water was going in – still no movement. Hang on a minute!
Yes, the (newly bought) moisture meter was faulty, I could dip it in water with no response at all. I rummaged around and found an old one and it worked, and confirmed that my design was OK!


