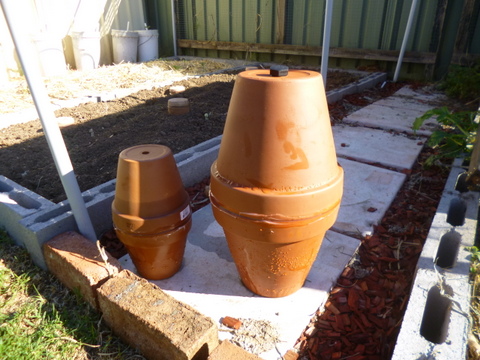
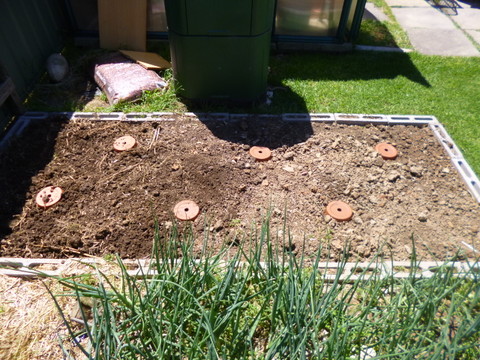
If you haven’t come across them elsewhere on this site, ollas (Spanish: pronounced oyyas) are unglazed terracotta pots, filled with water and then buried so that the water moves out of the pot over time and into the soil, thus irrigating plants. I was making them from scratch, moulding and firing them as part of a pottery group, and while I had made almost half of the number I needed, it was a slow process and was getting expensive. I was also second guessing myself, did they really work that well?
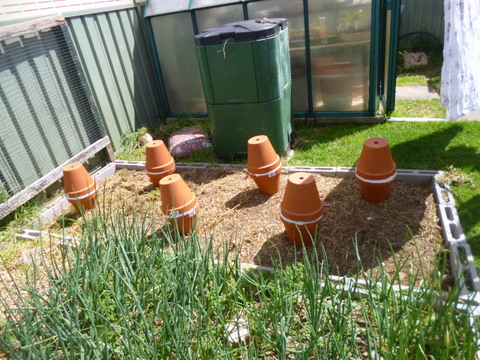
That was until one day towards the end of last summer at the tail end of a 4 month dry spell. I was inspecting a couple of veggie patches, one was lush and quite productive, and the other one just wasn’t happy, with the plants growing in it looking decidedly wilty. When I worked it out the difference between the two veggie plots was that the lush one had ollas and the wilty one had no installed irrigation, just watering with the hose. Time to go full steam ahead on the olla project!
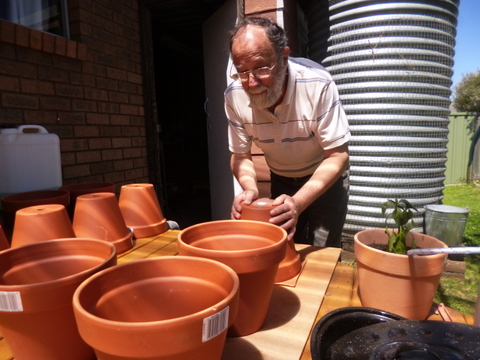
To reduce costs and improve the turnaround time I decided to buy in traditional terracotta pots (unglazed of course) and use them to make the ollas. A word of caution, though if you intend to do a similar thing – having identified youy supplier of pots, buy two, make an olla, and then fill it full of water ie test the pots out before committing cash to buy a stack of them. Make sure the water will move through the terracotta that makes up the pots. If you are making them from scratch then you have some control over firing temperatures but you will have no idea about ones which you buy premade. If the firing temperature is too high they might not be porous enough so try before you buy.
Assuming you have sampled and tested the pots and found them to be acceptable, the process for turning them into ollas is fairly simple –
1. You will need 2 pots to make an olla, take the one which will become the bottom one, cut a piece of thick plastic (I use thick polythene bags used as packaging), sit it on your working surface and place the hole in the pot on top of it. Fill the hole in with waterproof silicone material, dispensed from a cartridge gun is easiest. Allow 24 hours for the silicone plug to cure.
2. Get hold of some sheets of 200 grit sandpaper. Tack a sheet down abrasive side up to a piece of plywood, pyneboard etc larger than the sheet of sandpaper using drawing pins or similar.
3. Turn both halves of the olla (pots) so the rim is down and rub them on the sandpaper in a circular manner so that the normally rounded rim is worn down to a flat profile, this will allow the silicone joining each half to form a better seal. Warning – the dust generated by this operation will contain crystalline silica and should not be inhaled. Do the sanding outside with good ventilation but if you are still concerned wear a P1 dust mask.
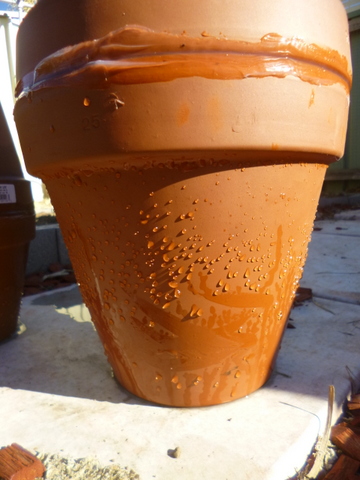
4. Wipe off any dust left over from the sanding operation from each rim. Using the cartridge gun loaded with a silicone cartridge, run a bead of silicone around the rim of the bottom pot (the one with the drainage hole plugged) the width of the pot rim. Then invert the top pot and place it rim down on the siliconed rim of the bottom pot. To ensure a good seal, run your finger around the join to smooth the surface off and make sure all parts of the join are sealed with silicone.
5. Allow the silicone to cure for at least 24 hours, then test fill each olla to ensure they will allow water to seep through their surface. (I know you checked out the original one before starting but this is a final quality assurance test). If you want you can install a cork or rubber plug in the filling hole in the top of the olla to reduce evaporation and keep dirt and insects, lizards etc from getting into the olla and taking up space.
Once they pass the final test they will be ready for installation


