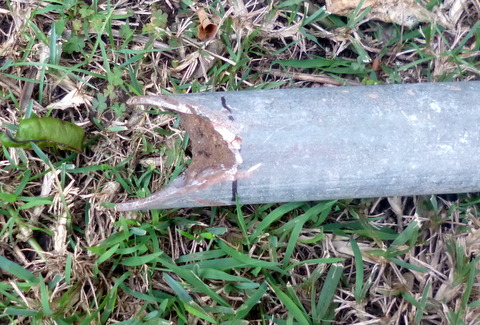
At the time of writing we have just come off a period of over 4 months with almost no rain – just a couple of showers over that time, barely enough to wet the ground. Overall, Australia is a drought country and climate change seems to be making that worse if anything so even when the rain comes we know that more dry conditions are just around the corner. It is with these gloomy thoughts that I started to research low cost, low tech irrigation techniques that were also water efficient. Ollas came up trumps, but I have also discovered other techniques which I am also in the process of building into choko tree farm. This is the first of those “others”.
Deep Pipe Irrigation
The basic point of deep pipe irrigation is that it gets water where it needs to be; direct to the roots of trees and shrubs. This has a number of benefits –
1. Less water is used – because you are getting the water to where it needs to go rather than standing around watering the ground surface and hoping it percolates down to the roots (while half of it actually runs off), less water is needed to achieve the same result.
2. Less time is used – in a likewise manner, because you are not standing around with a hose waiting for water to percolate down. It is just a case of fill each pipe and move on. It can even be set up to be drip fed, reducing time required even further.
3. Deeper roots are stimulated to grow – when trees and shrubs are watered from the surface, surface roots develop to make the most of this water. Unfortunately the top of the soil is the first bit to dry out leaving your plants susceptible to drought. By using the deep pipe method water is applied down into the soil, stimulating the plants roots to grow down and out to follow the water as it moves through the soil.
So, what is deep pipe irrigation?
Deep pipe irrigation uses of a length of PVC pipe 50mm in diameter (less if drip irrigation is to be used) and between 400 mm and 600mm long, sunk vertically into the ground within the plant’s root zone into which water is fed, directly irrigating the root zone.
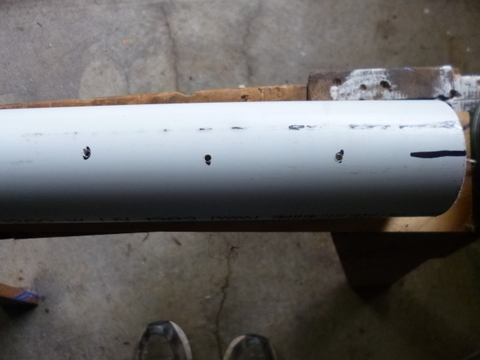
I use 500mm long pipe because it is in the middle of the range and gives me an even number of pipes if you by your PVC pipe in 3 metre lengths, as I do. To make the irrigator, cut the pipe to length, then drill a series of 3mm holes 50 to 75mm apart down one side of the pipe, mark at the top which side the holes are on. When installing the pipe it is crucial to have the line of holes facing the plant to be watered.
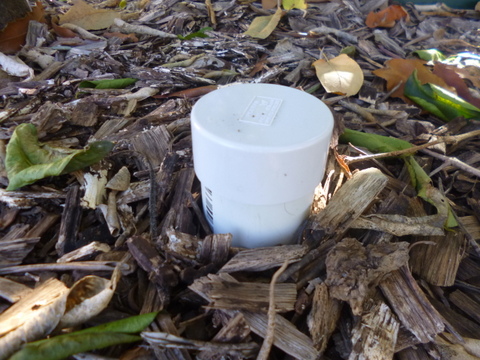
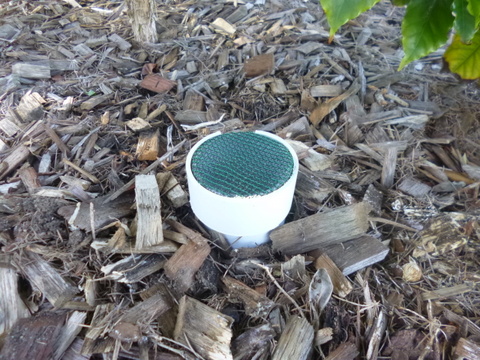
There needs to be a cover for the open end (top) of the pipe to prevent dirt and leaves etc filling the pipe over time and to keep out wildlife. My original plan was to have a solid plastic end cap on the open end (because I like the look), but that left me with another problem. One of the reasons to put in this irrigation method is to reduce the time required for watering, but if I had to get down on my knees and take each cap off, then replace it after watering, it seemed a bit self-defeating. To get around this I used some spare shade cloth and made a clip by cutting off a 25mm length of the 50mm PVC tube and then making a vertical cut on one side so it could be opened out and fit around the irrigation pipe. This holds an 80mm square of shade cloth on, allowing the pipe to be filled with water but keeping out the wildlife.
Retrofitting Deep Pipe Irrigation
This style of irrigation is excellent for establishing new trees and shrubs and so can be put in at the time when the new plants and put in place. Deep pipes will also allow you to water existing plants but is a bit more hassle to put in, here is how I installed them to my existing plantings.
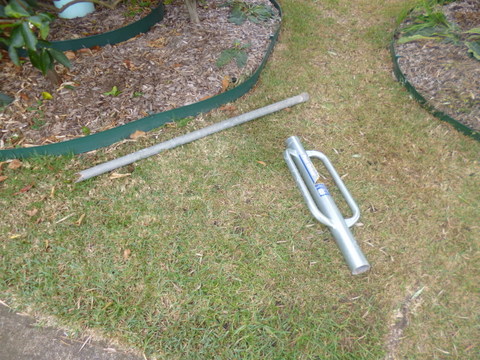
I had a 1500mm length of old imperial 48mm outside diameter galvanised pipe with a 50mm socket on one end (although an end cap would also do). To turn it into the tool I needed I used my angle grinder to cut the end without the socket on and angle from each side so that it came to two sharp points, one each side of the galvanised tube. It also helps if you make a mark on the side of the tube at the depth to which the deep tube is to be installed (in my case about 450mm-500mm).
To use the galvanised pipe to make a hole for the deep tube waterer to go in I needed a post driver, a large stillson wrench, a 25mm square stake about 1800mm long, a pair of ear muffs and a rubber hammer. The process is as follows –
1. Decide where the pipe is to be situated and clear away any mulch and debris from the ground surface, place the galvanised pipe pointy end down onto the soil and place the post diver over the top of it.
2. Make sure you are wearing the ear muffs because it gets very noisy when you are right next to it. Lift the post driver up and ram it down onto the top of the galvanised pipe, which will sink into the ground. Do this about half a dozen times or as many times as it takes for the pipe to be driven down to about a third of the desired depth. Remove the post driver.
3. Remove the galvanised pipe from the ground by using the stillson wrench to grip and turn the pipe to loosen it up for removal. While turning the pipe around, apply upward pressure to the stillson wrench so the pipe is slowly screwed out of the ground. This will be comparatively easy for the first part but will become increasing more difficult (but still doable) the further down you go.
4. With the pipe removed from the ground, place the stake in the top of the tube, invert the tube and strike it against a hard surface like a concrete path so that the stake is forced up into the tube and the plug of soil removed by the pipe is forced back out the end. You may need to clean some remaining soil out of the end if it is sticky and clayey.
5. Repeat steps 2, 3 and 4 until you get to the desired depth, cleaning out the pipe each time.
6. The galvanised pipe (48mm OD) is a bit smaller than the PVC pipe (50mm ID) so you need to put a bit of force on the PVC pipe to install it. Place the PVC pipe in the hole, ensuring that the line of holes is facing the plant to be watered and then, using a large rubber hammer, apply enough persuasion for the pipe to be installed to the bottom of the hole (ie, hit it!).
7. With the pipe installed, place the cover on by putting the square of shade cloth (or other mesh you have handy) and clip it in place.
You can now deeply irrigate as many trees and shrubs as you have deep pipes for.


