I like the beansprouts that you get in the Chinese restaurants. They are mung bean sprouts and over the years I have tried to replicate them at home so I can put them in my noodle and veggie stir fries or soup noodles or even salads. I have never been happy with the results using standard sprouting techniques, however. After some trial and research I have found a simple method of producing those long white crunchy sprouts just the way I like them. The trick is keeping them in the dark until they have gotten to the right stage.
First thing I needed was a container to raise them in, I have seen those wheeled storage containers used keep stuff in pressed into service as a sprouter but this was a much larger operation than I wanted. I looked through our plastic-ware cupboard but couldn’t find what I wanted – a plastic lunchbox the kids has used years ago – unfortunately in the intervening years it had been tossed.
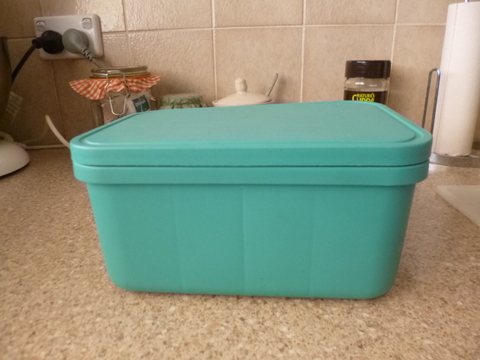
The next trick was to head for the salvation army second hand shop, where I was able to find what I wanted for a mere $2. For this princely sum I was able to get an opaque greenish plastic lunchbox (with lid!) which had the following dimensions - 215mm long x 140mm wide x 110mm deep (although the dimensions are not critical). To be honest I had intentions of drilling holes in the bottom to aid drainage and holes around the top to aid in ventilation, but was in a hurry to try it out. The sprouter seems to work very well just as it was without the holes, although I may add them in in the future.
A word about mung beans – dried mung beans are available quite cheaply from Asian or Indian grocery shops. They are grown for eating so sprouting with them is OK (I’m still alive). Given the choice I buy Australian mung beans.
The Process
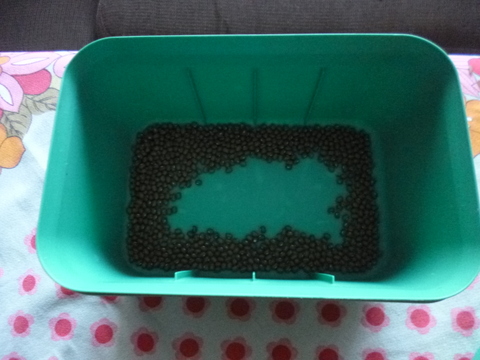
- Pour some dried mung beans into your sprouting container, not so many as to cover the bottom of the container, leave some room for them to expand. About 70% - 75% coverage of the bottom seems to be about right. (a rule of thumb is 125ml of seeds per litre of sprouter volume, but if in doubt put less in rather than more.)
- Pour them out of your sprouting container and into a glass jar (the why of the glass jar become obvious later!) and cover them in fresh cool water to twice the volume of the beans.
- Soak the beans for at least 8 hours, overnight usually works out to be a convenient soaking time. Once the beans have been soaked, check them and see if they have all absorbed water and expanded. Occasionally I find some have not and are still small and hard. If this is the case, change the water and leave them for another 8hrs – 12 hrs. If they haven’t expanded by then go on to stage 4 and pick them out once the sprouting is completed.
- Once the beans are soaked, drain them well and place them into the sprouter. Place the lid on your sprouter but don’t push it on so that it is secured, leave it up a bit for ventilation. Place the sprouter in an area which does not get direct sunlight, but where you will see it and not forget to rinse it out.
- Speaking of not forgetting to rinse your sprouts out……. Don’t forget to rinse them out morning and night with cool, clean water. The rinse water can go on your plants, don’t waste it!
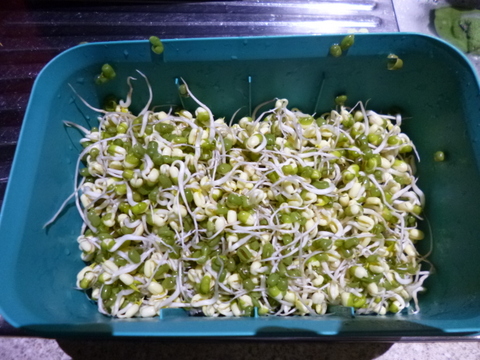
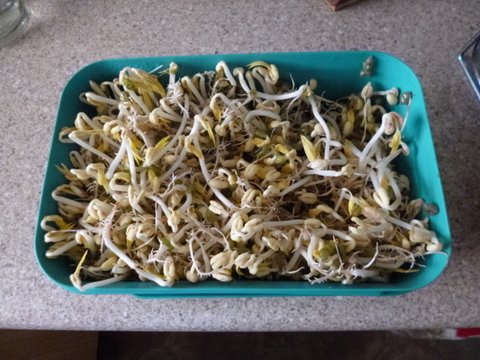
- Do this for about 5 to 7 days depending on how long you like your sprouts, rinse and check them twice daily.
- Once they have reached your preferred size, rinse them and drain as thoroughly as possible, then put them in a sealed container in the fridge where they will keep for about a week.
But wait, there’s more!
Before you eat your sprouts you may wish to remove the green seed coat from them. The seed coat is not toxic or unpalatable but they have a ‘plasticy’ texture (or ‘mouth feel’) and make the sprouts look crappy and unfinished. Place the sprouts in a bowl large enough to fit them all and fill the bowl with water. Gently agitate the sprouts and most of the seed coats will float off or sink to the bottom where they can easily be removed. Some seed coats, however, will have the sprout growing through them and will need to be removed manually (which can be tedious if there are lots of sprouts).
Your sprouts are now ready to be consumed and can work well in such diverse dishes as Chinese omelettes, soups, stir fries, salads, spring rolls or in small amounts as a garnish on just about anything. They are cheap, nutritious and easy to grow with a minimum of gear as well as being versatile. So get sprouting!


