


Drafting the Plan
With all of the information in place it’s now time to review it and come up with a plan for the balcony area which will allow the best and most productive use of the space which is available.
The construction details of the balcony will give you an idea of how much stuff you can cram into it and where it will go. Weight will always be a concern unless your balcony is on the ground floor and will probably set an upper limit to how much you can grow, but the size and how well it is constructed will give you an idea how far you can go. If in doubt, keep things close to the building where the balcony is attached as this will reduce the leverage effect of a weight placed on the edge of a balcony.
The climate data will inform you of the types of plants which you will be able to grow. Lots of sun and you will be able to grow most things whereas lots of shade giving somewhat less sun may mean leaf crops only. Remember, fruiting crops will require 4 to 6 hours of sunlight a day, leaf crops requiring much less while root crops will be somewhere in between in their daylight hour requirements.
The stuff already on the balcony which cannot be moved/removed will also set some limits on what new stuff you can install and of course the owner’s vision will be the best indication of the sorts of features to put in place.
Sketching the Layout
One of the permaculture design principles is to work from patterns to details. This means the very first part of your design is to sketch out where everything will go and once you get that right, you can start working out the details.
Make a scale sketch floor plan of the balcony (based on the one which you drew at the time you did the inspection) with nothing on it. If you do it on graph paper it will also make it easier to draw in the features you want to include in the balcony. If the features are also drawn to scale it will give you an idea of how much you can cram in, in reality. One way is to draw the features on a separate piece of paper, then cut them out and use them as models to move around within the balcony space to get the best fit, but drawing them on the diagram in pencil works too, just have a good art rubber handy!
Once you have a layout which looks like it will work you should consult the balcony owner to get a reality check on your ideas, you can then include any of the changes they require. Obviously if you are doing the plan for yourself you should already be happy with, you drew it up!
The Written Plan
To provide the detail on how the permaculture design drawing is to be implemented It is worth developing a written plan which will back up the drawn arrangement of what will go where on the balcony. The written plan may cover –
- Introduction covering what the plan is to achieve, including the owners vision.
- Any limits to production discovered during the assessment.
- Types of herbs, vegetables and fruit trees to be planted.
- A succession plan of when annuals veggies and herbs need to be planted to keep up a continuous supply.
- A list of the features and a description of how they are to be made or where they are to be sourced from.
- Expected costs and other resources required.
- Action plan of who is to do what, by when

The way I do it is to cover the basics at the start, like what the objective is ans what the assessment turned up, then devote a fair bit of space to the systems which are to be implemented as part of the plan. I give a general description of the element, what the features of the element are, a more detailed analysis of what is to be done and a list of plants which could be used in the particular element, where this is applicable. An example from a recent balcony design is included below -
Element 1.4 – Self Watering Container Area
Description
This is a wooden structure built from recycled materials as much as possible. It 875mm deep x 1500mm wide x 600mm high on the top area, 300mm high at the step down. It is designed to take 4 x 37 litre self-watering rectangular containers on the highest platform area and 2 x 20 litre self-watering containers based on recycled 20 litre buckets in the step down area.
Features
- Vegetable growing area
- Self-watering so needs less maintenance than other containers
- Structure opens to provide storage underneath
Plan details
- Obtain raw materials: rectangular containers x 4; 20 litre recycled buckets x 10, timber and sheeting to cover the required area
- Build stepped structure to take self-watering pots, include hinged door in the side facing the main doorway
- Construct the required self-watering pots
- Place on the structure and fill with growing medium and water
- Plant out with required vegetables and mulch
Plant list
Carrots, tomatoes, cucumber, peas, beans, cabbage, kale, broccoli, herbs
What are the Options?
There are a whole stack of innovative ways of growing herbs, veggies and fruit in a small area. Some examples of these techniques are listed below-
- Self-watering containers –either homemade or bought, these containers have a reservoir built into them so that during busy or hot times they don’t dry out quickly, as containers tend to do. They also do not have drainage holes like standard containers and can be used on balconies where drainage is limited.
- Grow bags – These are a cheap and easy way of providing veggie growing space. Just purchase a plastic 20-25kg bag of potting mix or compost, cut holes in the bag and plant your herbs or veggies. If the bag is left flat when planted out it works well for salad crops and shallow rooted herbs but if the bag is placed on its side, deeper rooted crops like carrots or parsnips can be grown. Don’t forget to cut drain holes in the bottom!
- Teepee or circular trellis – placed over a large pot allows crops to grown up instead of out eg climbing beans or peas, sweet potato, indeterminate tomatoes etc.
- Horizontal tube gardens – PVC drainage pipes can be cut in half or have holes drilled in them and filled with growing medium and mounted on the wall. They can be used to grow shallow rooted leaf crops and herbs.
- Sprouts – These require no soil and very little light. There are several processes for growing sprouts but to grow sprouts the simplest way is to soak some suitable seeds in a container, drain. Rinse and drain again. Then rinse and drain twice a day for a week or so after which your sprouts are ready to harvest.
- Microgreens - Microgreens are a bit more complicated but basically, the seeds are germinated in a container of potting mix, then grown up to the four leaf stage at which point they are harvested with scissors.
- Strawberry or herb tower – These are constructed by getting a plastic drum or garbage bin, cutting a series of 50mm holes around the outside and then filling it with growing medium. The holes are then planted with herbs or strawberries or leafy vegetables. The whole thing is watered from the top and rotated regularly to ensure that all sides get access to sun. Another option is to place a wire cylinder in the centre during construction and before the growing medium is put in. Veggie scraps and other organic material can be placed in the centre cylinder where it will break down and provide nutrients for the growing plants.
- Hanging baskets – These can be hung from the walls or the balcony roof or a freestanding structure. They are ideal for veggies that can cascade over the side like cherry tomatoes, cucumbers or beans.
- Edible walls – A series of containers (including recycled containers like cut off plastic milk bottles) are stacked in a framework which is attached to a wall. Each container is filled with growing medium and used to grow a herb or vegetable.

There are also a whole stack of techniques for getting the best out of a small area for growing vegetables and herbs or fruit trees and these are available in the following articles –
Strategies for a productive small vegetable garden
Strategies for a productive small fruit garden
But it is not All About Food!
Energy
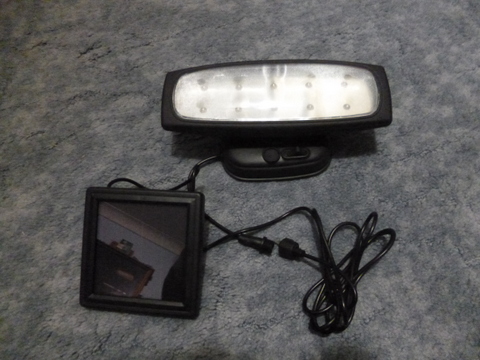
These days there are a plethora of solar powered gizmos like radios, lights and rodent repellers (rodent repellers?) that can be charged up on a sunny balcony then taken inside for use. They can not only reduce your electricity bill and carbon footprint but make you more resistant to blackouts if they happen in your area.
Another energy saver, the rocket stove, burns easily available biomass (small twigs and sticks) and can be used to cook your (home produced!) food. They work very well with a wok, which is an energy efficient method of cooking by itself, and with the addition of a hot plate the rocket stove can even replace the gas barbie. They burn stuff you can pick up at your local park or around the streets, in fact wherever you find big trees, further reducing your fossil fuel consumption.
Water
Water can be used as a feature, such as a pond with fish and edible plants. The water (complete with fish waste) can be removed a bit at a time and topped up with tap or rain water and applied to your plants as a fertiliser. The water feature can also absorb some of the sun’s heat, creating a cooler (and warmer in cold weather) microclimate in the area where it is.
Also, if your balcony is in the privileged position of having access to rainwater downpipes you can break into them and harvest the rainwater as it comes off the roof. You need to be a bit circumspect about storing too much rainwater (every litre adds a kilogram of extra weight on the balcony) but a 200litre rain barrel is a good investment.
Any water you prevent from going down the drain saves towns water being consumed and reduces the load on the cities’ storm water system. The large amounts of hard surfaces in built up areas which need to be drained of rain can mean heavy showers result in back-up and flooding. Every little bit removed from the flow helps!
Waste
Food waste can be a significant contributor to land fill and it rots, producing methane gas which is a far more potent greenhouse gas than carbon dioxide. Preventing your food waste from going to land fill by retaining it within your property and then processing it into fertiliser solves two problems with one action.
Obviously the classic three bay compost bin system is problematic if all you have is a balcony, not only from the point of view of space taken up but also the amount of waste needed to run it and the potential for unpleasant odours if it is not done right. Fortunately you have a couple of tailor made options for balcony dwellers – the bokashi bin and worm farm.
The bokashi bin uses an effective microorganism (EM) to ferment the food waste. It will accept raw meat, citrus and onions which can be an issue with worm farms as well as the other food waste items. The output has a mild fermented smell which I certainly do not find objectionable and can be placed directly in the bottom of pots when repotting. The material will break down rapidly in the soil making all of the nutrients available to your plants.
Worm farms need a little bit more upkeep but produce nutrient and microbe rich castings which can be applied directly to the soil, used in making your own seed raising/potting mix or suspended in water to produce an aerated compost tea.
Both setups will help you deal with food waste while supplying fertiliser to help your crops produce more bountifully.
For those interested, a completed balcony design and plan document may be accessed here.
Part 1 can be found here.
