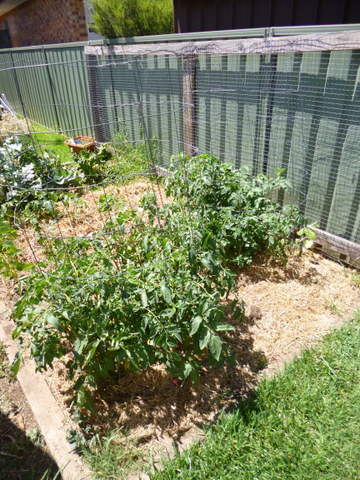
There are times when it is handy to have a trellis that can stand up by itself and support stuff you are growing in the veggie patch. It is even better if it is cheap and easy to build, with a minimum of tools and light enough to be easily relocatable. I made a couple a few years ago and have found them to be very useful in the veggie patch for tomatoes which require staking, cucumbers, peas, beans and just about anything else than climbs.
To make these wonderful things you need to get hold of a coil of wire mesh. The mesh needs to be big enough so you can get your hand through and retrieve the fruits or veggies growing inside the trellis. The wire mesh I used was 150mm x 150mm and this made retrieving errant fruit quite easy. The wire itself should be strong enough to maintain its shape while laden with fruit, although the cylindrical shape is as strong shape to start with, but flexible enough to bend when needed. The wire in the mesh I used was 2mm thick galvanised mild steel.
What makes the cylinders easy to make is that the wire mesh comes in a roll and its natural tendency is to keep that cylindrical structure, getting it to lay flat can be somewhat difficult but it makes forming the cylinder easy! The roll was 1200mm wide so that translates into a trellis 1200mm high.
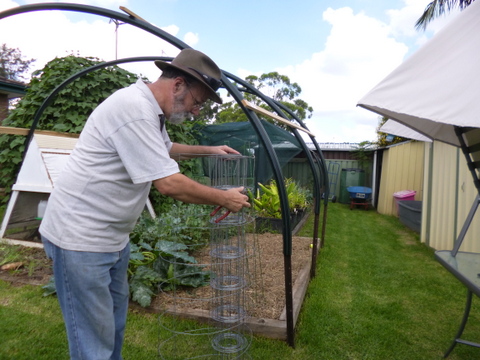
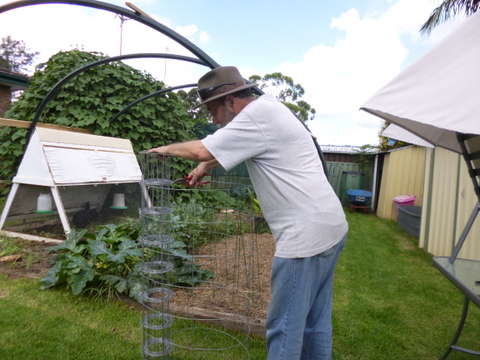
Work out what diameter trellis you wish to make, I found that for the size of my veggie patches (1200mm wide) a trellis about 600mm to 700mm in diameter works well. Uncoil sufficient wire to give you a trellis the right size (it will generally remain in a cylinder anyway) by standing the coil upright and unwinding the wire mesh outwards. You will be able to do this by yourself but a second person to hold the coil in one place while you unwind the wire will make the job easier.
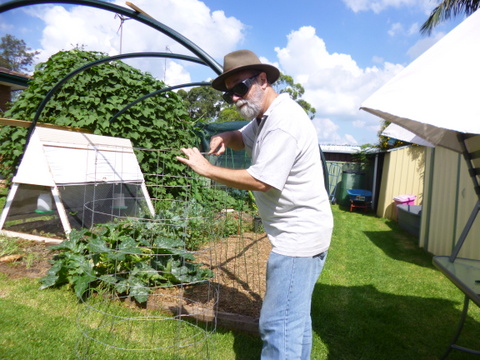
Once the mesh has been wound out to the required diameter, grab your trusty pliers or side cutters and cut the mesh from the roll so that the bit you cut off has protruding wires and the end of the main roll is flush with the last upright wire. This means that you have some wire protruding from the cut end of the cylinder which you can use to secure the cut end to the free end of the mesh. Then it is just a case of forming the cylinder and twisting the protruding wires around the horizontal wires in the first mesh of the free end. This can be done easily by hand but wearing gloves will reduce the likelihood of cuts from sharp wire ends.
To install the cylinder trellis, place it on the area of veggie patch where you want it to be (mulch first if you are going to). Then, to prevent it falling over when laden with goodies, secure with three or four tent pegs pounded well into the ground and at an angle, so they won’t pull directly out. Plant your veggies around the inside or oustide of your cylindical trellis and watch them grow!
If you are really canny you might try installing an olla in the middle of where the trellis is going to sit before you put it in place that will keep your veggies well watered through the driest summer. This past summer I grew tomatoes this way. We had three months without rain and the only water the tomatoes got was when I refilled the ollas two or three times a week. They grew well too!


