


We use coconut milk in curries mainly and I love the grated coconut top that you get on a homemade impossible pie but we avoid tinned products where we can so we decided to make our own grated coconut and coconut milk. Every part of the coconut is useful and it comes in its own recyclable packaging and with a bit of equipment (and a steady supply of coconuts) you can keep yourself in fresh coconut products indefinitely.
The Grater
Coconut graters come in various designs, hand held, hand and electric powered rotary and one built onto a stool so that you can sit on the stool and use both hands to press the coconut against the steel grater blade. The hand held one seemed too much work for me and a couple of the rotary ones I had seen did not look very robust to me so we bought a bench style one very reasonably priced from an Asian supermarket in Cabramatta. While I didn’t see any on that trip, you used to be able to by the steel grater blade itself for a few dollars which you could then attach to your own stool or whatever.


The Coconut
If you have ready access to coconuts straight from the tree that is a wonderful thing! Unfortunately we are not tropical enough here in Sydney to have our own coconut palm, more is the pity, so I was reduced to buying one from the local fruit shop. You should be aware that the unripe “drinking” coconuts that they sell, especially around the Lunar New Year will not work for this process. Due to the fact that they are unripe, the layer of meat on the inside of the coconut is very thin and tends to squelch (technical term) rather than grate.
If you aren’t sure you want to go through all the hassle of getting a grater and finding a supply of coconuts just yet, you can dip you toe in the water (so to speak) by buying some shredded coconut (organic of course!) and then following the directions from there.
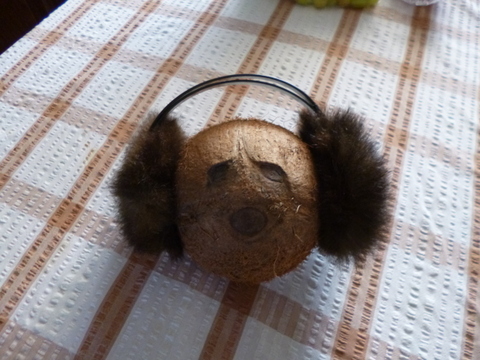
Opening the Coconut
To use the grater most effectively and avoid unnecessary blood in the coconut milk, the process works best if the coconut is cut neatly into two halves.
First push a hole into the coconut or dig out one of the “eyes” and drain the coconut water inside the coconut, this makes a refreshing drink when cold if you like that sort of stuff, so hang onto it. To split the coconut get hold of a hammer with a sharp edge, a meat mallet is ideal, the belt the side of the coconut with the side of the mallet in a circle around the circumference. It takes a small amount practice to get the amount of force to hit the coconut with, it suffices to say that if you don’t want coconut lumps start out light and work up.

At some stage of belting the coconut around its circumference a crack should appear and this will propagate around the whole thing as you continue to hit it. As a result, the coconut should collapse into two more or less equal halves. Job done!
Grating the Meat
Inside the coconut shell will be a lining of coconut meat about a centimetre thick and this is what we are going to grate. If you have the blade and stool arrangement, get yourself a bowl to grate the coconut meat into. The grater blade sits about 180mm off the deck so you need a bowl that is low enough to allow your hands room to drag the coconut over the blade but till still catch the grated meat. The one which I used was an oval 320mm by 220mm and was 60mm high, it seemed to work pretty well.

To start, wash your hands or get a spoon then sit down on the stool and get comfortable. While it was not the most comfortable stool I have ever sat on it only took about 10 minutes to grate the whole coconut. Although a bit of padding would not go astray if you wanted to do a few in succession. Once you are well seated, grasp the coconut by the outside husk in both hands then push the inside of the coconut down over the grater blade. The grated coconut will build up on the top of the blade and will need to be pushed off into the bowl regularly. One problem that may arise is flaky bits off the outside husk of the coconut rubbed off by your hands holding the coconut dropping into the bowl and contaminating some of the grated coconut. It would be worth giving the outside of the coconut a rub over to remove any loose stuff first.
At this point is it just a case of keeping going, grating off the coconut meat and scraping it into the bowl. Sooner or later you will start to hit the inside of the coconut husk, you be able to tell this by the change in “feel” of the grater and the dark brown bits appearing in the grated coconut meat. That is the hint to no go so deep, just keep it up until you get as much of the meat as you can.

Once the grating is completed you will have two half coconuts that will find uses as a fetching bikini top (Hawaiian style) for the lady of the house, to mimic horse hoof beats a la Monty Python or as small plant pots when inverted. You could also break them up and put them into the bottom of plant pots before you fill them with potting soil to help the drainage, the list of uses is endless!
Making Coconut Milk
This is the simple bit. Toss two cups of your grated coconut into a blended followed by three or four cups of hot water. Whiz the whole mess up for a couple of minutes and then pour it into cloth to filter it. I used a tea towel and it worked pretty well but split towards the end of the process so make sure you use a newer one than I did.
 (1).JPG "After whizzing up in the blender")
It works out easiest if you put the tea towel into a colander and then place that over a bowl to catch the coconut milk. Once the majority of the liquid has drained through, pick up the corners of the cloth and twist it around to squeeze out the remainder of the coconut milk. (it was at this point that mine split). There will still be some coconut milk in the meat so you can repeat the process for a couple more times or until the water runs clear.
.JPG "Squeezing out the goodness!")
This time I only carried out the one extraction and it gave me enough coconut milk to fool around with a couple of formulations ( more about this later) and make a really nice vegetable curry, full of home grown veggies of course. The meat leftover once the milk has been extracted can be toasted in the oven or in a pan and then added into biscuits or cakes for texture and to give a bit of a coconut flavour. Although in its untoasted form it looks remarkably like snow and I’m sure could be used to simulate snow for a ginger bread house or whatever.
.JPG "Leftover snow")
