In dry parts of the world such as North Africa or Sri Lanka (where they are called “Ollas”) they have used unglazed terra cotta pots to irrigate their crops for a looong time, the so-called pitcher irrigation. These pitchers were round bellied pots with a short neck and they were buried up to their lip in the soil and then filled with water and covered. The theory goes that the water then travelled through the unglazed terracotta slowly and into the soil, keeping the growing plants well irrigated.
According to reports from those what know about such things, we are in for a hot, dry summer so I thought that trying this out would be a fun thing to do. I am not much of a potter and when I looked around there was not much in the way of round bellied pots with short necks available so I had to make do with what I could get hold of, in this case flower pots.
Unglazed terracotta flower pots are available all over the place and don’t cost huge amounts of money, but there are a number of factors that need to be considered before you make your purchase that will have an impact on the performance of the pots –
- The rate at which water moves through the pot material – unfortunately this will be determined for the most part when the pot is made and you won’t know until you try it If you do make your own, putting sand in with the clay will increase this although the method used to make and fire the pots also have a role to play.
- Surface area of the pot – the purpose designed pots tend to be almost spherical to allow the most water storage for the surface area so a short squat pot is better than a long narrow one. Also, you want the plants to get access to the water so releasing the water below the root zone of your target plant does not achieve much.
- Wall thickness of the pot – The thinner the wall thickness the quicker the water can permeate through the terracotta bearing in mind 1 and 2 above.
There is also another complicating factor. Unglazed terracotta pots are well known for their ability to dry out on a hot day, letting the petunias or whatever you have in them wilt seriously or even die so to get around this some terracotta plant pots although unglazed, have been coated with a water based coating to seal the pot and prevent water evaporating out the sides. Needless to a say this runs somewhat counter to what we are trying to achieve here so make sure you establish if they have such a coating before you buy them. Quite often they will have a sticker on them informing you about the coating but even if they don’t, ask!
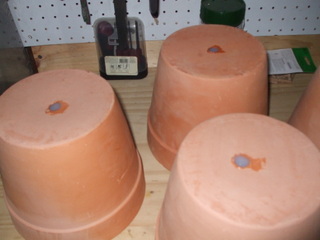
While terracotta plant pots are cheap and available they do have one disadvantage, the drainage hole in the bottom. The easiest way to deal with this is to put duct tape or gaffer tape on the inside of the pot to cover the hole and once this is done, fill the hole in from the bottom with silicon sealer (remember – silicon is my friend!). Leave the sealer to set overnight and you will be ready to go the next day.
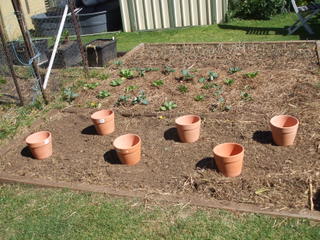
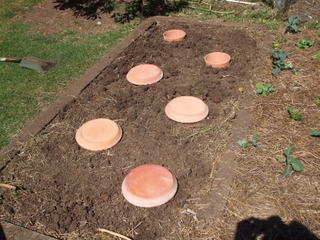
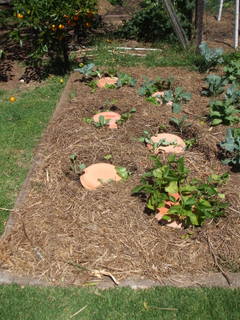
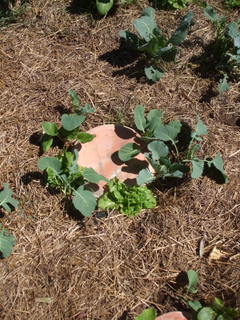
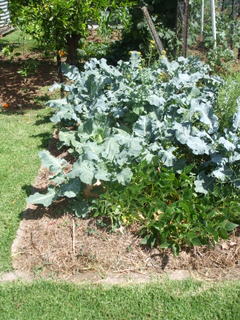
I wanted to see how they would work in one of my 1200mm x 3000mm veggie patches so I set up six in two lines of three off set from each other so that there was about 300 to 400mm between each pot. To plant them I dug the hole somewhat bigger than the pot itself, about 150mm bigger, then when I installed the pot I made sure that there was good friable soil in contact with the pot all the way around. To keep out dirt (and cats) and to reduce evaporation I got hold of some terracotta pot saucers that overhung the lip of the pot and placed them on top of the pot, upside down after filling the pots with water. I then mulched the whole bed to about 50mm thick.
The next trick of course is to plant out veggies around them and the question is – how far away? I have read stuff that talks about 450mm between the pot and the plant but to me this seems too far away, other stuff I have read says 10mm to 30mm between the wall of the pot and the plant and this to me seems right so that is how close I planted my veggies. I planted beans in a circle right around the first pot and then a mixture of brassicas, lettuce and other leaf crops at a spacing so that each pot had eight veggies around them.
Once planted I did water them in to make sure they got a good start. I suspect that it will take a little while for the roots to find the moisture oozing out of the pots so they will need to have some supplementary water until they do.
The pots have been installed for a few weeks now and it is interesting to see the difference in the rate the water moves through the pots between the different pots, even though they are the same make and size. The main one I was checking didn’t seem to be losing much at all, just a couple of millimetres a day, but when I looked through the others some were almost half empty and one was totally empty (although I think it may have been empty because I forgot to fill the thing initially, oops!).
It is important to keep the pots on the full side so that the hydraulic pressure keeps the water moving through the terracotta and out into the soil, so check them regularly, every few days to a week, until you get a feel for the water seepage rate for each pot.
The advantages and disadvantages of pot irrigation
Advantages
- It is cheap and easy to set up
- You can use water from any source, recycled bath water, rain water, town water, whatever you have. I’m using tank water and filling the pots with a watering can with the rose removed.
- It’s very water efficient with the water being delivered where it is needed and the minimum being lost to evaporation and none to run off.
Disadvantages
- The pots can break during installation or if you forget and tread on them.
- They need to be removed when the plot is to be readied for the next crop
I have also made my own "purpose built" pot irrigators and you can read about how I did it here


