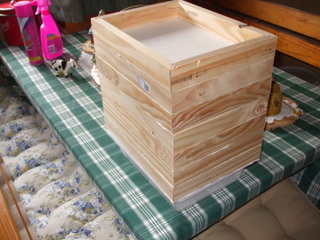
Do you like sprouts? I mean REALLY like sprouts? Then this little gadget is for you! It is cheap, quick and easy to build and of all of the projects I have done this is the only one that actually worked too well, pumping out so many sprouts that we couldn’t eat them all. The dimensions for the sprouter are based on a starting charge of two dessertspoons full of fenugreek seeds, because they are the type of sprouts we like so if you like bigger sprouts, say soy beans or smaller like alfalfa then you might want to adjust the sizes accordingly. Likewise this is designed to provide lots of sprouts on a seven day cycle so if you use faster or slower growing sprouts you may need more or less trays. To start I suggest you make less than you need and then if the sprouts are not fully grown as planned add a few more.
Making the Sprouter
1.The base of the sprouter is formed by a cheap plastic tray that catches any water dripping through the fabric. The one I got is 250mm wide by 335mm long and 70mm deep, all of the sprouter trays will sit on top of it.
2.The sprouter trays are made by 42mm x 19mm DAR pine and cutting the ends on a mitre saw or with a hand saw using a mitre box. We have only had a mitre saw for a few months, I never saw the need for one but my wife was starting to do some wood work and wanted one so of course we got it. Now we have it I have found it to be very handy and it makes it easy to make fast accurate cuts in timber.
3.To make the sides I bought 900mm lengths, one per tray, so that they were easy to transport (smaller car) and there was very little waste. I used the following process –
•Using the mitre saw, with the timber in the flat position (ie 42mm side down) make a 45° angle cut right at the end of the timber then measure the back (long side) to 335mm and make another 45° cut so that it is angled back towards the already cut and of the timber.
•Turn the timber over and measure 335mm along the back side and repeat the cut so that the angle is sloped back towards the cut end again. This should give you two identical pieces of timber with an external length of 335mm and an internal length of300mm.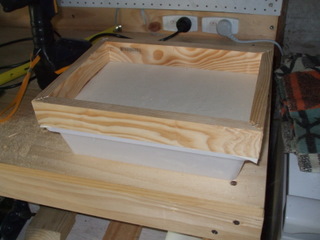
•Repeat the above process and make then ends with an external length of 250mm and an internal length of 215mm.
•Assemble all four sides into a box with external dimensions of 250mm x 335mm or whatever size you have calculated it should be.
•To hold the box together I went for cheap, quick and nasty and grabbed by staple gun, applying a staple each side of each mitred joint. If you wish you could glue (assuming the glue is food safe and water resistant), screw or nail your sides together.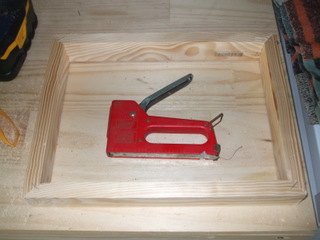
4.Now to install the base of the box, which is what the sprouts will sit on as they.....well, sprout! You can do this by getting hold of some cheap calico and cut out a piece a bit bigger than the size of your box.
5.Grab your staple gun again and place the calico on the bottom of the box so you have some overhang all round, this is so you can grip the calico and keep it taught.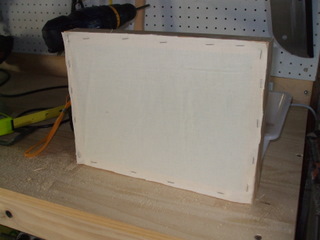
6.Place the calico over the bottom of the box and put a staple into each corner to secure it then, while holding a bit of tension on each side, put staples through the calico into the wood about 25mm to 50mm apart. Then use a very sharp pair of scissors, your wife’s sewing scissors would be ideal but don’t drop or blunt them or your life won’t be worth living, and cut off any overhanging calico to make the edge nice and neat.
7.Once this is done, on as many trays as you intend to use, you are ready to operate.
Operating the Sprouter
1.Get hold of some of the seeds you want to sprout and measure them out so you get used to making the same amount of sprouts each time, as mentioned above my sprouter is based on two dessertspoons of fenugreek seed. When the seed is measured out put the seed into a container, cover the seed with plenty of water and leave overnight.
2.The next morning pour off most of the water and then pour the wet seeds into the bottom tray and spread them out. You can tilt the tray so that any excess water can drain out the sides between the staples, some will be absorbed by the calico to keep the sprouts moist.
3.In the afternoon get hold of a spray bottle or sprinkler bottle or make one by punching small holes in the top of a PET drink bottle and gently sprinkle the seed with water and drain off the excess.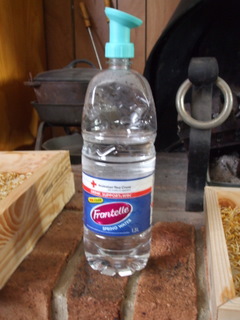
4.That evening, prepare another charge of sprouting seeds by soaking them in water.
5.Repeat steps 2 to 4 until all trays are full and your first sprouts are ready to harvest. Take them out of the tray, they are ready for immediate use or can be kept in a container in the fridge for a week or so.
6. Wash out the tray. If there is any sign of mould (black spots etc.) on the calico wash the area over with hydrogen peroxide (often just referred to as “Peroxide”)which acts like a bleach but breaks down to form oxygen and water so it leaves no residue, it is available from chemists and supermarkets. Leaving the tray out in the sun gives the mould a hard time too.
7.Recharge you tray the next morning and the cycle begins again. Don’t’ forget to regularly empty the catch tray at the bottom of any drain water.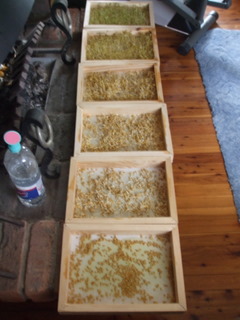
As I mentioned earlier in this article, the dimensions are to be taken with a grain of salt, but are perhaps a good place to start.


