What on Earth is a Bokashi bucket?
It is a small scale food composting system that uses an air tight bucket and special micro-organisms to break down the food and it does so without the yuk factor of the disgusting smells usually associated with anaerobic decomposition. It will also handle some materials that are verboten in normal composters and/or not particularly enjoyed by worms such as onions/garlic, citrus rinds and uncooked/cooked meat. They are ideal for those living in the city and suburban environment that want to compost their waste but are put off by the associated stink and hassle. Does this interest you? If so, then read on!
Making the Bokashi Bucket
Of course it is possible to go out to Bunning’s or wherever and pick up a commercial Bokashi bin, but they can cost over $70 and if you are a bit short of cash you can make yourself one for a bit over $10, or less if you have any 20 litre buckets already hanging around.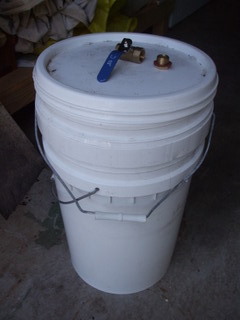
- Get hold of the raw materials – 2 x recycled plastic 20 litre buckets with tightly fitting lids, a valve and hollow bolt to go through the side of the bucket. The big hint, particularly if you are using recycled buckets, is to ensure that both buckets are the same size otherwise even a small difference in size can mean that when they are put one inside the other there will be a gap meaning they are not sealed, or they can seal so tight you can’t get the buggers apart when you need to!
- Pick the bucket that you are going to use as the inner bucket and drill some 6mm or so (it’s not critical) holes in the bottom to allow excess liquids to drain off.
- Get hold of the outer bucket and drill a hole as low down the side of the bucket as you can the same size as the hollow bolt or a bit smaller, I used a speed bit and my battery drill.
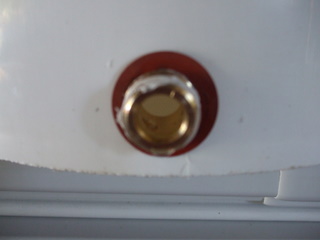
- Insert the hollow bolt through the hole form the inside out, wrap the threads in Teflon tape (plumber-on-a-roll) and then screw the valve onto the bolt and tighten up. At this point it is best to test your seal by putting some water in the bucket and checking for leaks around where the valve goes through. If you don’t do this now you may find unmentionable fluids leaking onto your floor and it will be much more difficult to fix. If you do find some water leaking out when you test it, run a bead of the appropriate silicon sealer around where the valve comes out and allow to dry.
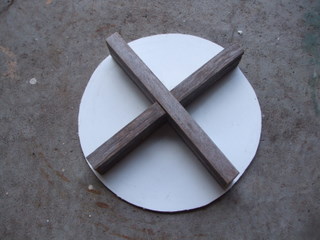
- The material in the bucket must be compressed to remove air spaces so you can make a tool to do this from the second lid, which will not be needed. Measure the bottom of the inner bucket and then draw a circle the same size around the lid using a pair of dividers. You can then cut out the circle using a band saw or jig saw. The plastic top is still a bit flexible to effectively compress the organic material so I grabbed a couple of pieces of recycled 70mm x 20mm DAR and cut two lengths the same diameter as the plastic disk, I then cut a jigged edge lap joint so that the timber formed an X. I screwed the X to the back of the disc and the tool, was ready to go.
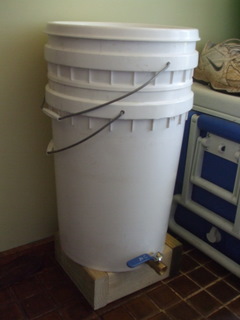
- I grabbed some pieces of scrap timber that I had lying around and cut them to size and screwed them together so that I had a box to sit the whole assembly on to get it off the floor and give better access to the drain valve.
-
The DIY Bokashi bucket was ready to compost (or bokash, or whatever you call it....)
Operating your Bokashi Bucket
- When you start out, place a 3cm to 4cm layer of your finest veggie scraps etc in the bottom of the inner bucket, then add in a layer of the Bokashi material, which you will need to buy from a hardware store or other supplier. This is one of those rare times, like eating chocolate, where more is better so don’t skimp, if in doubt add more. In any case at least a handful per layer of organic matter.
- Take your faithful compression tool in hand and press down on the organic material to push all the air out. If you want you can leave the tool sitting inside the bucket on the surface of the organic material, I certainly do.
- Replace the lid on the inner bucket making sure that you have a good airtight seal, because this is needed to reduce the oxygen inside the bucket to get the Bokashi doing its thing.
- Just repeat steps 1 to 3 every time you get some organic material until the inner bucket is completely full, making sure you put plenty of bokashi material in the last addition before sealing.
- During this time you should regularly open the valve on the bottom of the outer bucket to drain off any liquid, preferably into a container, the pour it onto your garden beds as a liquid fertiliser.
- Then seal up the top and leave it for two weeks to finish “Bokashing” (which is a fermenting type process), regularly draining off any liquid as in step 5.
- Having a second set of bokashi buckets at this point would be good, but otherwise if you don’t have too much organic material accumulating you can freeze it and use it to start up the next bucket once it is empty and clean.
-
Once the bucket has finished Bokashing you can use the output for a number of things (See the next section) and once the bucket is empty, clean it out thoroughly and it will be ready to go again either when you other bucket is full or to start now with your frozen stuff.
Any Problems?
If you bucket has not been doing what it is supposed to you may start to get anaerobic decomposition that produces the characteristic rotten egg smell or it may show the presence of black or blue green fungi, and this may be due to one or more of the following causes –
- You haven’t put in enough bokashi material between additions of organic matter, remember more is better!
- You haven’t drained off the liquid often enough and it is flooding the organic material, although with the larger reservoir of the home made bokashi bucket this is unlikely, it is still possible.
- The bucket lid has not sealed adequately, this is why it is important to make sure your lid seals before you make your bin and to always ensure you seal the lid tight after adding more organic material.
-
The bucket has been too hot or too cold for a prolonged period of time. Again this is unlikely if you keep your bucket inside, but don’t stick it out in the shed particularly if you are subjected to the 42°C that we get here in a Western Sydney summer!
Now What Do I Do?
Now that you have the output of your Bokashi the question is what can you do with it and there are a number of options –
- Add it to your existing outdoor composter if you have one
- Add it to a worm farm if you have one of those
- Dig it in directly into one of your veggies patches as is.
-
Use it to attract black soldier flies. This is the stuff of a whole ‘nother article but briefly you can use you bokashi output in a commercial or homemade black soldier fly larvae farming set up. This set up induces the black soldier fly to lay eggs in or around vegetable waste then captures the larvae (maggots) as they go looking for soil to pupate in. The maggots can then be fed to chooks or fish in an aquaculture system. I have found that the bokashi material attracts black soldier fly like nothing else!
Helping your Bucket do its work
- Do not add water, milk, juice or other liquids to your Bokashi bucket
- Keep the lid firmly sealed at all times
- Cut up any large lumps of organic matter to facilitate packing down
- If you only get small amounts of organic matter you can freeze them until you have enough to make a 3-4cm layer
- Don’t put paper, plastic wrap or meat bones in your bucket
- Keep the bucket in the shade
The only real down side to the Bokashi system is the continuing outlay on the Bokashi material itself, and I have read that it may be possible to home produce something similar, but I haven’t tried it so more research is needed. Watch this space!
Update 2012
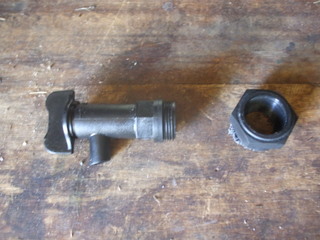
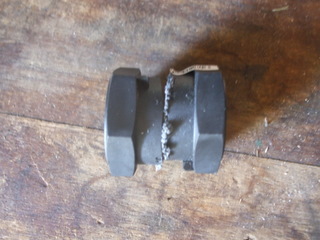
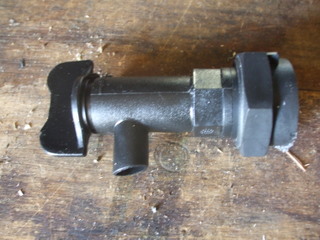
No I haven't gotten around to making my own bokashi stuff yet, but the bucket itself is still in daily use. I must admit that I was never happy with the tap in the original design above, it is just too expensive. I have done a couple of workshops on composting which included making a Bokashi bucket and in the lead up to those I spent some time wandering around the local hardware shop to try and come up with something just as effective but cheaper and lo and behold I did! There are black plastic taps made to screw into 20 litre plastic cube shaped liquid storage bottles but need to be secured in the bottom of the bucket and if you get hold of a 25mm plastic female plumbing connector it will screw straight in. You don't even need the full length of the connector so you can (as I did) saw them in half with a hand saw or band saw and use one connector to fit two bokashi bins with taps. Just drill a 25mm hole in the bottom of the bucket with a speed bit, push the threaded bit of the tap through into the bucket and screw on the half 25mm connector on the other side to secure the tap. It works pretty well but even so I would run a bead of silicone around the outside of the tap seal, just to make sure, so you don't get any Bokashi water making a break for it. Good luck!