You would be surprised at the implications of merely fixing a dripping tap have for our sustainability, obviously there is the wastage of water (over 20,000 litres in a year) but there is also the aspect of fixing things for ourselves and repairing rather than replacing equipment. So having the skill and gear to fix a leaking tap can be a very good thing, here we will cover the skills you need but I will leave it up to you to pick up the gear.
The usual reason that a tap is dripping is because the washer, a flexible seal that screws down onto a bearing surface around the water supply hole in the tap shutting the water supply off, is shot. The bit that does work, the washer itself sits on a disk on the end of a small cylinder or stem that keeps the washer in place, which is usually nylon or brass. The brass ones used to have a bolt that secured the washer to the stem but all the new ones seem to be riveted on. If you can get hold of any of the old bolted ones do so, you can remove the nut and exchange the unserviceable washer without having to waste the whole stem.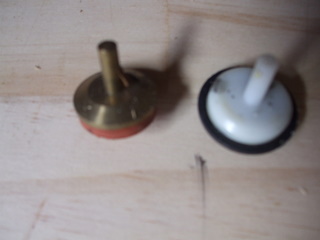
All of the washers seem to be some sort of polymer these days, nylon or some other sort of plastic. In the old days (“back when I was a lad” said in an old crotchety voice...) the washers were made of leather for cold water or fibre for hot water. If you had some leather and a 19mm and/or 22mm pad punch to cut the leather disk for a washer and a 5mm hole punch for the central hole you could make your own washers and fit them to the stem. 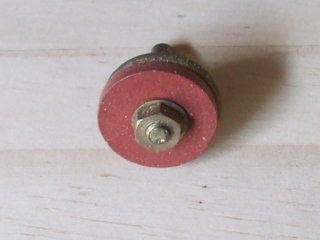
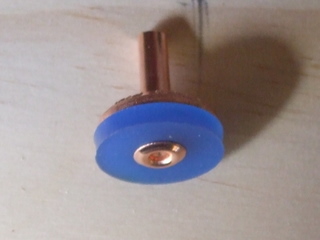
Just recently I found one of our outdoor taps dripping and changed the plastic washer and stem, replacing it with a brass stem. The way I did this was to shut the water off where the main comes in from the street, at the water meter next to the front tap, then with a shifting spanner I undid the top of the tap, pulled the old washer out and replaced it with the new and re-screwed the top of the tap back on, tightening it up with the shifter. It was a simple matter then to turn the mains back on and low and behold...................it still leaked! (extensive use of magic words).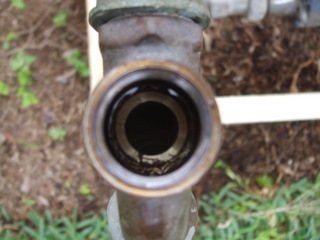
While this has happened to me in the past, it has been rare that changing a washer did not fix the problem. Mind you, the washer was definitely no good so it was not a waste to replace it but there was clearly another problem here. I still don’t know what causes it, but a crack or fissure can form on the bearing surface in the tap body that the washer mates with so that even if the washer is brand new (as it was in this case) water can still bypass it and continue to leak out of the tap. Frustrating!
Here is where a little tool worth getting hold of comes into its own – the tap reseater. A tap reseater is a carbon steel cutter the same diameter as the washer attached to a central threaded bar that rotates inside a threaded conical piece of steel that attaches to the tap body. The central threaded bar is rotated manually by pushing on the t-bar on the other end from the cutter. While they are not expensive it is worth making sure you get a good one, you used to be able to get a cheap model that relied on sandpaper rather than a steel cutter and it was practically useless, so go for the steel.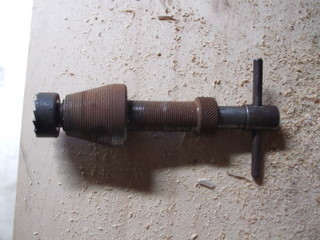
Once you have identified that a crack is your problem, wind the central bar up into the tool and then screw the conical body of the tool down into the threaded section of the tap exposed when you take the handle off, making sure it is reasonably tight. Then screw the central threaded bar down until the cutter just makes contact with the washer bearing surface in the tap, push on the t-bar to rotate the cutter, shaving small amounts of brass off the bearing surface. It you try to go too fast it will either gouge hunks out of the bearing surface, buggering it, or the cutter will bind and you won’t be able to turn it at all – slowly does it!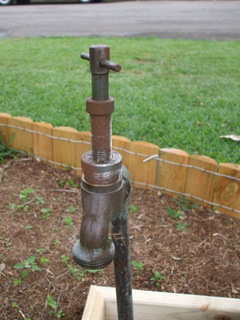
Remove the tool and check the process of the work regularly so you only remove as much metal as is required. Once the bearing surface is free of cracks again, turn the water supply back on a bit and flush some water through the tap to wash out any brass shavings that have fallen into the tap body. Otherwise these can get caught between the bearing surface and the washer making you think the leak is still there (I’m speaking from experience here).
All that needs to be done now is to reassemble the tap, turn on the water supply and revel in your now leak free water supply. By doing it yourself you will not only save wasted water but also saved money on what would have meant a replacement tap.


