If you have already sampled my comments in the previous microgreen article you will know what a wonderful, practical and tasty source of nutrition microgreens are as well as having a reasonable idea of how to produce them. If you haven’t, go read it first, I’m not going to repeat it all, except the production bit!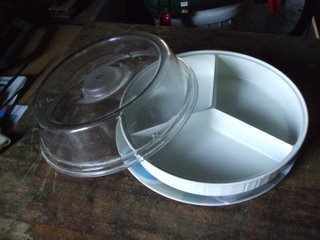
Producing microgreens in a large amounts can be a good thing if you are using them heaps but what if you like small amounts of variety? I was wandering through our local Salvation Army shop when I came upon a round, plastic microwave cooker that was divided up into three equal “wedges” (for want of a better term). It looked perfect for raising microgreens and for the vast price of $1.50 I was able to purchase it; and for another $1.50 I was able to get a plate to go under it to catch any water draining after irrigating them. It was big enough to produce three loads of microgreens neatly separated from each other and the lid was high enough to allow germination and some growth before it would need to be left off. It was also decorative enough not to look out of place in the kitchen. Perfect, reusing at its best.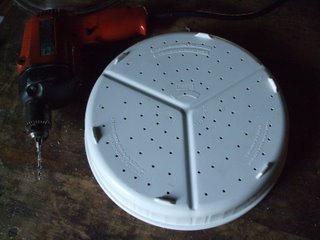
The first trick when I got it home was to grab hold of a very sharp 6mm or so drill and drill a whole stack of drain holes in the bottom to stop the microgreens getting wet feet. The plastic is quite brittle and I figured could easily break up even though it was reasonable thick, so I used a very sharp drill bit and was comparatively restrained in the pressure I applied to the drill, letting the bit do the work. In the end all was well and I was able to drill in all the required holes without destroying the container.
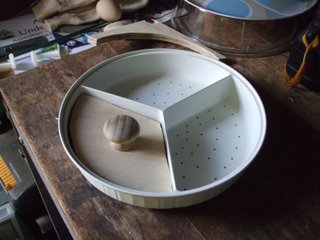
It appeared to me fairly obvious that, due to the shape of the container, a simple rectangular lump of wood to press down the growing medium, seeds etc was not going to work, so I fished out a piece of 10mm thick ply wood and sketched the shape of one of the wedges on it. After cutting it out using my small band saw (it could just as easily have been done by hand with a fret saw) and sanding it back to smooth of the rough edges I tried it in place. It fit! Not bad for someone almost without manual skills. I found an old knob off a cupboard door, screwed it on for use as a handle and we were away.
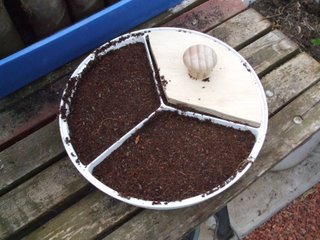
Using the same growing medium that I always do (1 measure of coarse river sand; 2 measures of worm castings and three measures of cocopeat) I filled up each of the wedges to the top and then pressed them down with the little wedgie press. I then sowed the seeds on top quite thickly, one type in each wedge – fenugreek, mung beans and lettuce – covered with another layer of growing medium and again pressed down to ensure good soil to seed contact. I then watered the whole shebang with a sprinkle nozzle on a PET drink bottle, replaced the clear lid and stood back to await the fire works!
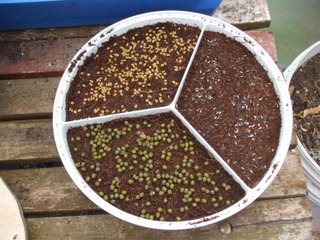
And they weren’t long in coming! Unfortunately the top layer of growing medium at about 5-6mm thick was a little too thick and well tamped down so that when the thickly sown seeds germinated, rather than push through the top layer as I expected they lifted it up in one solid layer. It looked a bit weird but in the end it was only a minor inconvenience and after being broken up with my fingers and watered in, all was well.
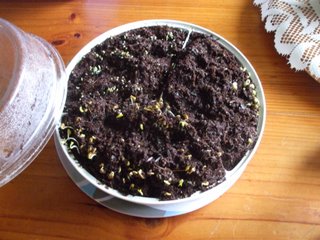
Things were moving along quite well and all of the microgreens were growing strongly but we had to go away for the weekend and, with nowhere else to put them, they stayed on the side of the sink in the kitchen with the curtains closed. This resulted in them not getting enough light so they became rather long and leggy, but this did not seem to interfere with their flavour. The lettuce did take the longest to recover, the other two being thicker with nicely flavoured stems.
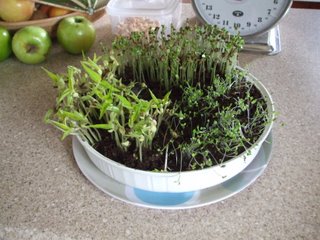
This was a great way to grow a variety of microgreens in a small area, right in the kitchen where they were going to be used. Sometimes it can be a pain to have to walk down to the greenhouse to harvest some microgreens for a meal, but my lovely partner in the sustainable life would not be enthused over numerous flats full of growing things cluttering up the kitchen either. This way we could have a happy household and microgreens too.


