


Growing veggies in containers is a good way of growing your own food if you are pushed for space, don’t own where you are living and may need to move or have difficulties with the planting, cultivating and harvesting at ground level. Container growing has a lot to recommend it, but it also has a down side in that the containers will dry out much more quickly than veggies in the ground, one hot afternoon and they are wilt city!
So what is the answer? The self watering container, originally marketed in the US as an Earth Box and now available in Aus, but you can also make them yourself. In principle, they are a container with a layer of growing medium on top and a water reservoir in the bottom and a structure that allows the growing medium to contact the water and wick it up to the plants in the growing medium by capillary action.
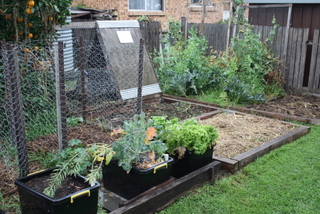
A good container to start with are those rectangular storage containers on wheels, you can buy them almost anywhere these days, I used ones 542mm long x 310mm high x 385 mm wide , 280mm high from bottom of growing chamber to top of rim and a volume of 55 litres. It is best to get the opaque ones made of black or dark blue plastic rather than the clear ones which suffer horribly from degradation due to the sun’s ultraviolet light. The clear ones will turn very brittle in about 12 months whereas the black ones I used have been in use in the back yard for over 5 years and show no signs of falling apart.
To make a self watering container I followed the process below and got to the point where it only took me an hour to whip one up -
1.Cut out the inner part of the lid to form the base of the growing chamber – use a jig saw by drilling a 6 mm hole and inserting the blade or starting the saw on an angle and slowly bringing the saw blade down into contact with the plastic. As you cut the rim off, stay as close to the outer rim as you can and when you are finished retain both parts. 
Note: This process is noisy as buggery so wear hearing protection at all times when using the jig saw and where there is any chance of flying materials always wear eye protection.
2.Use a Stanley knife or equivalent to trim off any plastic waste from the base.
3.Select the flower pot that you are going to use as your capillary well, one about 125 +/- 5mm is a good size. To allow water access to the material in the pot it needs to be perforated. This may be done by a drill, but it is probably quicker to use a pad punch and a hammer with the pot placed over a piece of scrap timber secured in a vice. The holes should be around 6mm in diameter and placed in rows up and down the pot. 
4.Measure the diameter of the pot and mark a circle slightly smaller than the pot (say about 2cm smaller than the pot diameter) using a pair of dividers on the top of the base that you just cut out.
5.Drill a 6mm or so hole just inside the scribed line, insert the jigsaw blade and cut out the scribed circle. It is important to be aware of what you are cutting onto……….if the saw gets hard to push you may be disfiguring your table or saw horses. (I’m speaking from experience here!)
6.Drill or punch four holes equidistant from each other around the top of the pot. Place the pot top down on the base and over the hole you just cut out. It should be resting on the surface that will become the underside of the base. Drill four 6 mm holes in the base so that they line up with the holes in the top of the pot. Attach the pot to the base using four cable ties (I used 100mm x 2.5 mm cable ties, you will need 20 for each earth box you plan to build.) and then using side cutters, cut off the end of the cable ties.
7.It’s now time to attach the supports so that the base that will support the growing medium won’t wind up filling the water reservoir. I used 80mm diameter PVC pipe, because that is what I had but other things, even more pots if they are the same height, could be used.
8.Measure the height of the pot and then cut off 4 lengths the PVC pipe, I found a little band saw works very well for this but there is no reason why a hand saw would not do as good a job.
9.Drill the 4 equidistant 6mm holes again, around 6mm from one end of the cut pipe and then place the pipe on the base and drill a corresponding hole in the base and attach each piece of pipe with the cable ties. The base should now sit in the box and be stable. You should now drill a series of holes, say 6mm (1/4") throught the base to allow transfer of oxygen and rainwater to drain into the reservior below, I drilled them around the perimeter of the base and between each of the stiffening ribs.

10.In one corner of the base drill a 25mm hole using a speed bit or auger to fit the 25mm outside diameter plastic filler tube. Cut a length of tube so that when the tube is resting on the bottom of the box, it protrudes 25mm or so above the top of the box. Then chamfer the lower end of the filler tube so that one side is cut away, allowing water to be run into the bottom part of the box as needed.

11.Place the base into the box and drill two drain holes (around 6mm diameter is fine), one in the middle of each of the long sides of the box just below the level of the base, the idea being that when the water reservoir in the bottom is full, it will announce this fact by spurting water out of the drain holes.
12.The box is now ready to assemble by placing the base into the box and filling the top section of the box with potting mix, planting the veggies and then putting mulch on top.
Normal hay, straw or other organic mulch can be used or black plastic may also be used by putting it on top of the box then re-fitting the rim of the cut-out lid and making cross cuts in the plastic where each of the plants is to go. The black plastic will maximise solar heat in winter and keep weeds down but will not break down and add fertility to the box.
Almost any veggie can be planted in the completed box – a half a dozen brassicas, or eight lettuces,
or a dozen shallots or you could fill it with herbs, the possibilities are endless. This year we grew ginger in one and had the best ginger crop ever!
You can also put liquid manure into the water that you fill the reservoirs with to water and feed your veggies at the same time. To fill the reservoir I just run a stream of water from the hose into the filler nozzle until water gushes out the holes in the side, or top them up with a watering can and with a full reservoir you don’t have to worry about going away for the weekend or a week.

2017 update
The self-watering containers are still working well in our backyard, some seven or so years since I put them together, and I thought I would mention what I have learned in the interim –
- Leave the plastic mulch off! It only cuts down on oxygen transfer between the atmosphere and the soil. Regular organic mulch works much better in the long run.
- Unless you have intentions on pulling things to bits regularly, cable tying everything together is not necessary. It can help to keep the central pot in place, but if you get a pot with a lip and then cut the hole so it is a bit smaller than the lip, it will support itself.
- Just to re-iterate – you really do need the black containers, preferably labelled as shock resistant or some-such. I was reading a garden book the other day where they talked about making these self-watering containers, but the pictures were of the translucent ones. Seems to me they had written the book form a theoretical rather than a practical experience perspective. (just sayin’)
