


Not quite ten years ago, while doing my PDC (Permaculture Design Course) I had the opportunity to pick up some Queensland arrowroot (canna edulis) from a property we were visiting, so I took advantage of the opportunity and brought some home. I planted it where the outflow from my productive water garden was, to see how it would grow. It grew very well, and is still growing. It is a tropical plant so it dies down a bit over winter and then bounces back the following spring.
It grows almost too well in fact! I was doing some work around the place and had harvested some arrowroot for use, got distracted and placed it down in one of the raised wicking beds we use to grow our asparagus, then promptly forgot about it. A couple of weeks later they decided that they liked it there and sent down roots and made themselves at home. Cheeky devils!
I left them there and have been grabbing the odd rhizome for eating purposes. I must admit that so far I haven’t been impressed! Baked, steamed or fried the really did not seem to do it for me. I certainly couldn’t see using them as a potato substitute! But all is not lost, they have a starch that can be extracted and used as a thickener for sauces, soups and stews etc. According to Wikipedia they contain 23% starch but I should imagine this would vary depending on the growing conditions.
It was time to have a go at extracting it for myself!
After reading around a bit it seems the process was a fairly simple one, but one large scale process talked about using sodium metabisulphite, which confused me a little because this step was not mentioned in any of the small-scale extraction processes. Oh well…..
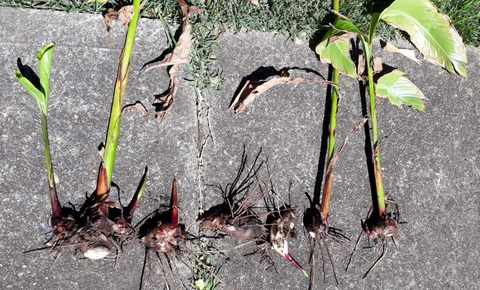
I grabbed some arrowroot from the bed and cut off the stalks and once that was done the destalked but unpeeled rhizomes added up to 800 grams.
The first job after harvesting and washing the rhizomes is to peel the outside skin or scale off them, because according to the big boys this will result in the starch having a disagreeable flavour. So rather than stuff things up, I applied our trusty potato peeler and removed all the skin I could with this method and then used a sharp knife to cut away any of the peel the potato peeler couldn’t handle.
Then an interesting thing occurred! As soon as the rhizomes were peeled, their pristine white surface immediately began to oxidise and discolour, taking on a reddish brown hue. That explains the sodium metabisulphite, which is a reducing agent and protects against the oxidation of the rhizomes and their pulp, I guess resulting in a whiter looking starch.
The peeled but unpulped rhizomes weighed 700 grams.
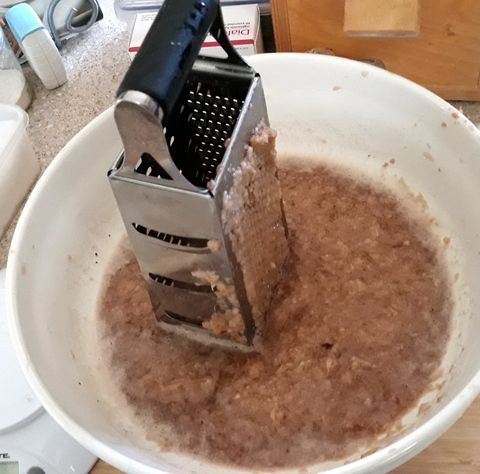
Next trick is to pulp the rhizomes. Rather than using a food process (which we don’t have) or a blender (which we do), I elected to use our manual grater, on the fine side. I was working on the idea that you would extract more starch if the particle size was smaller. This took a little while and some effort but resulted only mildly grated fingers and a load of quite disgusting looking mush. (yum yum!). Anyway.
To extract the starch from the mush, I added a bit of water and swirled it around in the large bowl I was using to contain the mush, then scooped a cup or two out and placed it into a double thickness cheesecloth ‘cup’ in my hands (for want of a better term) and then squeezed the water and starch out into another large bowl. I emptied the stuff left in the cheesecloth into another container and then repeated the process until all of the grated mush was turned into squeezed out nuggets in another bowl.

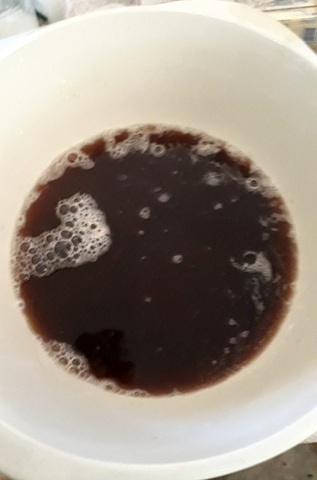
I then replaced the squeezed out nuggets into the original bowl, added some water and swirled it all around to re-mushify (technical term) it, then re-squeezed it out again to extract any remaining starch. At this point the starch and water mix in the second bowl was an interesting reddish brown colour that the photo really does not do justice to.
I left the water in the bowl overnight to let the starch settle out to the bottom, then lunch time the next day I tipped the red water out and let the layer of starch in the bottom dry out. Once it looked dry at the surface, I shredded it up so that there was more surface area for the water to evaporate from, and left it sitting in the sun again.
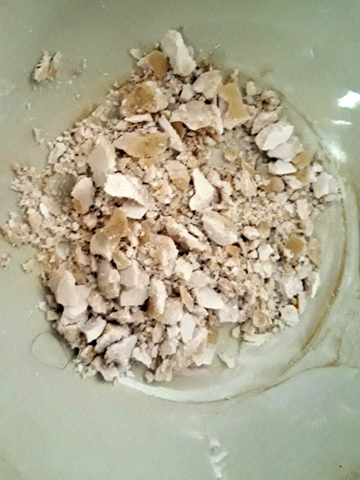
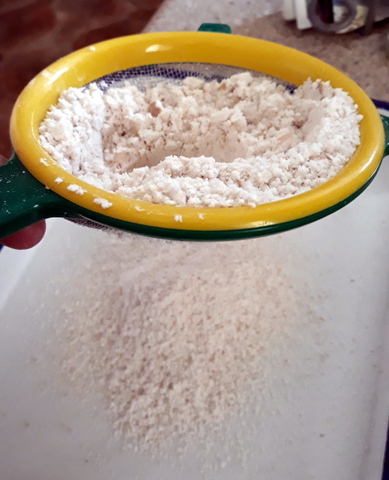
The next morning it appeared to be dry enough, so I passed it through our finest kitchen sieve. The resulting powder was not as fine as the commercial stuff but seems to work OK. I could possibly have tried passing it through a layer of the cheesecloth or some other fine material mesh, which would have given me a finer powder. For those playing at home, out of the unpeeled 800gms of rhizomes I got a yield of 82gms of arrowroot flour. It is clear from this that I did not get the best yield possible and I will not be putting Arnotts out of business by competing against their arrowroot biscuits!
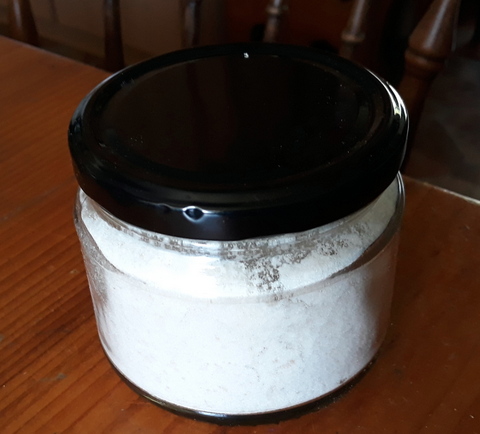
But, meh! Free home produced organic thickener for soups and stews etc? Winner!
Use
Evidently when using arrowroot, two teaspoons of arrowroot will substitute for one tablespoon of cornflour and one treapoon of arrowroot will substitute for one tablespoon of wheat flour. As usual with these things, the arrwroot stach should be pre-dispersed in a small amount of cold water before adding it to the hot soup, stew or sauce to be thickened. Once thickening has taken place, the food should be removed from the heat because overheating of an arrowroot gell will cause the starch to break down and lose its viscosity.
