


It can be handy to be able to preserve your veg in times of abundance for times when they are not so abundant. Preserving leaf crops has its own unique challenges and over the years people have developed techniques to overcome these challenges and the most popular ways are fermenting, freezing and drying.
• Fermenting – fermenting foods introduces an interesting flavour profile and fermenting leaf crops (think kimchi) can result in strong flavours if you are starting out with strongly flavoured leaf. To me, I don’t like much in the flavour of fermented foods so I really did not consider this much.
• Freezing – Leaf crops can be quite bulky, and to store any amount in a freezer will take up quite a bit of room. Our freezer is small so I also had to discard this one.
• Drying – I had not really thought much about drying leaf crops because I thought they would be too denatured, but I have found that drying them reduces their bulk considerable (Yeah, I know – der!) but when carried out using the correct technique, allows them to retain most of their nutrition.
There are a number of points to be taken into account when drying leaf crops to preserve them,
1. Use an indirect solar drier (or electric dehydrator) – The sun, while being a very efficient and free method of drying your leaves, produces considerable amounts of ultraviolet radiation which will have a negative impact on the nutrients in the finished product. Thus using the sun to dry edible leaves directly is not the best way. An indirect solar food drier uses the sun to heat up air, then conducts the warm, dry air through layers of the leaves to remove their moisture. This removes the water from the leaves without reducing their nutrient value.

2. Dry the leaves within a day – this prevents moisture reabsorption overnight and subsequent moulding if you are using a solar drier. This is less of a consideration if you are using an electric drier as tis can be run until the process is complete.
3. Blanch the leaves before drying them – after picking and cutting the leaves, steam them for 3 minutes over boiling water, this kills any pathogens (important if the resulting leaf powder is to be used uncooked) and improves taste and nutrition.
The process
Drying your leaf crops to preserve them is a simple process –
1. Harvest – remember to harvest only as many leaves as you can process in a day and wash them in clean water to remove any bugs, snails, slugs etc. as well as any ummm errrr faeces that they may have left behind. . I use silver beet, which we have in abundance, harvesting 10 to 12 large leaves each time which works out well for filling up our solar food dehydrator.
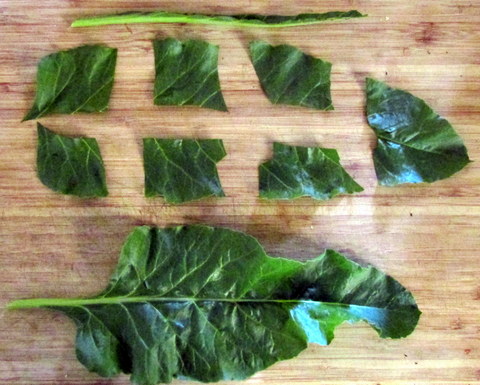
2. Prepare – remove any stems by scraping the leaves of the stems eg Malabar spinach, sweet potato or choko or cut the stems out of the leaves eg silver beet, spinach or rocket. If the leaves are large, cut them into 30 – 40mm squares, this will make for quicker and more even drying and that’s what I do with our silver beet leaves.
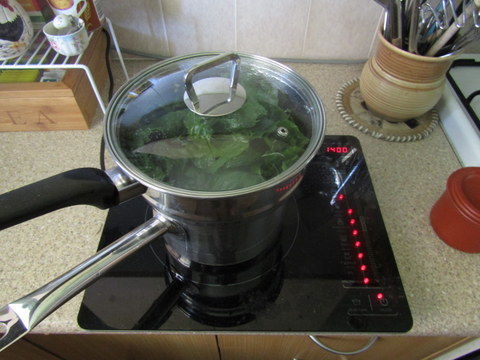
3. Blanch – while preparing your leaf crops, boil up some water in a pot and place a steamer on top. Once prepared, place the leaves into the steamer and steam them for 3 minutes, and remove them. I used our usual veggies steamer on the induction cooker, just got the water boiling in the bottom pan then dumped the prepared leaves in the top steamer. After timing for three minutes I removed them from the steamer, then dunked them in cold water, which makes the next part easier.
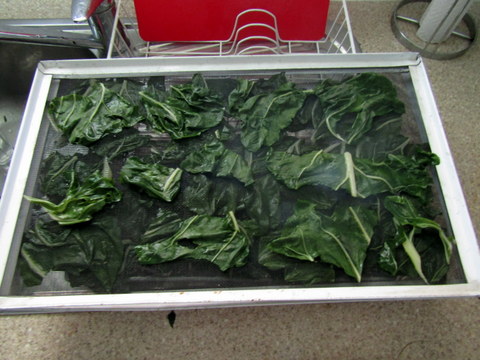
4. Arrange – place the steamed (and cooled) leaves onto the drying trays, neatly and in a single layer such that you fit the most leaves on each tray making sure there is no overlap and the leaves. Do not allow any part of the leaves to sit on the tray frame (if there is one) as this will slow down the drying process considerably. Then place the trays into the dehydrator. If using a solar dehydrator it is best to be able to get to this point as early as practicable in the morning.
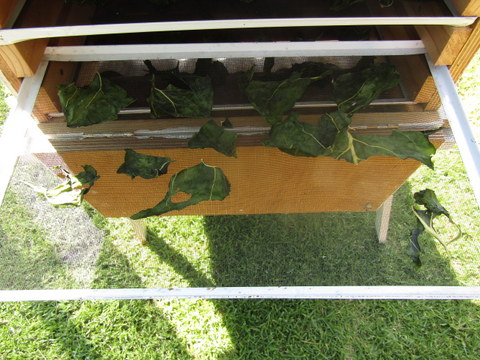
5. Check – keep an eye on the leaves to ensure they are drying evenly, a quick look two or three times during the drying process, particularly towards the end is enough. Reposition the leaves if required. Our solar dehydrator sits in the backyard so it is just a case of heading out the back door and opening the drying box to inspect.
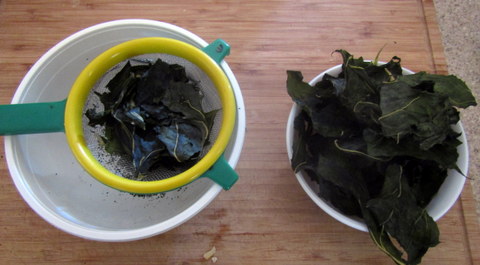
6. Process – once the leaves are dry to the point of being brittle, remove them from the drier. To break them up, rub the dried leaf pieces through a sieve, we use a small kitchen sieve which we had already. It doesn’t need to be superfine at this stage. This can also assist with removing any leaf stems or midribs not removed when the leaves were initially prepared, too.


7. Grind – The leaves are already reduced in particle size by the previous process and grinding will reduce them to a powder. I used our new coffee/spice grinder but you could try a blender or food processor if you have one, use a mortar and pestle if you are really keen, or even put it through a grain grinder if you have one of those. We found the coffee grinder worked very well!
 I
I
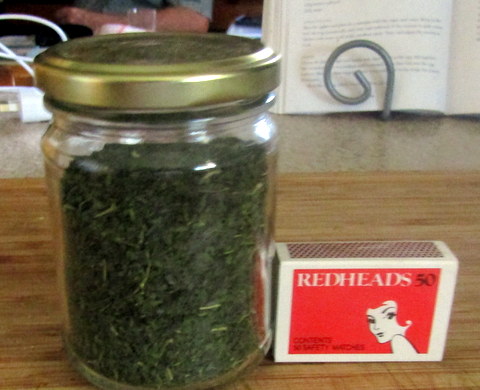
8. Store – Store your leaf powder in a sealed container (eg repurposed glass jar) in a cool, dry dark place. It should maintain its nutritional content for up to a year. The above photo is of 45gms of leaf powder before grinding, it fills over half of a 120gm jar and is the end result of 36 silver beet leaves processed as described above.
OK, so now you have this stuff, what can you do with it?
The dried leaf powder can be used in lots of recipes and for me there are two main advantages –
1. Improved nutrition, depending on the plant(s) the leaves have been harvested from a wide range of vitamins and minerals can be added to existing dishes, and
2. The replacement of something which is difficult (or impossible) to home produce such as wheat flour with a percentage of material which can be home produced, making imported (into the home) staples like flour go further.
The books tell me that you can replace up to 20% of flour in a recipe with dried leaf powder without causing problems with flavour or texture. Read about our experience with Green Tortillas here (in preparation at the moment). Dried leaf powder can also be included in biscuits, cakes and homemade pasta. Making your own leaf powder enriched pasta can be a great way of getting the vegetable level in your kids diet up and who in their right mind would refuse to eat GREEN pasta!
Leaf powder can also be used to enrich cooked dishes like soups, stews. Casseroles and curries. More strongly flavoured leaf powders such as those made from brassicas would be more suited to curries and other strongly flavoured dishes.
