


When we installed our off grid system, it seemed easiest to leave the 12 volt lighting, which was part of the original system, in place, and operate it through the 24v to 12v converter. This has proved to have advantages and disadvantages, but overall it works for us. The use of 12 volt lights has been a continually evolving part of our system. I started out back in the day using round, clear steel and plastic trailer lights with festoon 18 watt (double ended) bulbs, then moved through caravan 12 volt fluoros, high efficiency 12 volt fluoros to halogen downlights and finally now to LED downlights.

Once we found the high efficiency 12 volt fluoros, we invested heavily in them because they provided a really good level of light and not extravagant power usage, and put them in most rooms. They were also supposed to have a long service life before the bulbs needed to be changed, and this has been the case with some lasting through 10 years plus of nightly usage. Unfortunately, it has not been the bulbs that have been failing but the unit itself and at $120 each when we bought them, these units are not cheap!
However, in the intervening years the development of 12 volt LED downlights has meant that for a fairly modest outlay, we have been able to replace the high efficiency fluorescents as they failed, with LED downlights, for a fraction of the cost. The advantage we have of course is that because we are replacing existing 12 volt lights, all the wiring and switches are already in place.
The Process
First I remove the old fluorescent from the ceiling, they are only held on by a couple of screws so this is a fairly easy part of the job. The wires are attached to the light terminals by spade lugs, these don’t work with the new lights so I generally just cut them off to make things easier.
Next I poke the wires back up into the ceiling and using a 70mm (2 ¾”) hole saw, and using the original hole the wires came through as the centre, drill 70mm hole in the gyprock ceiling. This makes a bit of a mess but nothing a vacuum cleaner can’t handle!
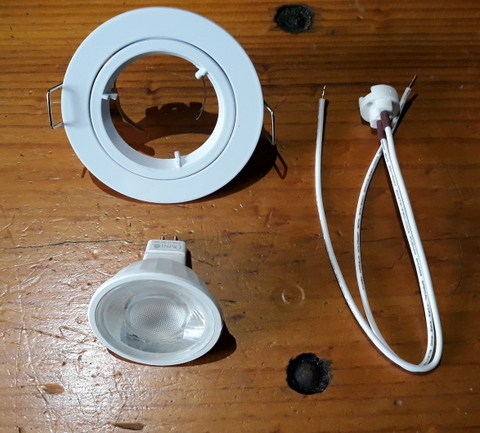
I then put the LED surround into the ceiling, which is just a case of bringing the 12 volt power wires through the centre of the light surround, bending up the spring-clips that hold the surround in place and slipping it up into the ceiling. To connect the wires of the light fitting to the 12 volt power wires it was just a case of stripping some insulation of both sets of wires then joining them using a piece cut off a terminal block.

With the wires connected, it is a simple matter to insert the contacts of the LED light into the fitting on the wires, slipping the connected light into the insert, then pushing it up into the housing and rotating it slightly to secure it. With the light in place it is just a case of turning it on to check everything is working. With the new setup in place, when the bulb goes on strike it can be replaced in seconds and for a cost of $10 to $15.

The high efficiency 12volt fluorescents have served us very well over the years, but as they fail (there are 3 still in service) they will be replaced by the 12volt LEDs.
