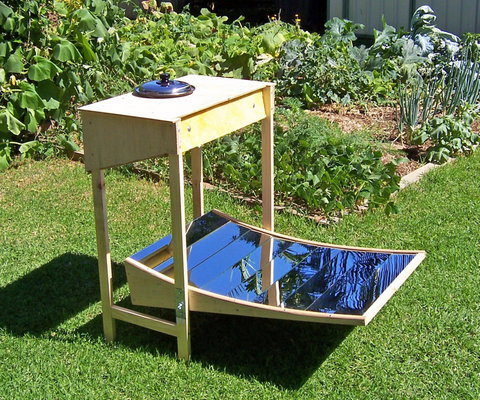
I first came across this type of solar cook about 20 years ago and determined to make one. I saw similar constructions on two websites, one was French and the other German, one referred to it as the ‘Nelpa’ (an anagram of ‘panel’ evidently) and the other called it a ‘Primrose’ (no idea where they got the name!). The thing I found interesting was that, while each site had plans, they left out certain critical dimensions. Fortunately (for me) they left out different dimensions so that I was able to put the two plans together and build one for myself!
The cooker may be broken down into two pieces:
– The carcase – which supports both the cooking gear, consisting of a matt black painted pot, and the reflector, and
- The reflector unit itself
The way it works is that the reflector is a series of rectangular glass mirrors mounted in such a way that, when faced towards the sun, the reflection of the suns’ heat from the mirrors all hit the bottom of the cooking pot. The carcase has a glass bottom on the box that supports the cooking pot allowing the suns rays to heat the bottom, and some of the sides, of the pot. The reflector is mounted in the carcase so that its angle can be changed to ensure that the heat hits the pot. It is also constructed so that the reflector can be pulled up against the carcase to make storage and transport easier.
How I built the Carcase
The carcase is composed of four legs with a plywood box at the top that has a glass bottom and supports the cooking pot. There is some insulation inside and outside the box to reduce heat loss.
I made the two sides (each consisting of two legs) from 42mm x 18mm DAR pine. I cut two 910mm lengths of the pine to form the vertical legs and joined them together with two 395mm horizontal braces, one 115mm up from the bottom and the second one across the top, all of them being screwed into place with a single countersunk wood screw, in from each end. I then added in another piece of pine, angled so that the top of the pine was 100mm from the top on one side and 200mm from the top in the other. This would form the support for the glass bottom of the box. I then made the second side, same as the first!
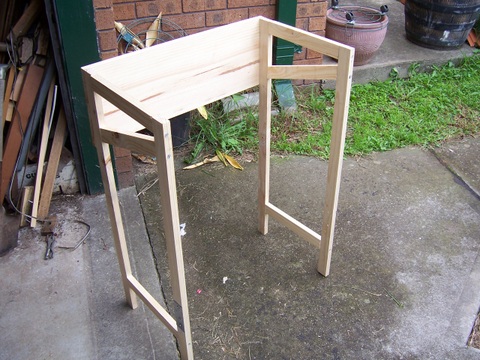
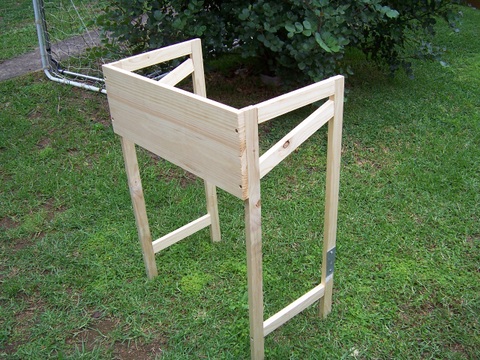
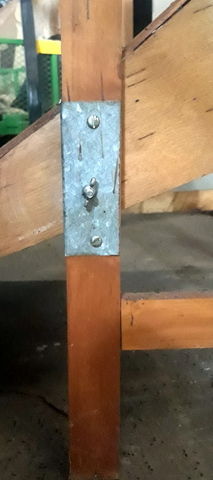
On the legs closest to the reflector I attached on each a piece of thin galvanised steel sheet that was 110mm x 42 mm on the outside of the leg about 200mm up from the bottom end of the leg with two screws. I then drilled a 6mm hole through the leg and steel sheeting 50mm up from the bottom of the plate. This is to act as the pivot point for the reflector.
I then joined each side together using a single piece of 19mm thick DAR pine which was 660mm long by 220mm wide and held in place by 4 countersunk wood screws. The sides of the box are rounded out by a piece of DAR pine 620mm x 112mm x 20mm which is angled back slightly from the bottom to the top to allow the reflector to rest against it when it is folded up. It is covered by 20mm thick fibreglass insulation 600mm x 120mm and secured by two wood screws and washers.
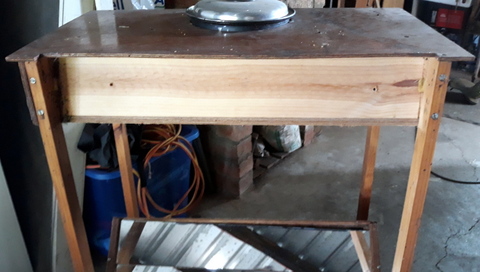
Insulation removed
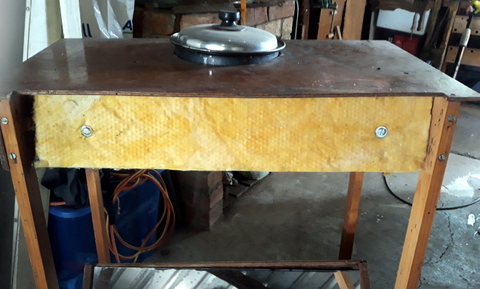
Insulation in place
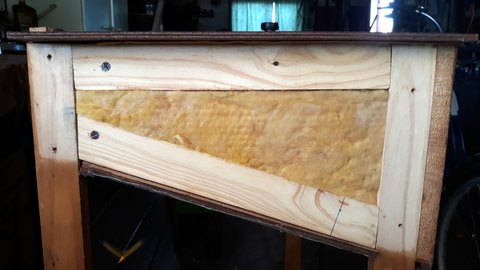
The side with cover removed showing insulation in place
The bottom of the box is formed by a piece of 3mm glass, 620mm x 350mm in size, secured against the bottom of the box by 5mm plywood tacked in place all the way around it. The top of the box is formed by a piece of 10mm plywood 720mm long x 400mm wide. The top has a 205mm hole to support the cooking pot and a cutout on the front of 620mm x 20mm also to allow the reflector to be folded up against the face of the carcase. To make a better seal but still allow the top to be removable, I put some felt between the top and rest of the carcase to prevent the heat escaping.
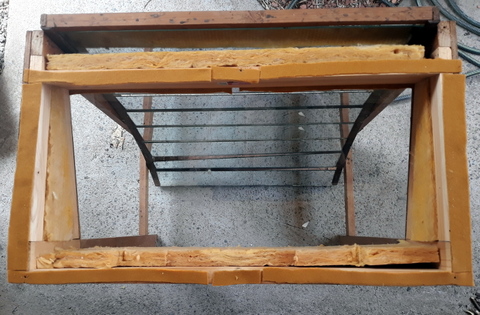
Looking down into the carcase, top removed, through the glass bottom
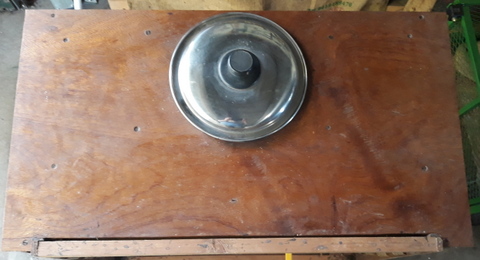
The top from above
Due to the cooking pot being so much smaller than the width of the cooker, there is also a fitting each side holding a piece of mirror angled at 45° to reflect more of the suns heat onto the sides of the pot. The diagrams below show the dimensions of the fittings (two per side mirror) and where they are fixed in place.
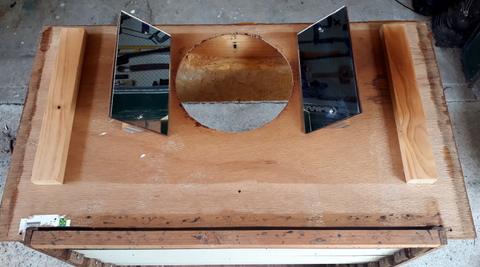
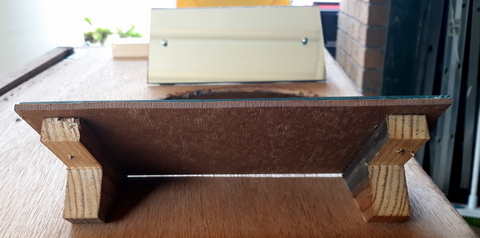
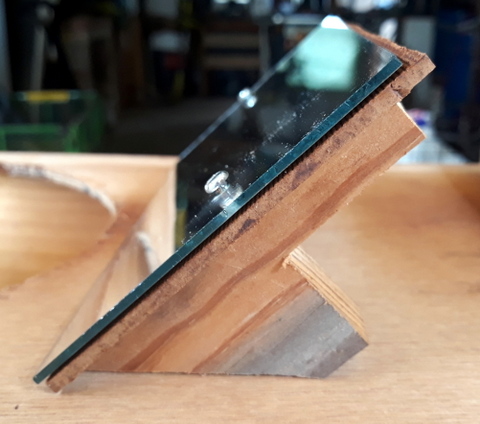
How the fittings are fixed to the underside of the top
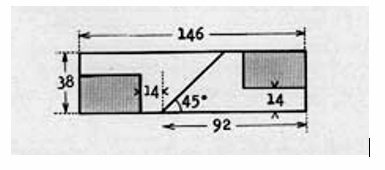
Dimensions of the fittings
The pot is a 205mm stainless steel pot and lid, with the outside of the pot painted with matt black engine enamel. I removed the handle of the pot so it would fit into the hole and made sure the pot I used had a flange on the top edge so most of the pot would sit down into the cooker but not fall through.
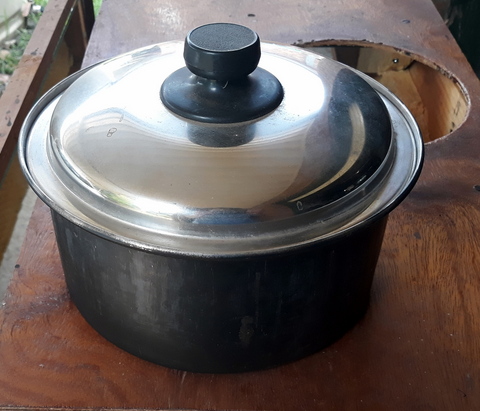
I probably could have made the cooker a bit narrower, but I wanted to make sure that things were stable, and it was unlikely to tip over.
How I built the reflector
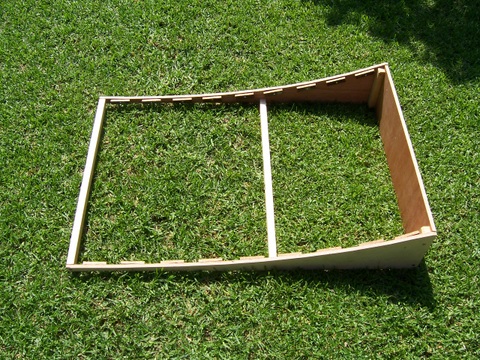
The reflector is a box 900mm long by 620mm wide, and the sides are graduated from 20mm thick at its thinnest point up to 172mm at its deepest point. It is made from 10mm 5 ply. Mounted on the reflector are 9 x 100mm wide by 595mm long pieces of mirror glass. Due to the mirrors I had available there are a number of different thicknesses of glass. (hint: thicker is more robust, so better).
Regarding the mirror glass reflectors, it had been my intention to cut them to size myself, using a hand glass cutter. I had enough mirror glass to cut the 9 pieces I needed for the reflector plus some spares. Having irretrievable stuffed the first couple I had tried to cut, I decided this was a job for a professional and approached a local glazier to cut them for me, which they did. I can’t remember how much it cost, but it wasn’t too much and being 20 years or so ago would be no indication of what that might cost today. Moral of story: there is no shame in getting help with the more technical parts of a project!
The sides of the reflector are graduated so that the reflection from each individual mirror will hit the same spot, ie the bottom of the pot through the glass bottom of the carcase.
To build the reflector I got hold of some 10mm plywood as mentioned above. Three pieces were required – 2 x 879mm long by 172mm wide to make the sides and 1 x 600mm long by 172 wide. For the fourth part of the reflector box (at the thin end) I used some 20mm x 20mm pine.
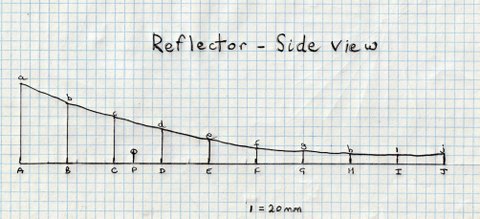
To make the curve on the sides of the reflector box and thus ensure the mirrors were at the correct angle, I marked what would be the bottom of the reflector at intervals as per the ‘Horizontal Distances’ in the table below. I then measured out the ‘vertical distances’ as per the table below. By joining up the tops of the lines, this gave me the correct curve to place the mirrors on and I then cut out the curve from both sides of the reflector box.
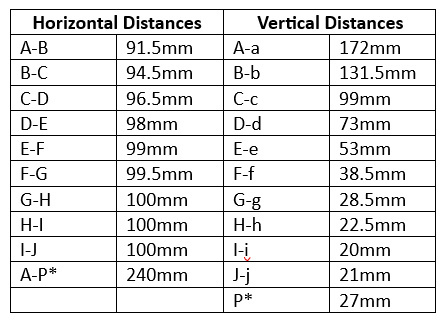
Using some 20mm x 20mm pine in the corners as braces I put the reflector box together using wood screws and added a 20mm x 20mm pine brace 365mm from the high end of the reflector box.
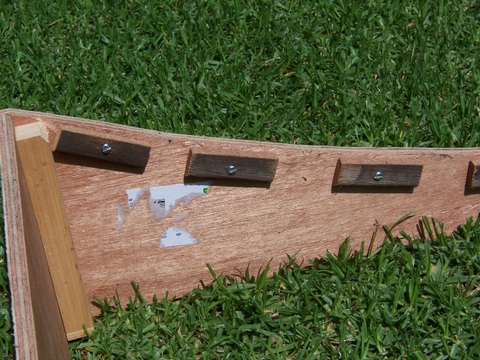
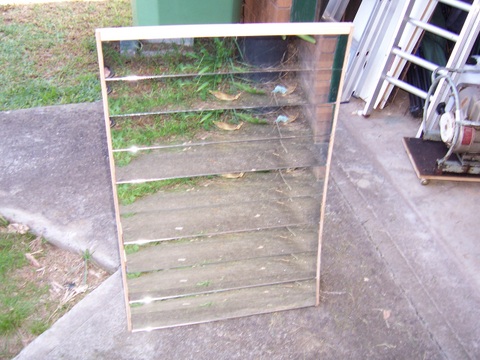
To put the mirrors in I screwed supports made from 20mm x 5mm rounded edge moulding with one side sawn off to make it flat, to the inside of the sides of the reflector box so that the mirror could be put in place inside the reflector box and at the correct angle. Once the mirrors were in place I secured them by screwing more 20mm x 5mm rounded edge moulding along over the top of the ends of the mirrors.
I drilled a 6mm hole in each side of the reflector at point ’P*’ (P standing for ‘pivot!) and then slid in a 6mm x 50mm bolt with a wingnut on the outside to tighten the pivot and secure the reflector to ensure it remained at the correct angle.
Advantages of this design
- The lid is accessible (as opposed to a solar oven where the whole pot is enclosed) allowing the food to be tasted, added to, stirred etc.
- The bottom of the pot is heated, allowing parts of the recipe to be fried before putting the lid on eg, when making spaghetti Bolognese the onions and garlic can be fried off, then the mince added and browned before adding sauces etc. This is impractical when using a solar oven style cooker.
- Steam escaping when the food is heated does not condense on the reflector.
Disadvantages of this design
- It is far and away the most complex design I have ever put together.
- Some heat will be lost to the system in the steam escaping from the lid and through the uninsulated lid itself.
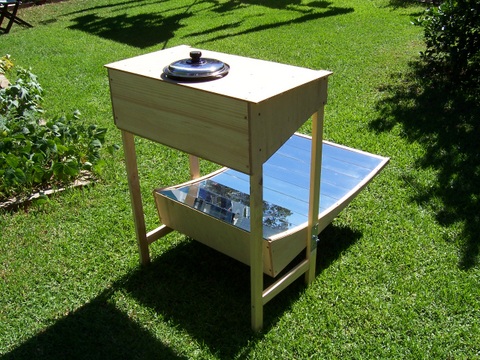
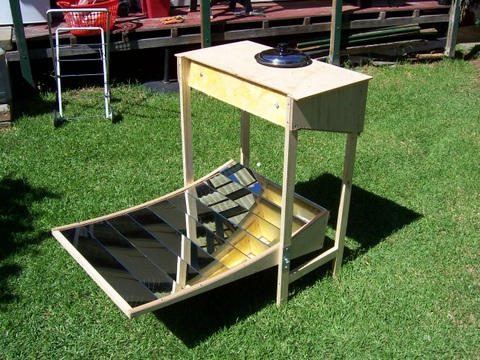
While it is a complex build, it was a lot of fun and has now been in existence for 20 years and still is working perfectly. There has only ever been one issue, when we had an open day and it was out for inspection, the child of one couple decided it was built to be climbed in and when our backs were turned he did just that, breaking one of the mirrors. It was only a minor hiccup as I had spare mirrors prepared for just such an occasion.
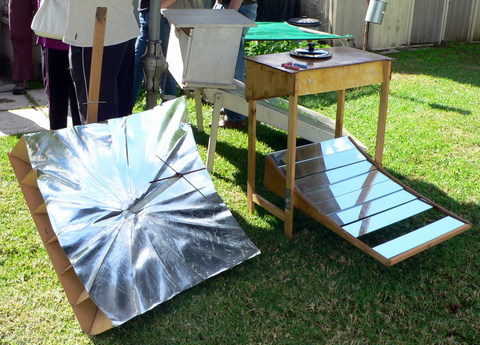
Note the missing mirror!


