


There are times, occasionally, when everything comes together.
It was interesting to watch the upsurge in people wanting to grow some of their own food as the impact of COVID-19 hit. Clearly this is something I personally wanted to encourage, and so the articles and YouTube videos on the Choko Tree reflected some of that encouragement. Then a friend of mine said he had some polystyrene foam boxes ne no longer needed that I could have if I wanted to pick them up. I wanted!
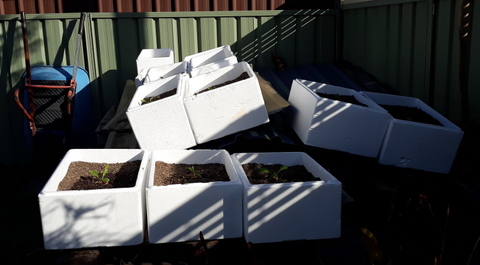
With a little thought it came to me that I could grow some veggie seedlings and make DIY veg boxes out of them and pass one on to every house in the street. Fortunately we live on a comparatively small street with only twelve houses apart from our own so it was not an impossible task. Between the boxes my friend provided and a few I had already hanging around I only needed to buy a couple to complete the numbers. One of our local purveyors fruit and veg sells them off cheaply so I was able to make up the numbers at low cost.
The only real cost was the growing medium which needed to buy, and I settled on a mid-range potting mix, not the el cheapo stuff but not the $10 plus a bag stuff either. I bought sufficient to allow about 25 litres plus a bit per box and seeing as some of the boxes were different sizes the uptake was variable.
Designing the Boxes
I needed to work out exactly what veggies I was going to put in each box, and the design I came up with was put together with the colder weather in mind, but would actually work for any time of year. What I came up with was this –
- Radish (Variety: Cherry Belle) – radish are a root crop so the seeds had to be sown where they are to grow and I sowed them in a line down one side of the box, 8 to 10 of them per box. They are the quickest growing vegetable in the box and should be able to be harvested within a month. Once harvested there will be more room for the other veggies to mature.
- Lettuce (Varieties: Oak leaf and Green mignonette) There is one of each planted either side of the central leaf vegetable. These are different from the usual iceberg lettuce for sale at Woollies. Oak leaf does not head at all, the leaves are harvested from around the bottom and sides of the plant as they grow, this makes for a longer harvest time. The green mignonette can be harvested in the same way but will eventually form a small heart. Both lettuce types were started off in punnets, then transferred directly to the veg boxes. They can usually start to be harvested in a month and half to two months. Once they start to bolt (send up seed heads) and go bitter they can be removed to leave space for the third veg.
- Spinach beet (Perpetual spinach) This is the central veg which I raised as a seedling then put into newspaper pots for transplanting. It is a short lived perennial, lasting up to 2 years, and is a slower grower than the other two vegetables being ready for harvest in six to eight weeks.
Constructing the Boxes
Before I did anything else I sowed the two types of lettuce and the spinach beet seeds in punnets, then left them to germinate and grow, a couple of weeks later I started working on the boxes themselves.
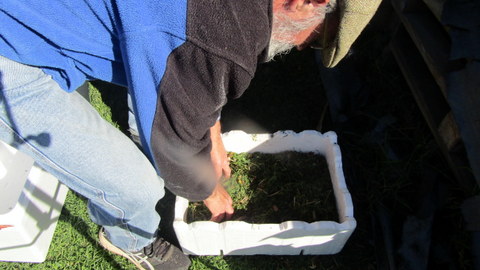
The process was fairly easy and there is an article and YouTube video if you want more detailed information. Most of the boxes (well actually, all except one) did not have drain holes so the first order on the agenda was to put in some drain holes. The cleanest and easiest way to do this is to use something hot to melt the holes and I used an electric soldering iron, which was quick, efficient and easy – turn the box upside down, burn in a dozen random drainage holes, then move onto the next one.
To fill the boxes I first put in a layer of organic matter, this would break down and release nutrients as plants grew and reduce costs by taking up some of the volume of the box that would not need to be filled with potting mix. Generally when making veggie boxes I use grass clippings because we don’t use chemicals on our lawn and row a variety of species (weeds) in our lawn. In this case because I was making so many at one time I didn’t have enough lawn clippings so I made up the balance with the straw/chook manure mix from the chook retirement village.
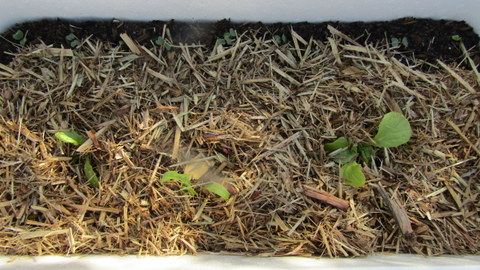
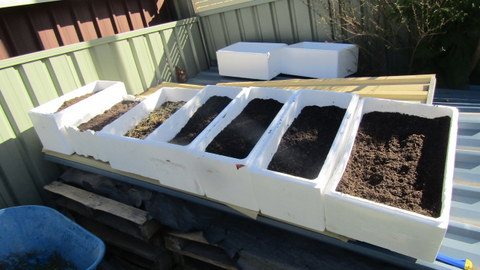
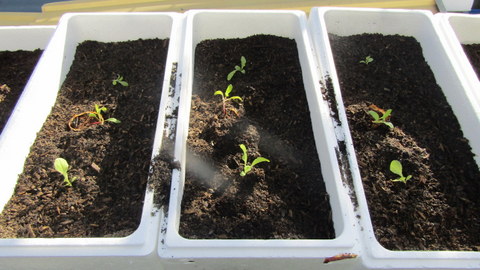
With the boxes half full of organic matter I then topped them up with the potting mix and gave them a good watering. I set them all up on the area where the tiny house will be down the back yard, I could keep an eye on them there and they would get plenty of sun. I sowed the radish seed in a line down one side of each of the boxes. I was going to wait for the radishes to come up, but was too impatient so after a few days I transferred the lettuce seedlings and one spinach beet seedling into each box. I watered each box every day or two.
When the radishes came up, and there was an excellent germination rate, I let them grow for a few days then mulched around the larger seedlings with sugar cane mulch, but left the strip where the radishes were growing bare.
I figured it would be a bit weird to drop this on someone’s’ front porch without any explanation so I put together a letter on what it was and how to care for it, along with a colour picture of each veg when mature. I printed off a copy for each neighbour and included it with the veg box. A copy of the letter is available here.
Once everything was well grown I delivered them all one morning, and that morning I really got my exercise! They were heavy, but seemed to get heavier as I delivered them. I don’t expect any reaction, but I hope they are able to keep their DIY veg boxes going and get harvest some fresh produce from them. Who knows? Maybe they will even get the veg growing bug! I can only hope.
In the end, there wasn't much reaction although a couple of neighbours did thank me and one even gave us some really nice home baked muffins. Another neigbours told me that they had just had some of the produce with their lunch, so that was nice to hear! Most of the boxes dissapeared into back yards and one that was left out the front does appear to be flourishing.
